36 2 Basic Operation
Control Panel
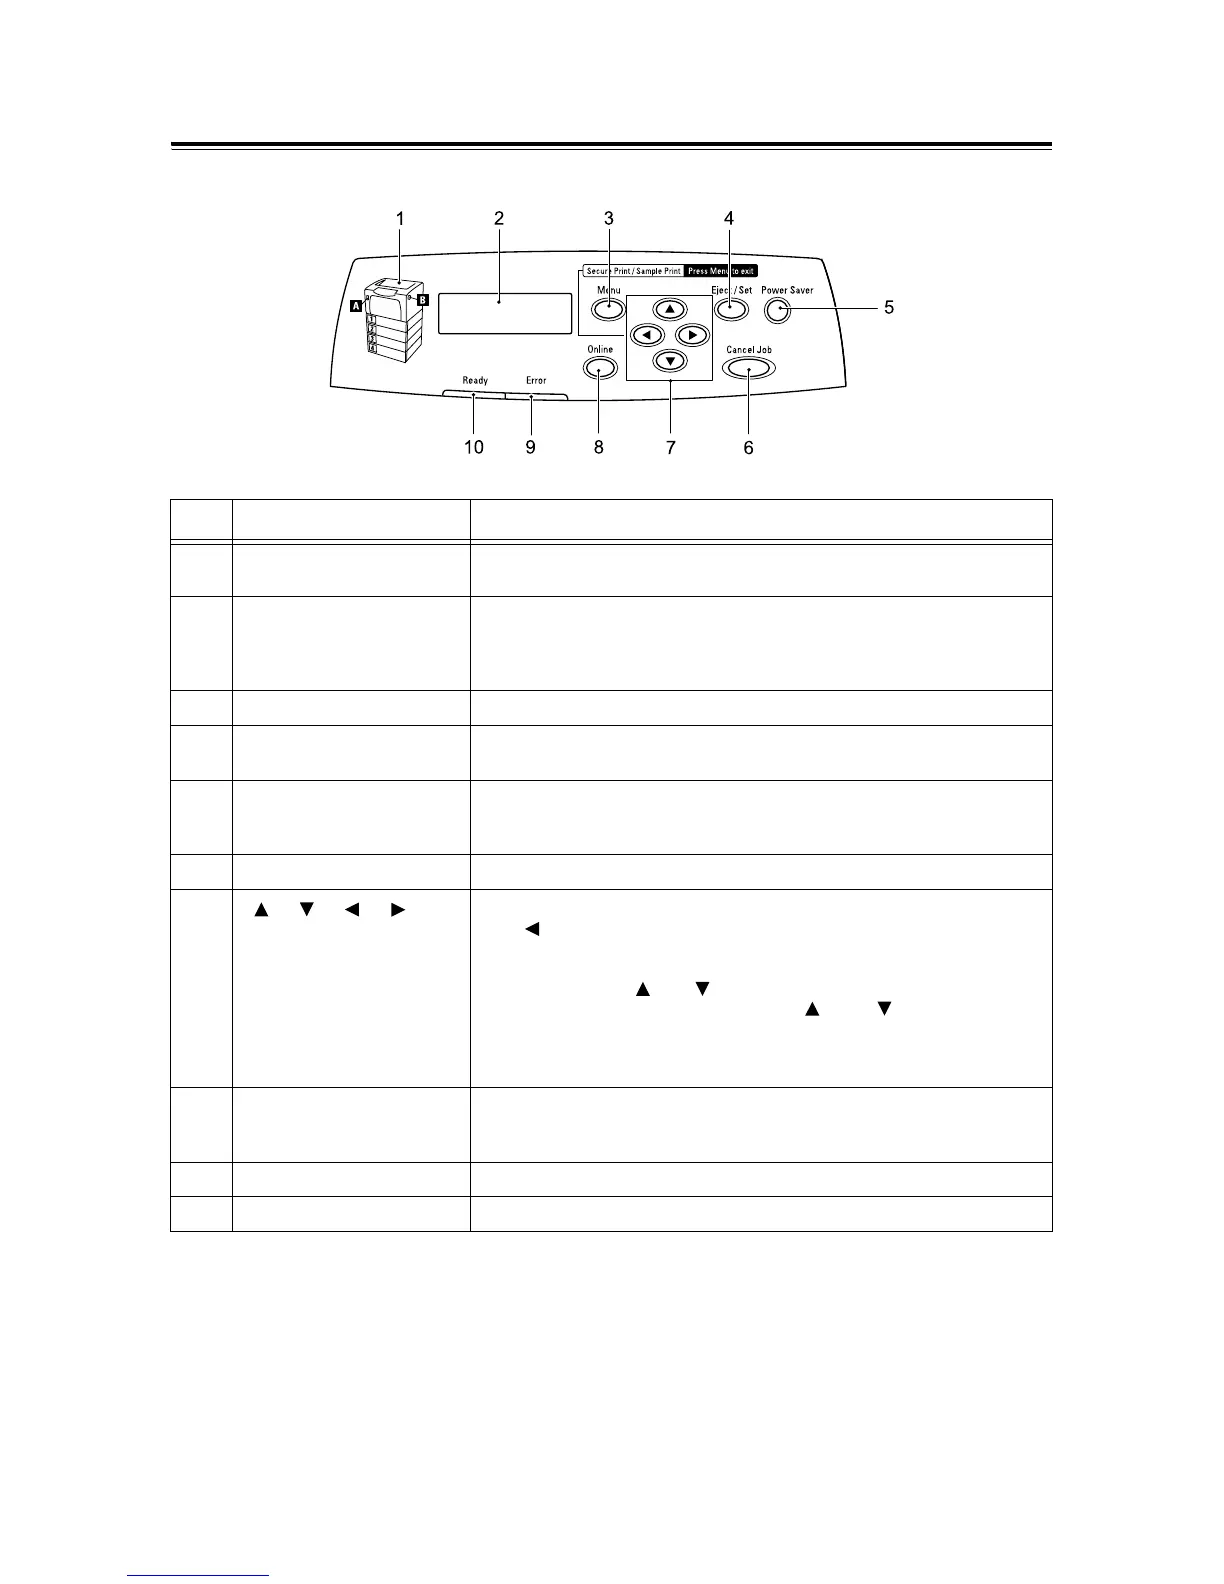
No. Name Description
1 Indicator In the event of an error, use this to verify the location of the button indicated in
an error message displayed on the LCD display.
2 LCD display Displays the status of the printer, menu options, and messages.
Refer to
• "Control Panel Display" (P. 37)
3 <Menu> button Pressed to display the menu screen.
4 <Eject/Set> button Pressed to confirm the menu option selected on the menu screen. This button
is used also when printing reports/lists.
5 <Power Saver> button/lamp Pressed to exit the Power Saver mode. This button/lamp lights when the printer
is the Power saver mode and blinks when the hard disk (optional) is being
accessed.
6 <Cancel Job> button Pressed to stop printing.
7
< >, < >, < >, < >
button
Pressed to advance to the next menu, item, or option.
The < > button is used also when using the Security/Sample Print feature.
Note
• Holding down the < > or < > button scrolls through menus, items, and
options in a circular fashion. Pressing the < > and < > buttons
simultaneously displays the default values.
• To use the Security/Sample Print feature, the hard disk (optional) must be
installed.
8 <Online> button Pressed to switch the printer to offline status. When the printer is offline, the
<Ready> lamp goes off and the printer becomes unable to print. Pressing this
button again switches the printer from offline to online (ready-to-print status).
9 <Error> lamp Blinks or lights when an error occurs.
10 <Ready> lamp Lights when the printer is ready to print.