Windows Printing
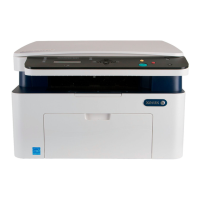
Xerox® WorkCentre® 3025
User Guide
55
5. For:
• Windows 2003 - select Settings > Printers.
• Windows Vista - select Add a Local Printer.
• Windows 7 - select Start, > Control Panel, > Hardware and Sound, > Devices and Printers.
6. Select Add a Printer in the far left column.
For Windows 7 select Add a network, wireless, or Bluetooth printer.
7. The Add Printer Wizard window will appear. Select the Next button.
8. Select The Printer that I want isn’t listed.
9. Select a shared printer by name.
10. Type HTTP:// followed by the printer's fully qualified Domain name or IP Address in the URL field.
The Printer Name can be either the Host Name or the SMB Host Name as shown on the machine
Configuration Report, depending on the name resolution used by your network (WINS or DNS).
11. Select the Next button.
12. Select the Have Disk button and browse to the location of the printer driver and select the OK
button.
13. Select the Printer Model and select OK.
14. Select Yes if you wish to make this the default printer.
15. Select Next.
16. Select Finish.
Raw TCP/IP Printing (Port 9100)mac
Raw TCP/IP is a printing protocol that is similar to LPR printing. Also known as a direct TCP/IP
connection or sockets interface, it sends information directly to the machine and does not require a
Line Printer Daemon (LPD). The advantages are that connections stay open for multiple print files and
spooling is not needed, therefore, printing is faster and more reliable than LPD printing. Raw TCP/IP
printing is contained in Windows and other third-party applications and operating systems.
Note Raw TCP/IP Printing is enabled by default for port 9100.
Information Checklist
See the Information Checklist in Configure Static IPv4 Addressing at the Machine.
How to Configure Port 9100
1. At your workstation, open the web browser and enter the IP Address of the machine in the
Address Bar.
2. Select Properties.
3. If prompted, enter the Administrator User Name (admin) and Password (1111), and select Login.
Select Properties.
4. In the Network Settings link, select Raw TCP/IP, LPR, IPP in the directory tree.
5. In the Raw TCP/IP Printing area:
a. Select Enable.

 Loading...