VESDA-EVEP-A10-P Product Guide
32 www.xtralis.com
B
25mm
3/4”IP S
25mm
3/4”IP S
Edge of Detector
C
Inverted
Detector
A
D
A
Upright
Detector
25mm
3/4”IP S
25mm
3/4”IP S
Edge of Detector
D
C
B
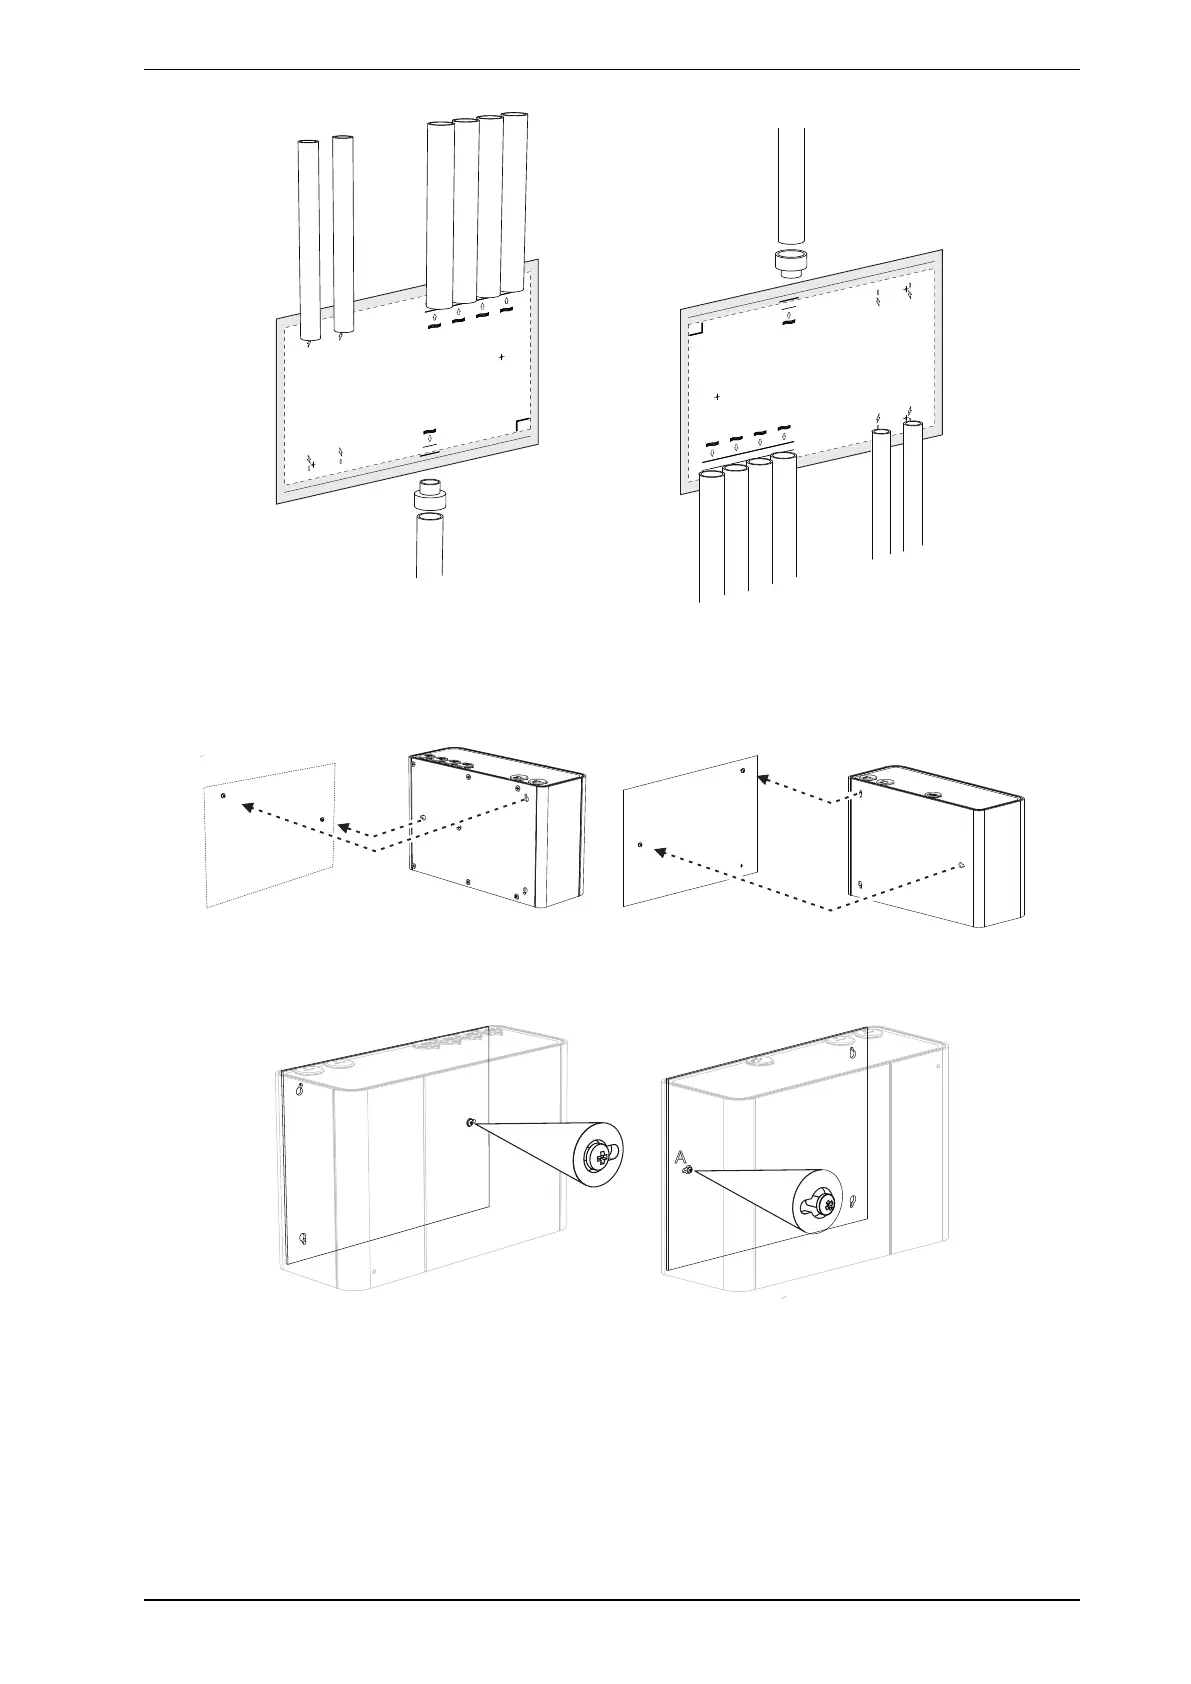
Figure4-25: Position conduit and pipes
8. Remove the mounting template.
9. In order to allow the detector to be positioned, retract the inlet and exhaust pipes and electrical conduit.
10. Mount the detector onto the screws using the keyholes using the following steps:
Upright
Detector
Inverted
Detector
Figure4-26: Mount the detector
l Position the right keyhole on the rear of the detector over the head of the right screw (A) (Figure4-27).
A
A
Upright
Detector
Inverted
Detector
Figure4-27: Position detector over screw
l Slide the detector to the left, or to the right for inverted detectors, to lock the detector on the screw
(Figure4-28).