VESDA-EVEP-A10-P Product Guide
www.xtralis.com 83
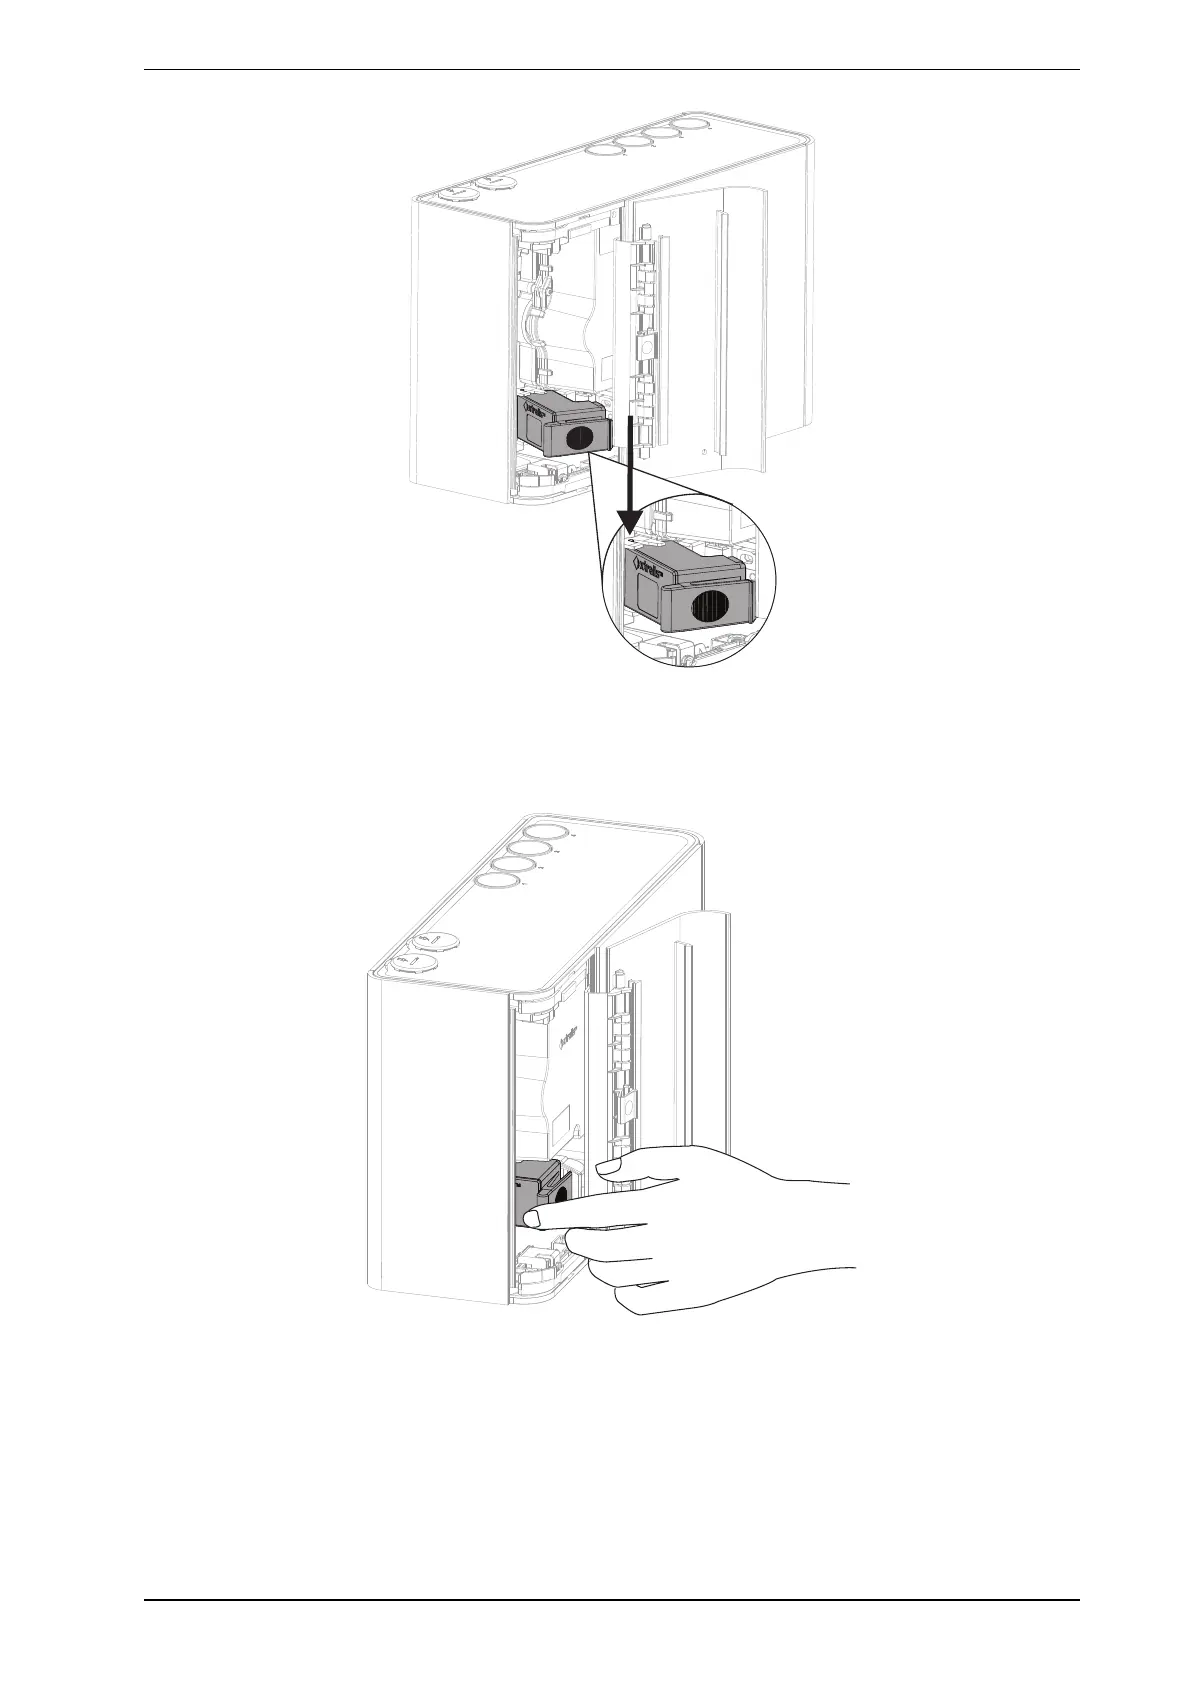
Figure7-5: Engage hinge pins
3. Tilt the filter to the right.
4. Firmly press, as shown in Figure7-6, until the filter makes a distinct clicking sound and no additional
movement is possible.
Figure7-6: Reinstall the Filter