Wiring
5 - 33
5.3 Cable connections
Outline connection diagram
Fig. 5-2: Cable connection
5.3.1 Connection to main power supply
Before you turn on the main power supply, first connect all other cables which are
needed such as the cables between robot and robot controller.
NOTICE
To connect the robot controller to the main power supply, a CEE connector must be
prepared (type: 432C6).
The grounding inside the robot controller is factory assembled (maximum grounding
resistance of 0.1 ).
1. Turn the main switch to the OFF position.
Fig. 5-3: Main switch in OFF position
Power supply connection Primary power supply cable
Robot cable Programming pendant cable
Robot Front view
Rear view
All dimensions in mm
Main switch at the front side of the robot controller
(432BS6/ABB)
1
2
3
4
5
6
7
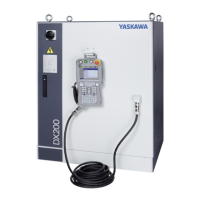
DX200
YASAKAW DX200
Part No.
Power Supply Peak kVA
AC 400/415/440 Average kVA
Serial No.
Date/Signature
Type ERDR-
Robot Type
Robot Order No.
Robot Serial No.
YASKAWA ELECTRIC CORPORATION
2-1 SHIROISHI KUROSAKI, YAHATANISHILU KITAKYUSYU, JAPAN
YASKAWA Europe „Robotics Division“ GmbH
Yaskawastr. 1, D-85391 Allershausen
-X4
-X2
-X3
-X1
X81
PROGRAMMING PENDANT
1
5
2
6
3
7
4
1
YASAKAW DX200
Part No.
Power Supply Peak kVA
AC 400/415/440 Average kVA
Serial No.
Date/Signature
Type ERDR-
Robot Type
Robot Order No.
Robot Serial No.
YASKAWA ELECTRIC CORPORATION
2-1 SHIROISHI KUROSAKI, YAHATANISHILU KITAKYUSYU, JAPAN
YASKAWA Europe „Robotics Division“ GmbH
Yaskawastr. 1, D-85391 Allershausen
1
 Loading...


