13
2.5.3 Electrical connecon steps
• Idenfy the funcons to be connected and locate the posion of the cable clamp, see “2.5.2 Idenfying
the funcons to be connected”.
• Check that the cables used comply with the intended use and with the regulaons in force.
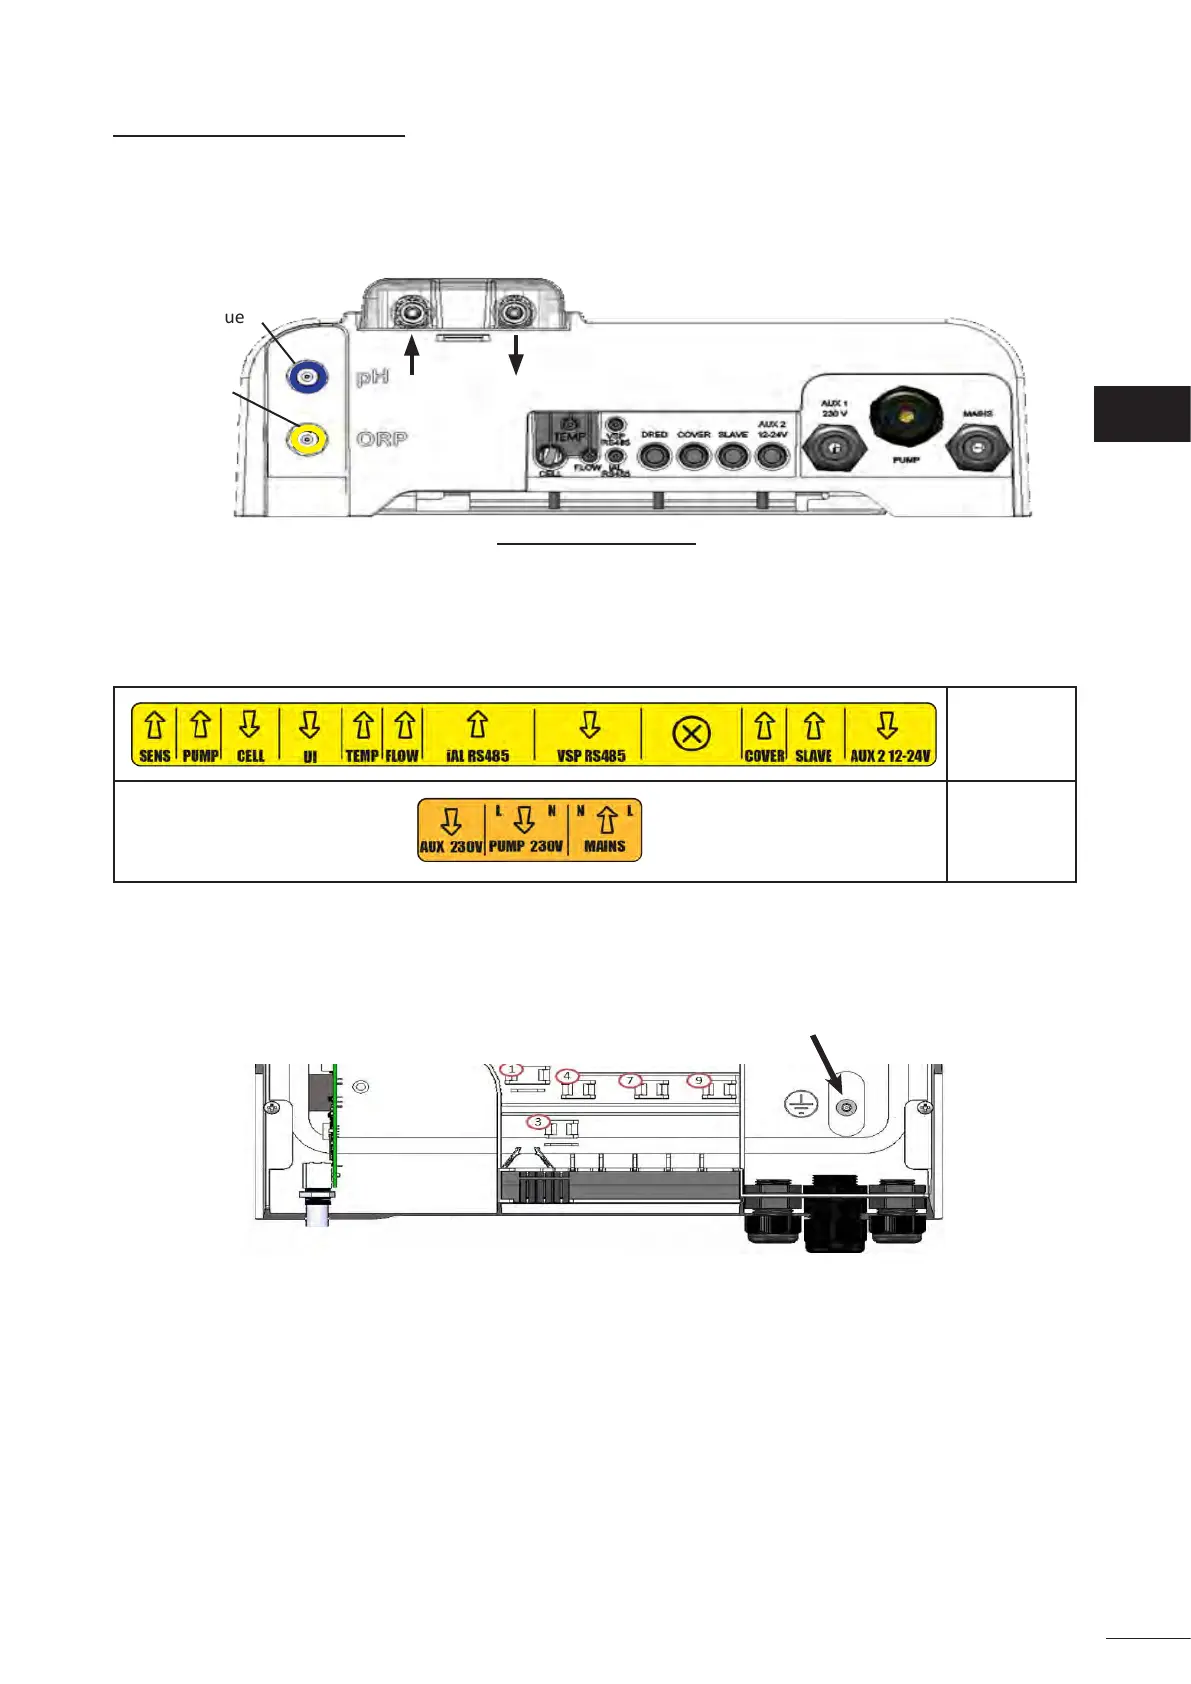
• Idenfy the input for each desired funcon at the boom of the control box:
pH = blue
ORP = yellow
View from below of a control box with an installed module
• Pass the cable into the associated cable gland or pierce a hole in the PVC diaphragm (made of rubber) using
a screwdriver of an appropriate diameter.
• Idenfy the terminal block dedicated to the desired funcon using the idencaon zones:
Low-voltage
part
High-voltage
part
• Install a cable clamp (supplied) to mechanically hold the cable against the appliance's frame; the position
of the cable clamp is shown, see “2.5.2 Idenfying the funcons to be connected”.
• If the lter pump (single- or variable-speed pump) is connected to the chlorinator, it must be grounded
using the dedicated grounding stud by crimping an appropriately-sized lug for the wire (not supplied).
EN