Pannoramic MIDI 1.17 User’s Guide 2 Installation
2 Installation
Warning!
The installation of Pannoramic MIDI must be carried out by a trained
professional!
In any other case the warranty will be automatically voided.
The supplier or distributor is not liable for any damages caused by an
installation carried out by an unauthorized person.
Only qualified service assistants are allowed to install the hardware and software. The product is
ready for use after installation.
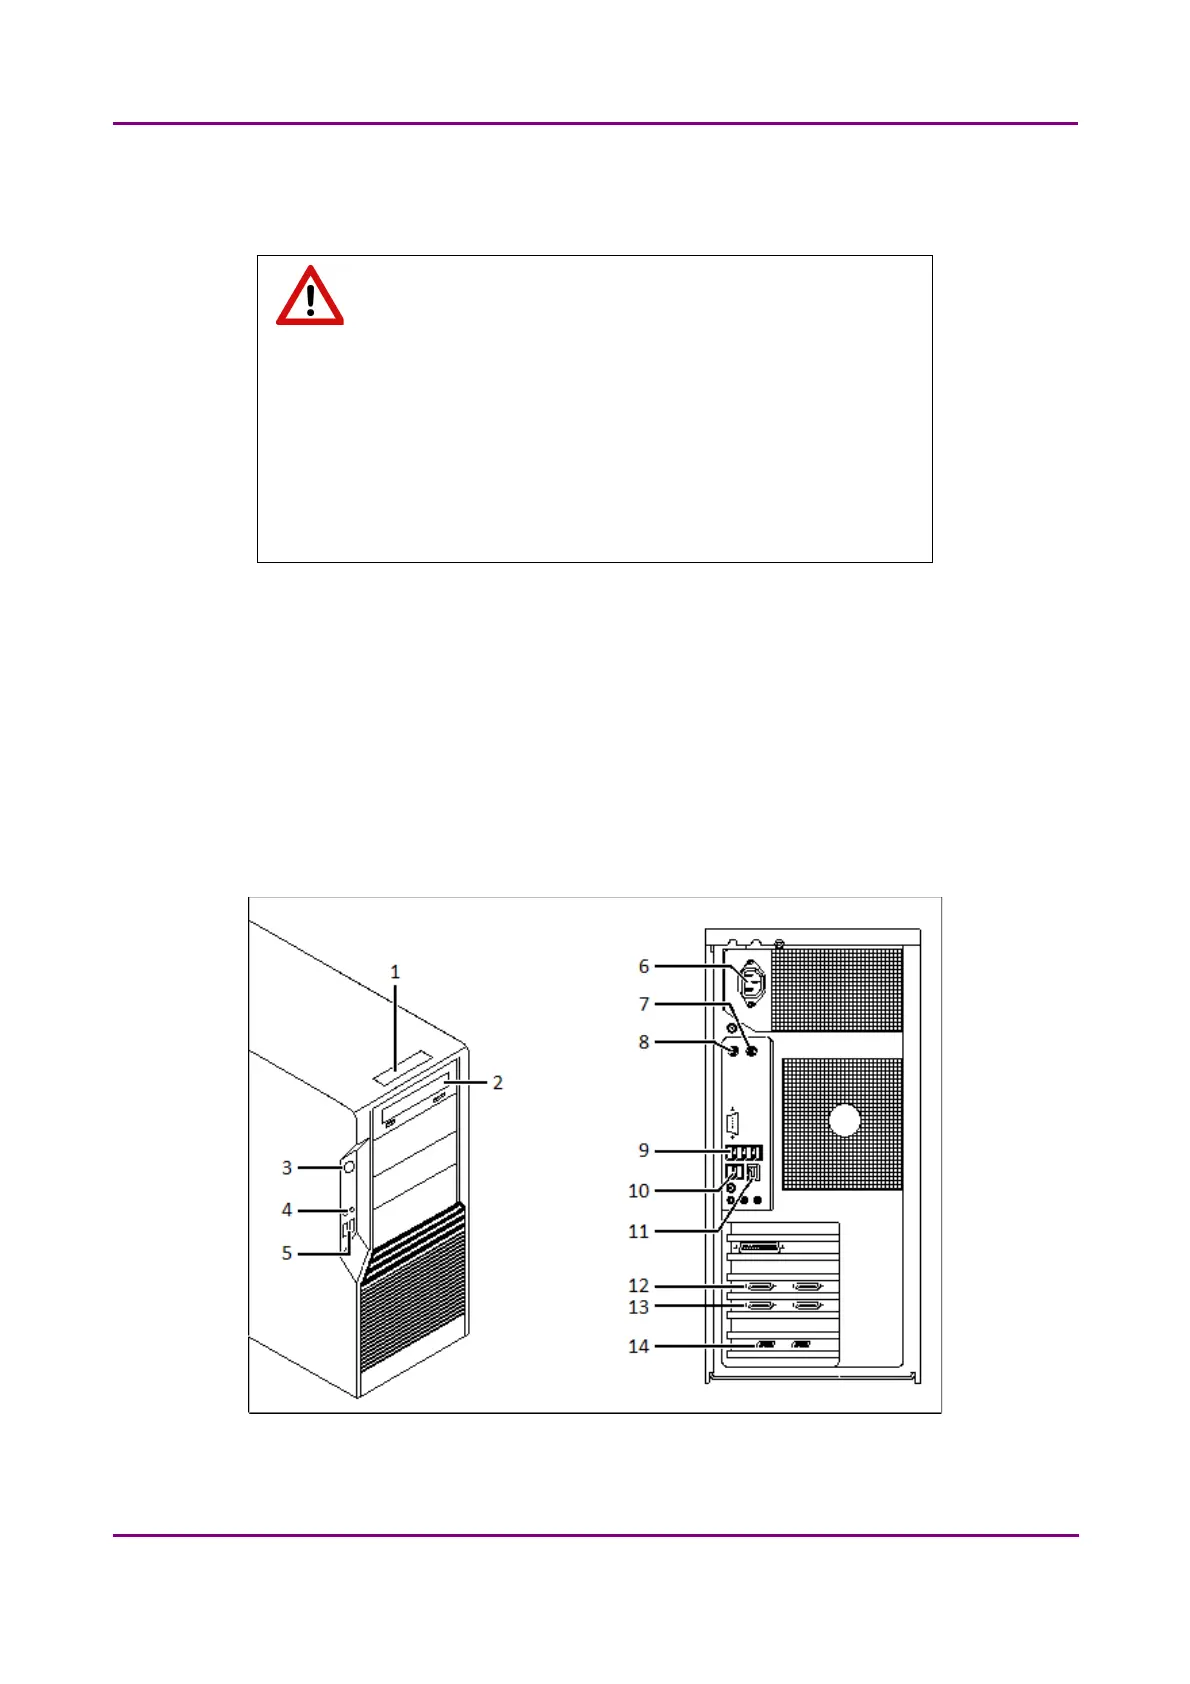
2.1 Control computer ports
The following figure shows the location of the connectors in order to enable easier transportation of
the product for a short distance, by disconnecting cables and detaching hardware components from
each other.
Figure 4 – Ports on control computer
April 3, 2014 - Rev. 1 3DHISTECH Ltd.
22(127)