Pannoramic MIDI 1.17 User’s Guide 5 Troubleshooting and Maintenance
5.3.2 Replacing the halogen lamp
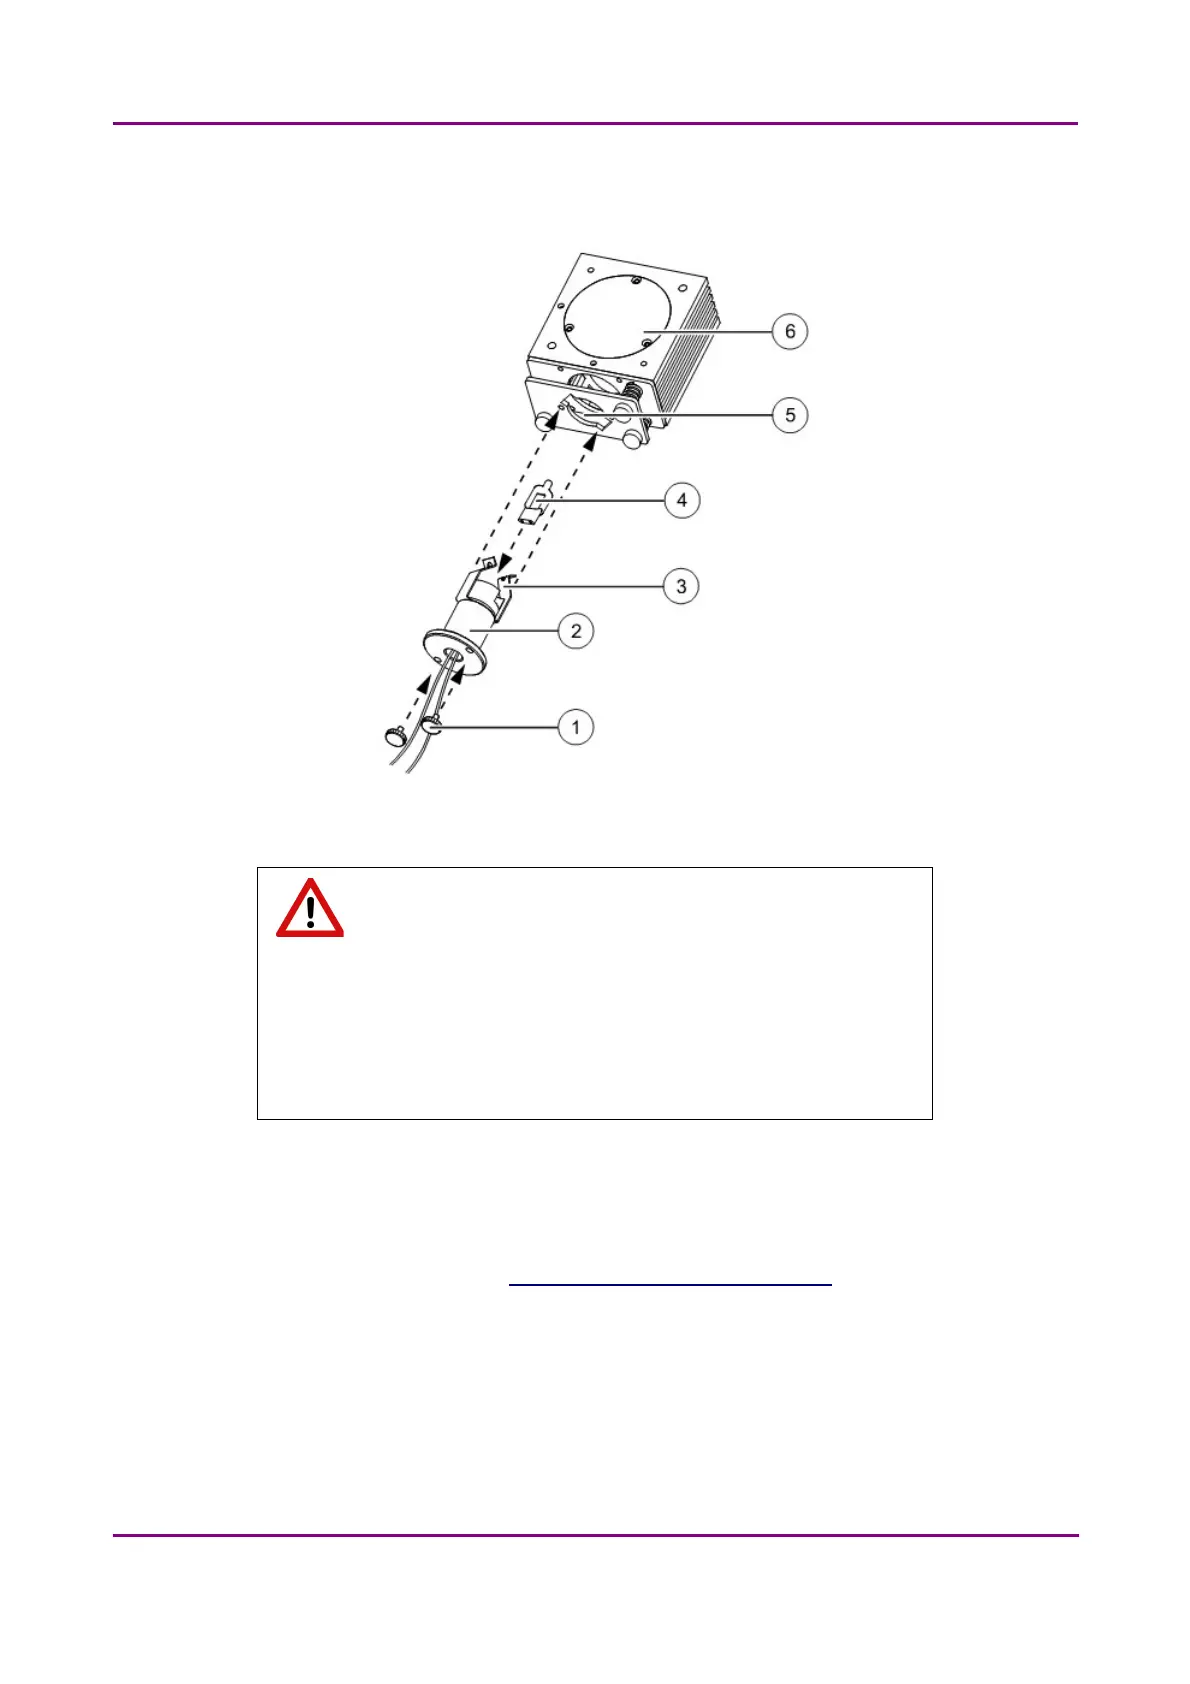
Figure 76 – Replacing the halogen lamp
Warning!
Hot surface! Wait for the lamp surface to cool down. Keep a cool-down
time of approximately 15 minutes.
When changing the lamp, avoid touching the replacement bulb with
the bare fingers!
1. Exit control software.
2. Switch off the power supply and disconnect the power cable.
3. Open the cover (see section 5.3.1 Opening the protective covers).
4. Hold the lamp mount (2) with your hand.
5. Remove the knurled screws (1) from the heat sink body (6) completely.
6. Turn the lamp mount counter-clockwise (for approximately 45 degrees) until the two
clamps (3) are aligned to the hole (5) on the heat sink body.
7. Remove the lamp mount with the lamp.
April 3, 2014 - Rev. 1 3DHISTECH Ltd.
114(127)