A10 Thunder Series 6430(S) ADC/CGN
Sliding Rail Kit Installation
page 18
• #2 Phillips-head screwdriver.
Sliding Rail Kit Installation
Installation consists of the following tasks:
1. Attach the Front Brackets to the Chassis
.
The factory-default brackets and the additional brackets are required.
2. Attach the Inner Rails to the Chassis
.
3. Attach the Rail Assemblies to the Rack
.
4. Slide the Chassis Into the Rack
.
The following sections provide detailed steps for each task.
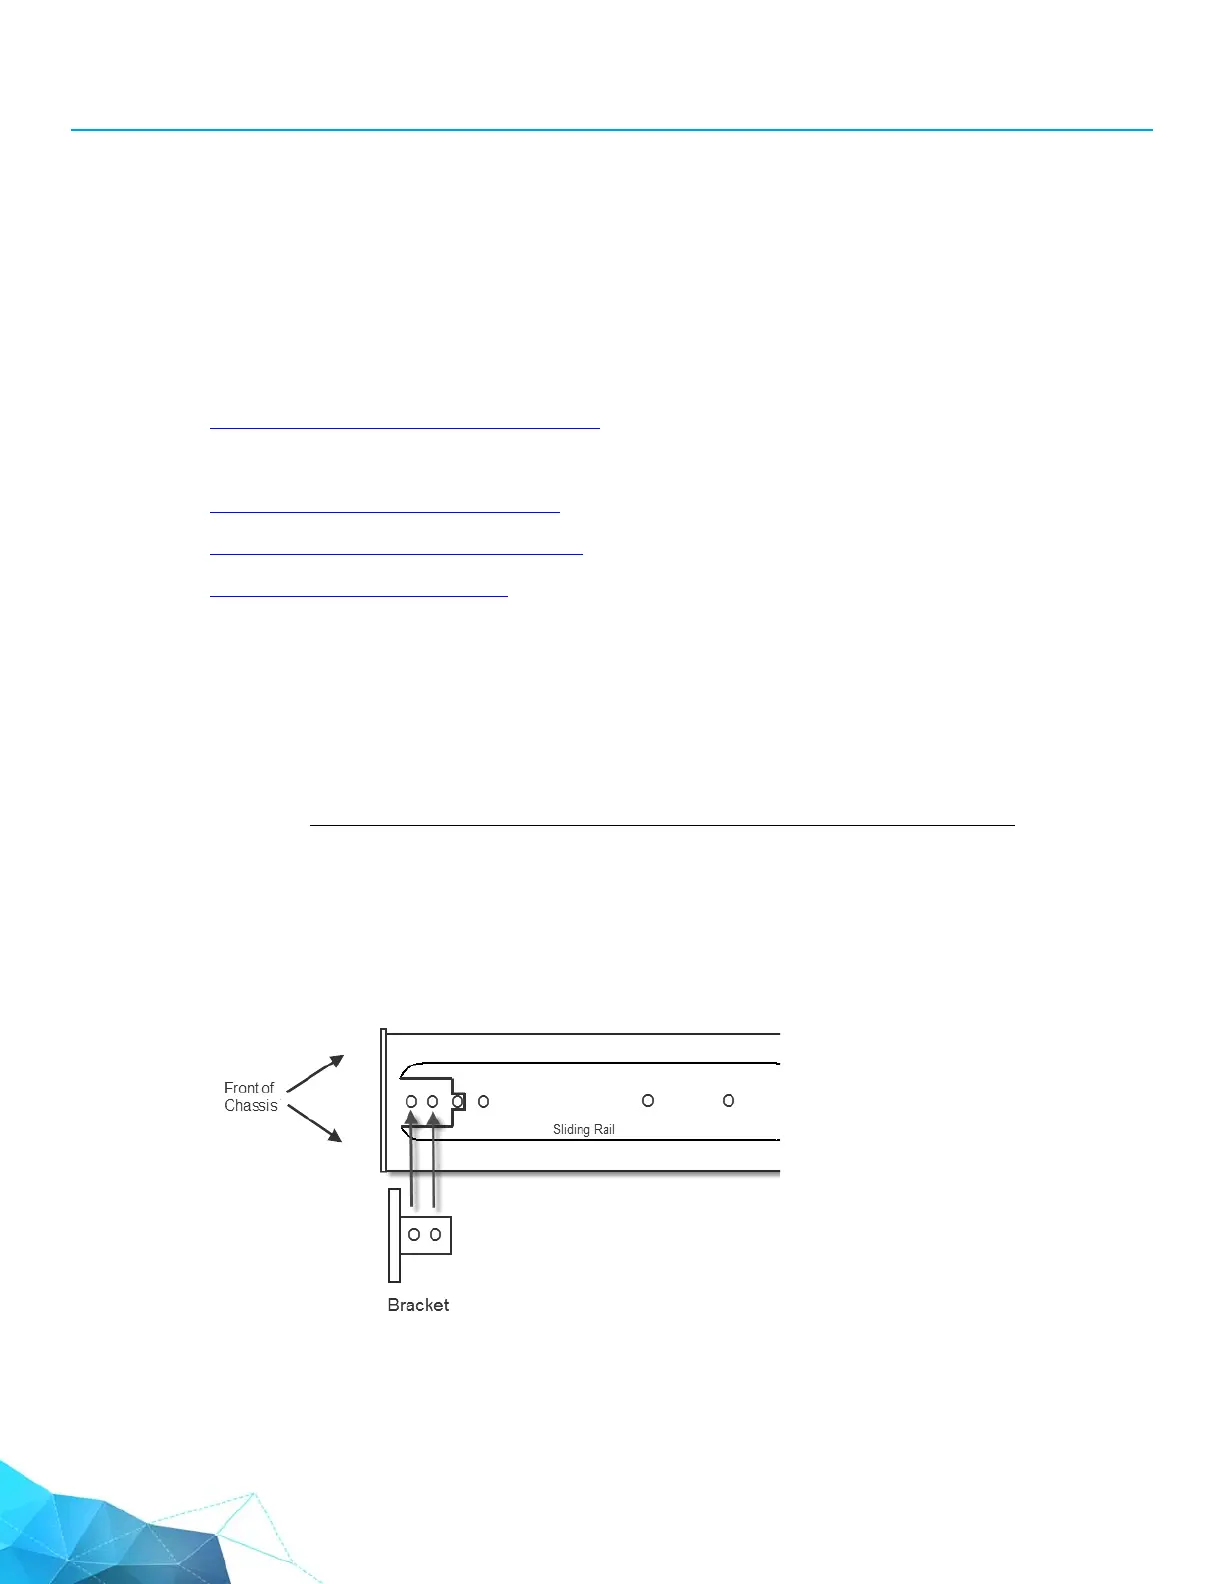
Attach the Front Brackets to the Chassis
Perform the following steps for each front bracket.
CAUTION: Do not attempt to mount the chassis using only the front brackets!
The front brackets are not designed to support the chassis’ weight.
1. Use the #2 Phillips head screwdriver to attach the factory-default rack-mount brackets to the chas-
sis, if not already installed.