A10 Thunder Series 6430(S) ADC/CGN
Sliding Rail Kit Installation
page 20
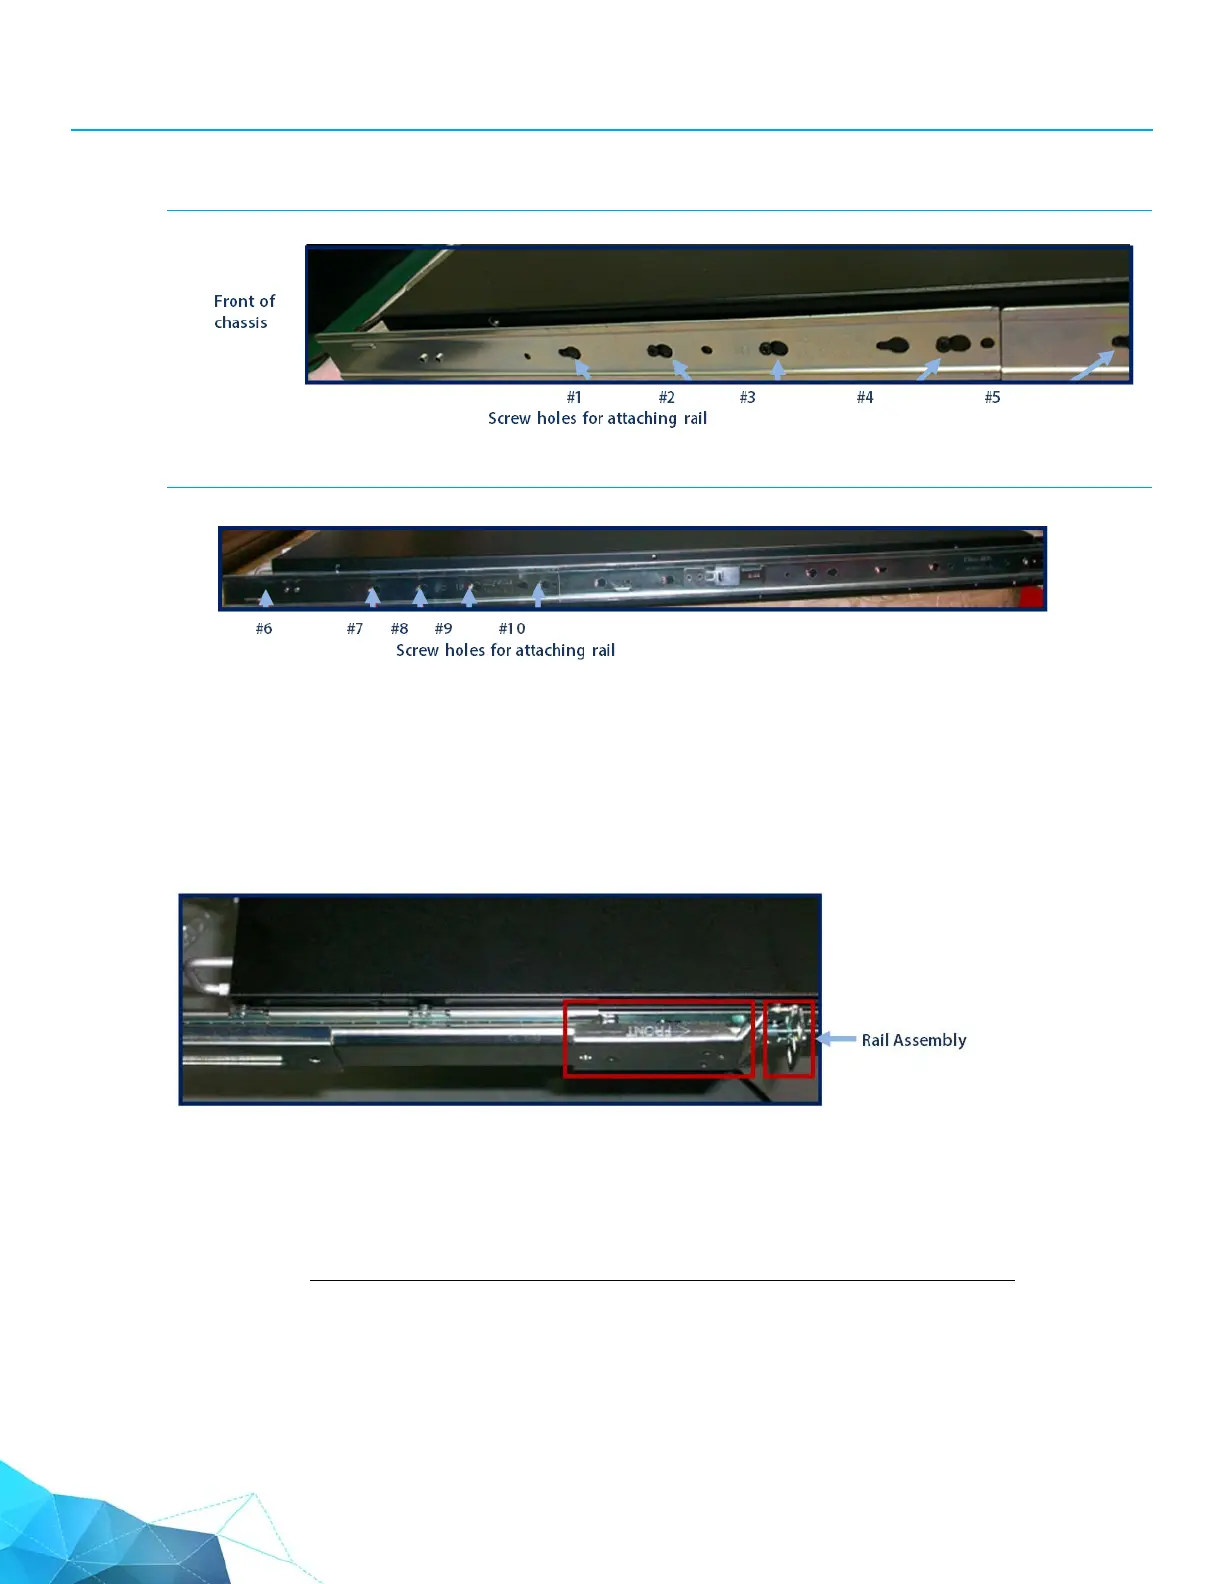
FIGURE 13 Inner rail attachment (Front-end of rail):
FIGURE 14 Inner rail attachment (Back-end of rail):
5. Use a total of 20 x pan-head screws to fasten the inner rails to each side of the chassis (10 x pan-
head screws for each side).
Attach the Rail Assemblies to the Rack
Make sure to attach the rail assemblies front-side forward, as shown below.
Perform the following steps for each rail assembly.
1. Align the 3 screw holes at the front of the rail assembly behind 3 screw holes in the front of the
rack.
NOTE: If you plan to use your own screw, please make sure they are not too
long to fit into the rail.
2. Insert 3 screws and partially tighten them. Optionally, you can use the silver pan-head screws and
hex nuts supplied with the rail kit.