Figure 53. Freq/PW Limit screen
Seng Pulse Width
Pulse width is the duraon of each electrical pulse (me smulaon is on) and is measured in microseconds
(µs). Pulse width adjustments can be made between 50 and 500 µs and in alternang increments of
12 and 13 µs, starng with 12 µs.
NOTE: Wide pulse widths will deplete the baery at a faster rate and increase recharging frequency.
1.
From the Program screen, press the Balance key unl it highlights the PW parameter.
1.
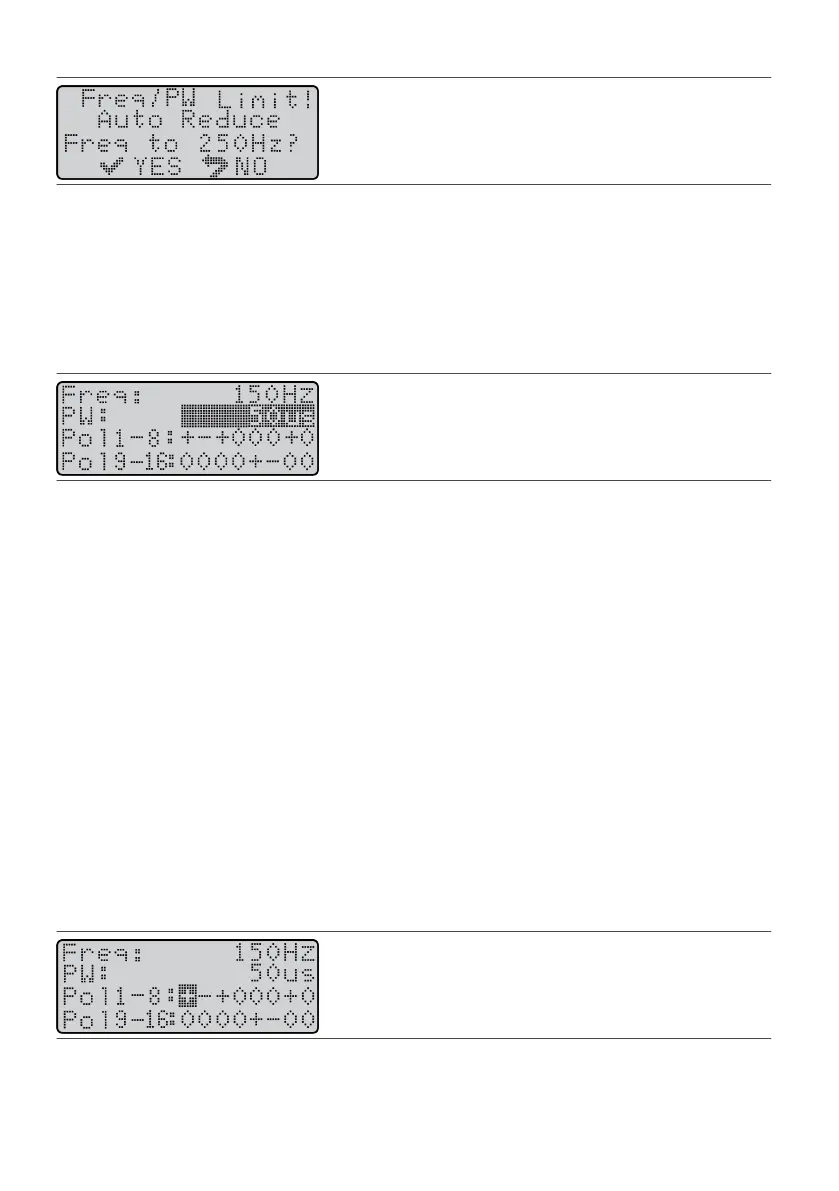
Figure 54.
Highlight the PW eld
CAUTION: An increase in pulse width without a previous decrease in amplitude can cause uncomfortable
smulaon sensaons. Always adjust amplitude accordingly when adjusng pulse width.
2.
Press the Amplitude Increase (or Decrease) key unl you reach the desired value.
2.
NOTE: Changes to pulse width will reset any prior percepon or maximum tolerable sengs.
Seng Electrode Polaries
Electrode polaries control the formaon of the electrical elds and where the paent feels smulaon. You
can select a polarity symbol (
+
,
–
, or 0) for each electrode on a lead, and each electrode has a default seng
of neutral (0). The system can also be set to funcon with the IPG (also called a “can”) as the anode (
+).
When using a single quadripolar lead, the rst four polarity symbols in Pol 1‑8 represent electrodes 1‑4. When
using a dual quadripolar lead conguraon, the rst four polarity symbols in Pol 9‑16 represent
electrodes 5‑8.
NOTE: Changes to polaries automacally set any acve amplitude to zero and reset the percepon and
the maximum tolerable values.
Seng Polaries Using Only the Electrodes
These instrucons present the method that is normally used to set electrode polaries. With this method, you
set at least one electrode on the lead to funcon as an anode (
+).
To set electrode polaries using only the electrodes:
1. From the Program screen, press the Balance key unl it highlights the Pol eld.1.
Figure 55.
Highlight the Pol eld
2.
Press a Scroll key to highlight the electrode that you want to set.
2.
3.
Press the Amplitude Increase (or Decrease) key to select a polarity (
–
,
+
, or 0).
3.
4.
To change the polarity of another electrode, repeat steps 2 and 3.
4.
23