Using The Scan Tool
3 – 18 • • • • • • • • • • • • • • • • • • • • • • • • • • • • • • • • • • • • • • • • • • • • • • • • • • • • • • •
3
Print Data
The Print Data function allows the printing of diagnostic information
stored in the Scan Tool.
✓ The Scan Tool’s internal battery power can be used to print data.
✓ Print Data is available from both the Main Menu and OBD II Function
List.
✓ Make sure you have previously installed the PC software in Using the
CD.
✓ Launch Scanning Suite and then start printing application.
✓ Follow all instructions on PC.
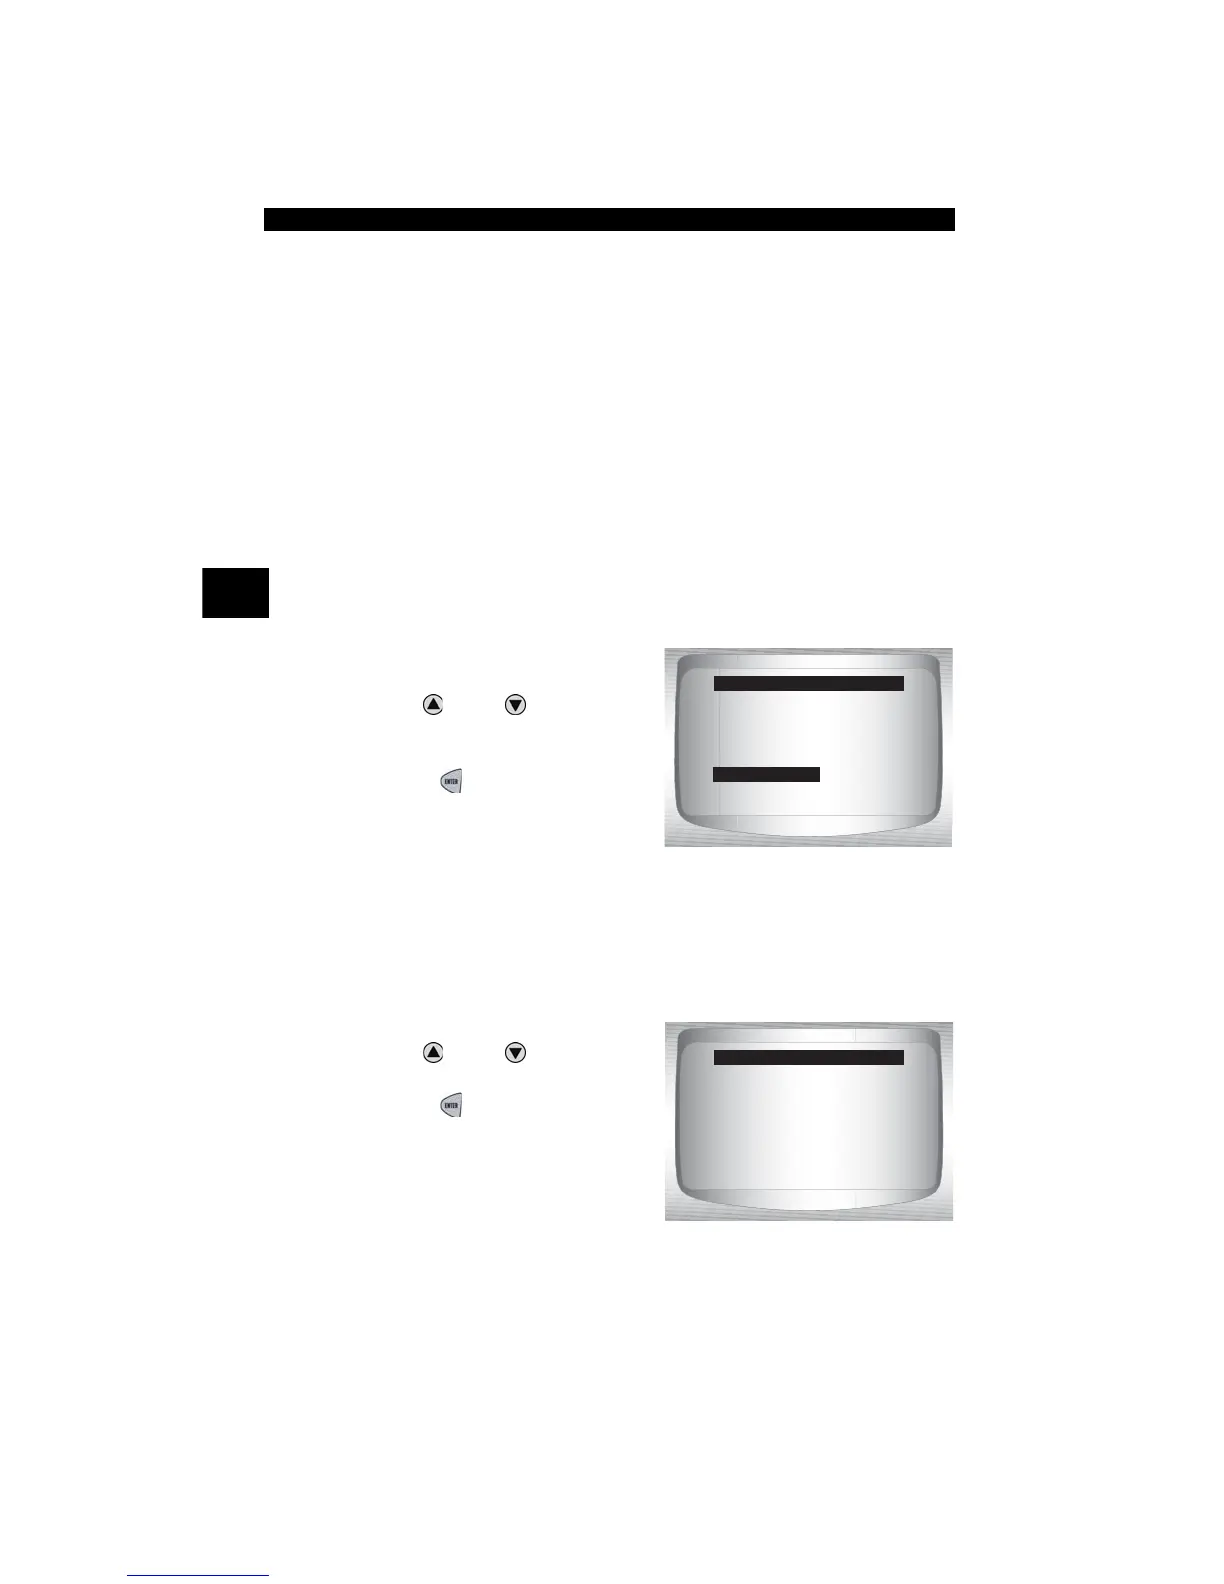
1.Select Print Data from the
OBD II Function List.
•Use
UP
or
DOWN
arrow
key until Print Data is
highlighted.
•Press
ENTER
.
✓ When printing playback data, Start Frame and End Frame need to be
defined.
2.Select Data To Be Printed.
•Use
UP
or
DOWN
arrow
key.
•Press
ENTER
.
OBD II Function List
=====================
Record Data
Vehicle Information
Modules Present
Review Data
Print Data
Code Lookup
System Setup
PRINT MENU
=====================
I/M Readiness
Codes
Pending Codes
State OBD Check
Review Fre eze Data
O2 Monitor Tests