User’s Manual
44
NOTE: For the Alarm-Out action, the alarm output and beep you select should be set to
the Event mode in the Alarm-Out setup screen (Schedule tab).
Highlight the box under the Notify heading and press the button. You can toggle the entire list
On and Off by highlighting Notification and pressing the
button. You can toggle the individual
items On and Off by highlighting that item and pressing the
button. Highlight OK and press
the
button to accept your changes.
NOTE: For the Notify action, the notify item you select should be enabled in the Notification
setup screen and the DVR should be registered in the RAS (Remote Administration System).
Highlight the desired box under the PTZ heading, and press the button. A list of PTZ presets
appear. Select the preset position for each PTZ camera, where you want PTZ cameras to move
to when the DVR detects video loss on the selected camera’s input.
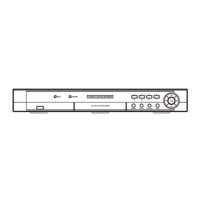
System Event
Highlight System Event in the Event menu and press the button. The System Event setup
screen appears.
Highlighting the box under the Interval heading beside each alarm-in and pressing the button
allows you to change the interval that you want the DVR to run self-diagnostics on Alarm Inputs.
You can select from 1 hr. to 30 days or Never.
Figure 47 Health Check setup screen.
The DVR can be configured to run self-
diagnostics and report the results.
Highlighting the box beside System and
pressing the
button allows you to select the
interval that you want the DVR to run self-
diagnostics on the system. You can select from
1 hr. to 30 days or Never.
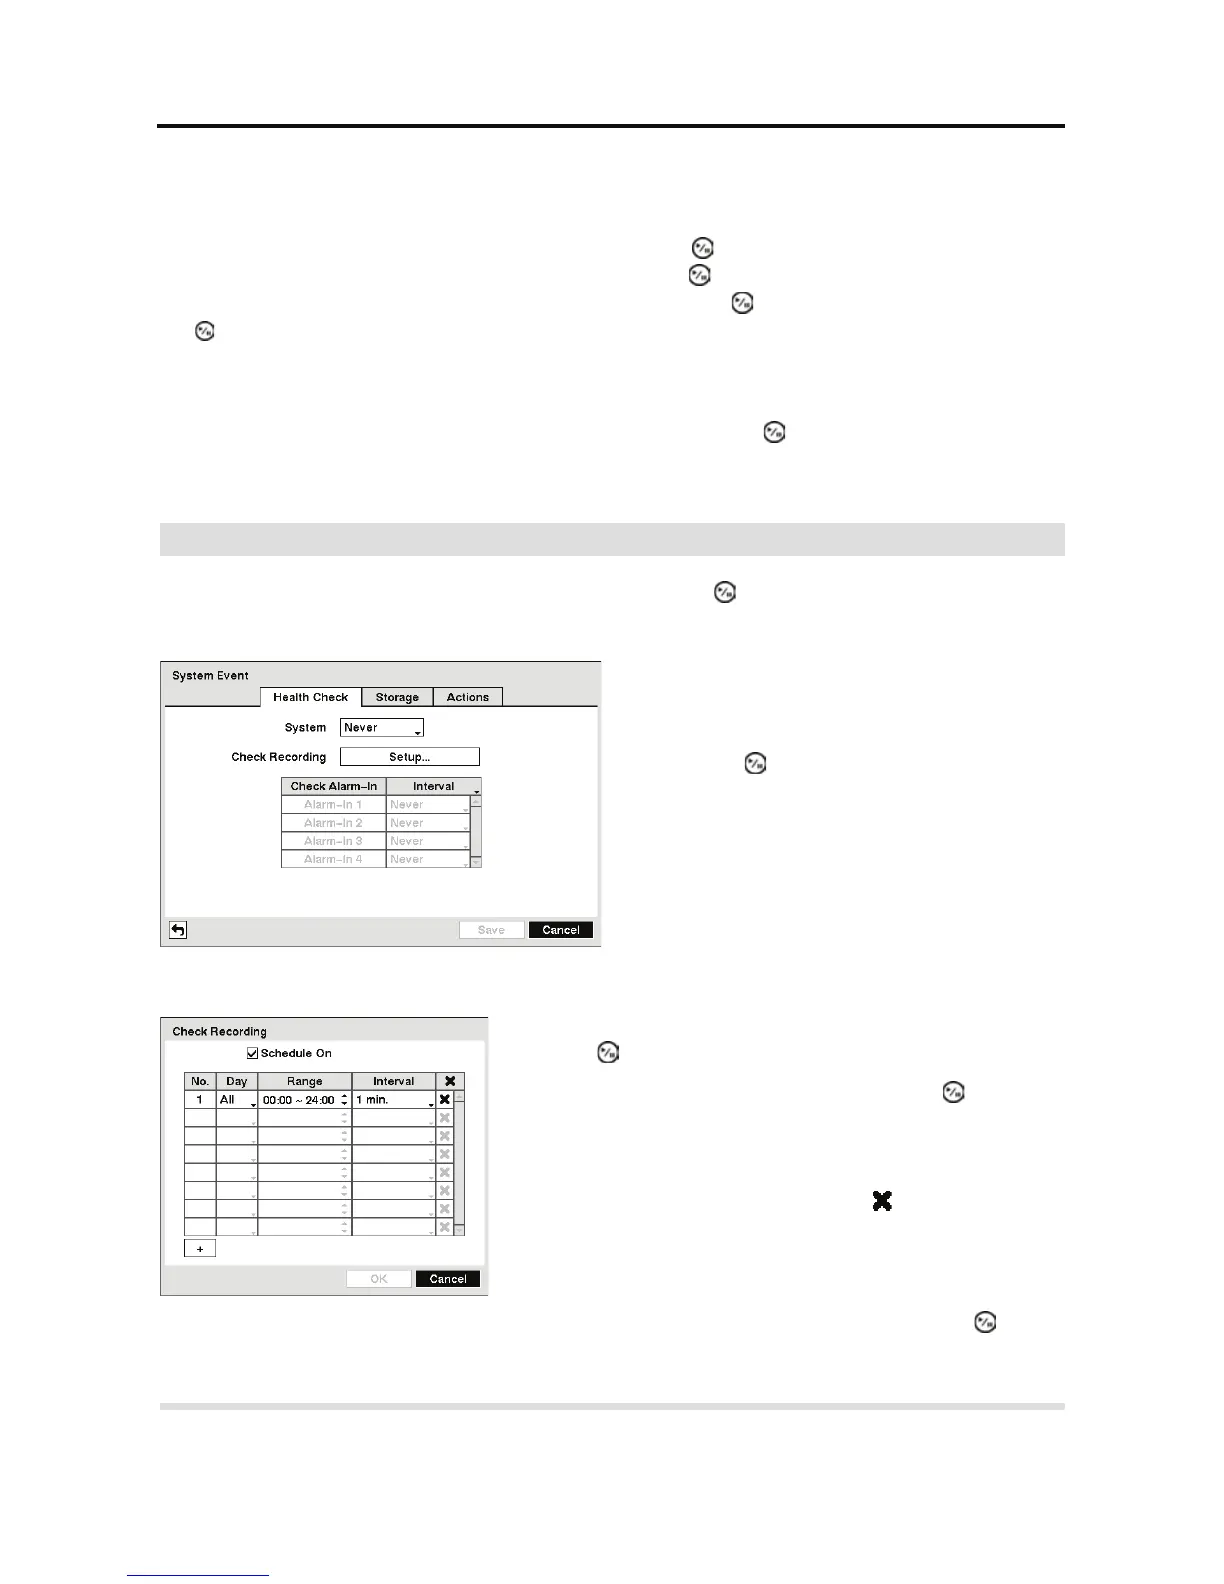
Highlight the Setup... box beside Check Recording and
press the
button. The Check Recording screen appears.
Highlighting Schedule On and pressing the button
toggles On and Off. When set to On, you can select the day,
time range and interval that you want the DVR to run self-
diagnostics on the recorder. The Interval can be selectable
from 1 min. to 7 days or Never. The
box allows you to
delete a check recording schedule.
 Loading...