AEQ XPEAK
IP Intercom System
13
2. PHYSICAL DESCRIPTION OF THE DEVICES.
In order to understand each unit’s wiring, installation and operation procedures, first it is
necessary to get used to the connectors and the rest of specific elements found in the device’s
front and rear panels.
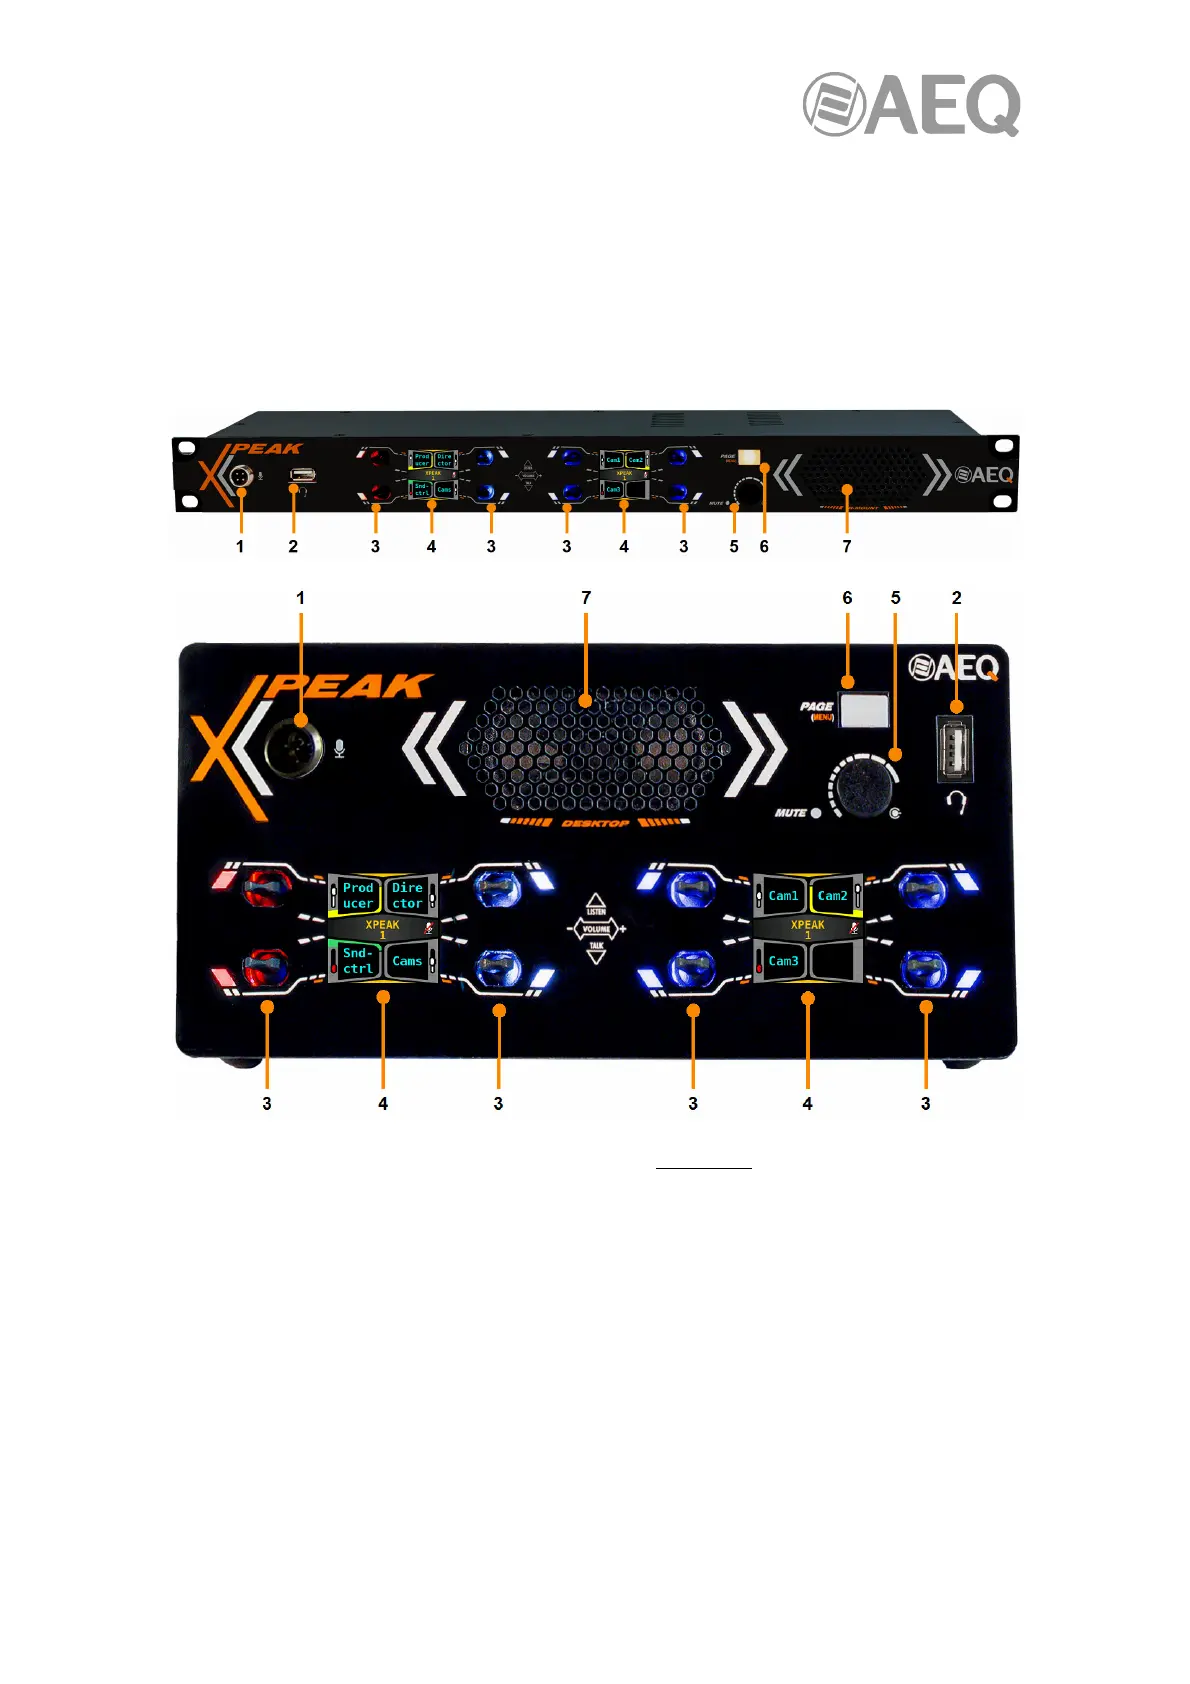
2.1. Physical description of Xpeak_R and Xpeak_D user panels.
2.1.1. Front panels description.
1. Microphone connector. This connector is valid exclusively for the provided condenser
microphone.
2. USB connector for optional headset. A-type connector compatible with any USB standard
headset. When connected, the local microphone and integrated loudspeaker are
deactivated.
3. 8 x 2-axis lever keys. Each one has an associated RGB LED.
4. 1,54” TFT Color screens.
5. Rotary encoder with push-button. During operation, the push-button activates the MUTE
function, and the attached indicator is illuminated.
6. Page and configuration menu access key.
7. Integrated loudspeaker.