AEQ XPEAK
IP Intercom System
18
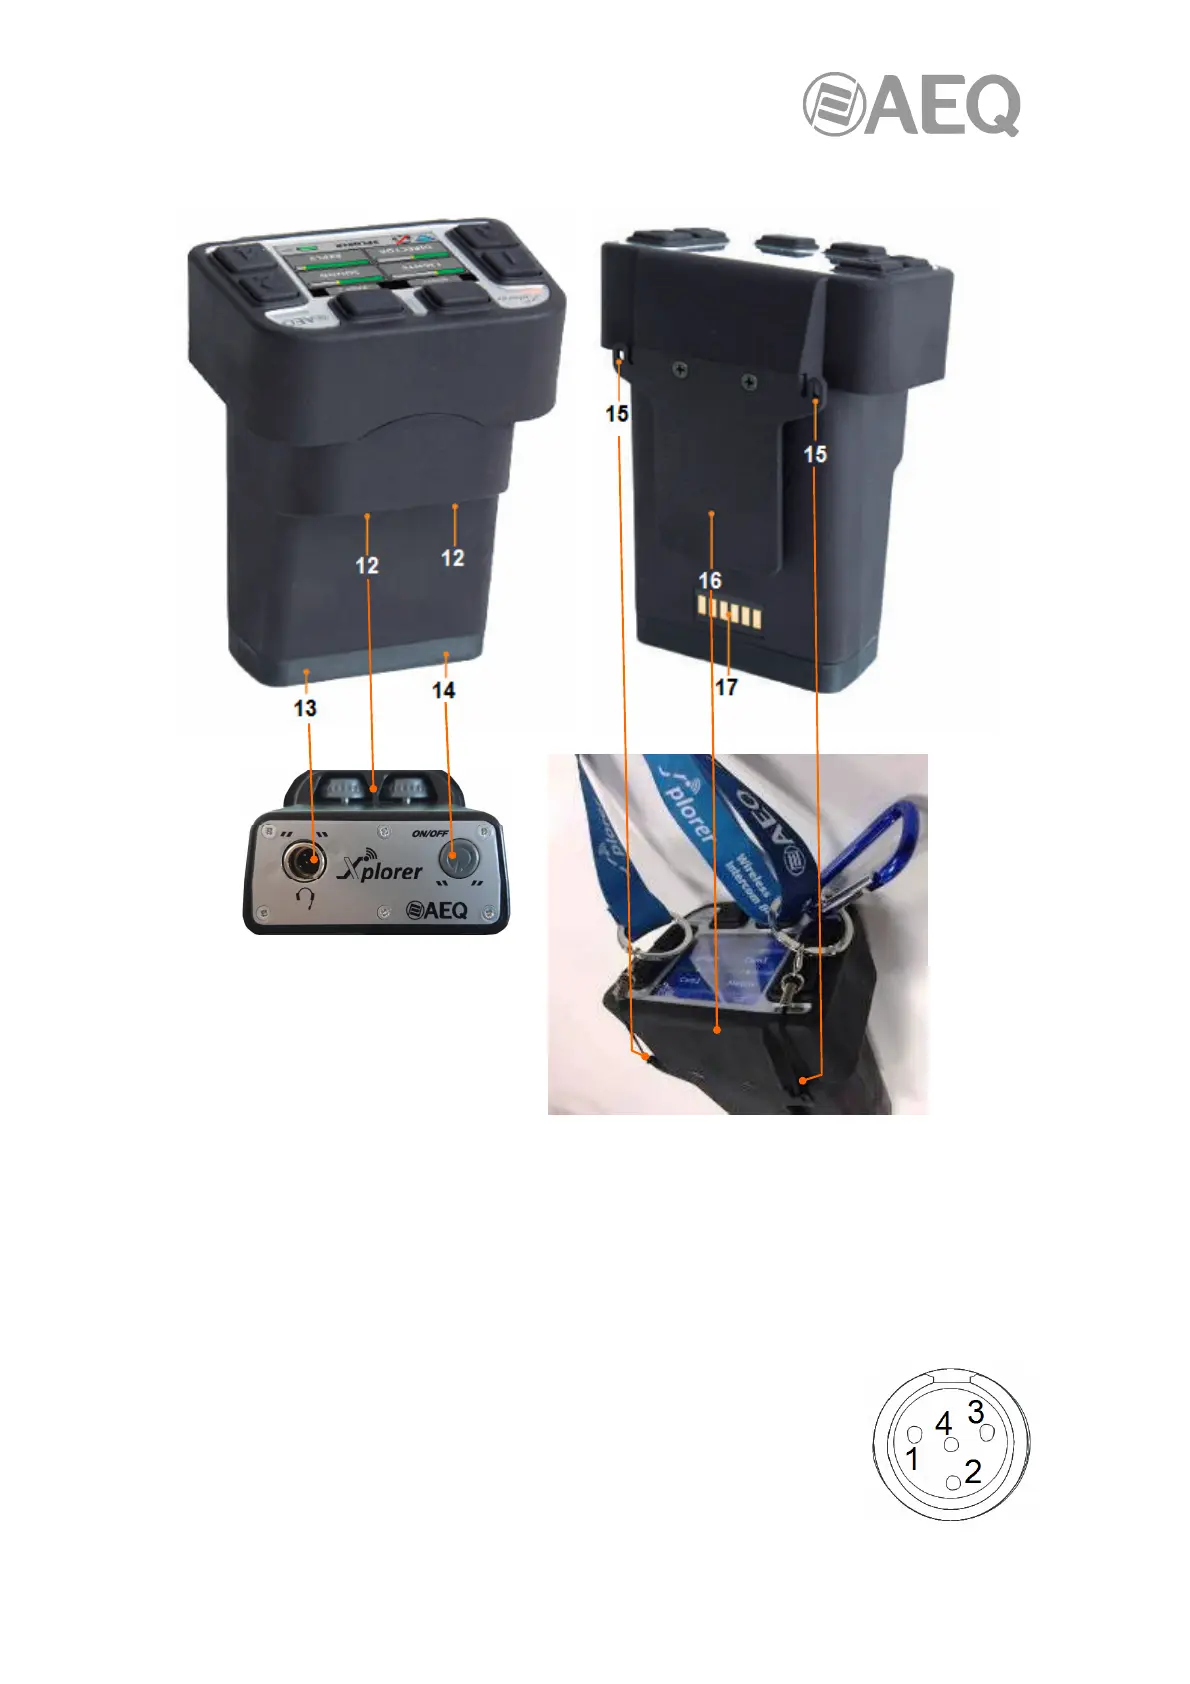
2.3.2. Other elements.
12. Rotary encoders: general volume, particular volume, movement between menus and other
functions.
13. Headset connector, "Tini-QG" (mini-XLR), underneath. See section 2.3.3.
14. ON/OFF Switch, underneath. In order to turn off the unit, press and keep pressed for 5
seconds.
15. Belt anchors (to be used as a shoulder strap with tape, or with a carabiner).
16. Belt hook.
17. Charging connector.
2.3.3. Headset connector.
Micro-headphone headsets are connected to a male "Tini-QG" connector
located at the bottom of the unit. The input stage for the headset’s
microphone is designed to be used with "electret" capsules homologated by
AEQ, requiring 2.8V supply.