3-22 Chapter 3
Adjustments and Correction Constants
Sampler Magnitude and Phase Correction Constants (Test 53)
5. 8753ES only:
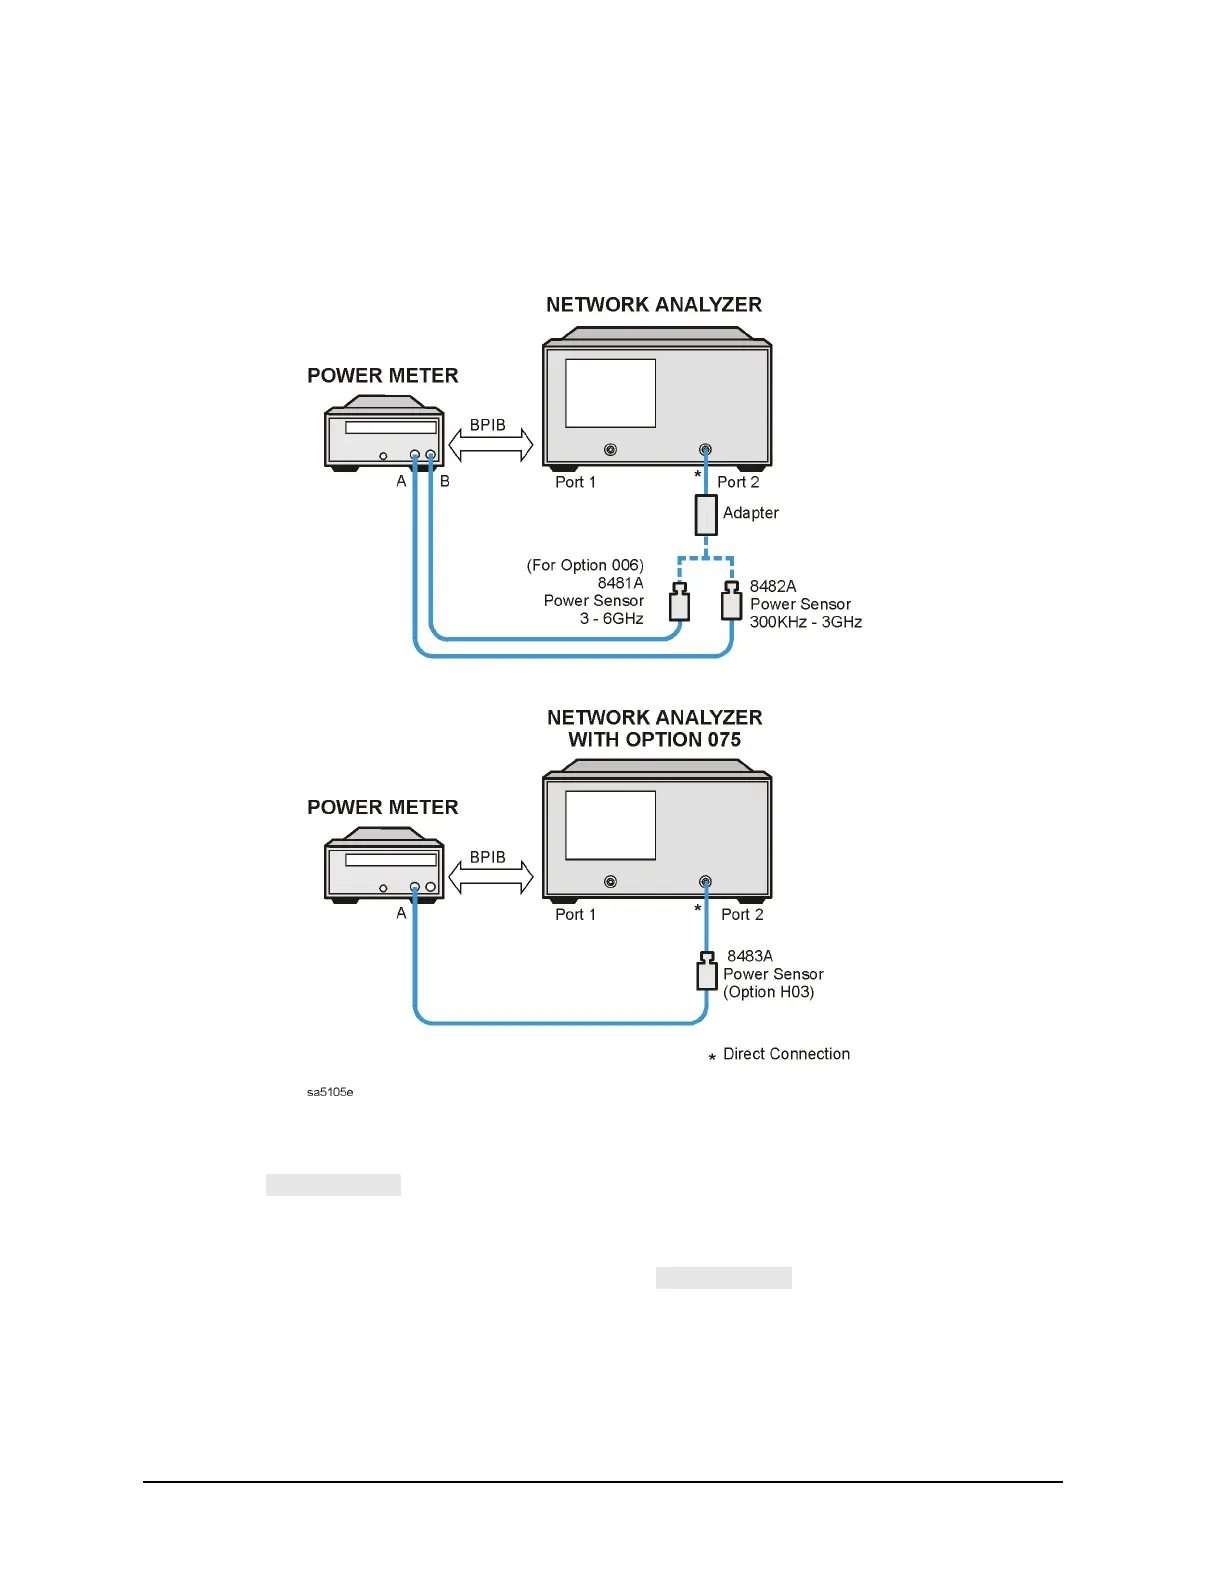
When the analyzer displays CONNECT <3 GHz SENSOR A TO PORT 2, make the
connections as shown in Figure 3-8, using the 8482A power sensor.
Figure 3-8 Connections for Sampler Correction at Port 2
6. For 8753ES only:
a. Press . This part of the test will take about 10 minutes.
b. For Option 006 Instruments Only: When the analyzer displays CONNECT 6 GHz
SENSOR TO PORT 2, make the connections as shown in Figure 3-8, using the
HP/Agilent 8481A power sensor. Then press . This part of the test will
take about 20 seconds.
7. When the analyzer displays CONNECT PORT 1 TO PORT 2, connect the second through
cable (for which you have previously determined the insertion loss) as shown in Figure
3-9. Proceed to step 9.

 Loading...


