114 Agilent 1200 Series Autosampler Reference Manual
4 Repairing the Autosampler
Needle-Seat Assembly
Frequency When the seat is visibly damaged
When the seat capillary is blocked
Tools required 1/4 inch wrench (supplied in accessory kit).
Flat-head screwdriver.
Parts required Needle-seat assy (0.17 mm i.d 2.3 µl) G1313-87101 for G1329A
Needle-seat assy (0.12 mm i.d 1.2 µl) G1313-87103 for G1329A
Needle-seat assy (0.50 mm i.d 20 µl) G2260-87101 for G2260A
Preparations for this
procedure
Select “Start” in the maintenance function “Change Needle” (see “Change
Needle” on page86).
Remove the front cover.
Use the “Needle Up” command in the “Change Needle” function to lift the
needle an addition 1 cm.
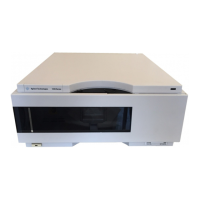
1 Disconnect the seat-capillary fitting from the injection
valve (port 5).
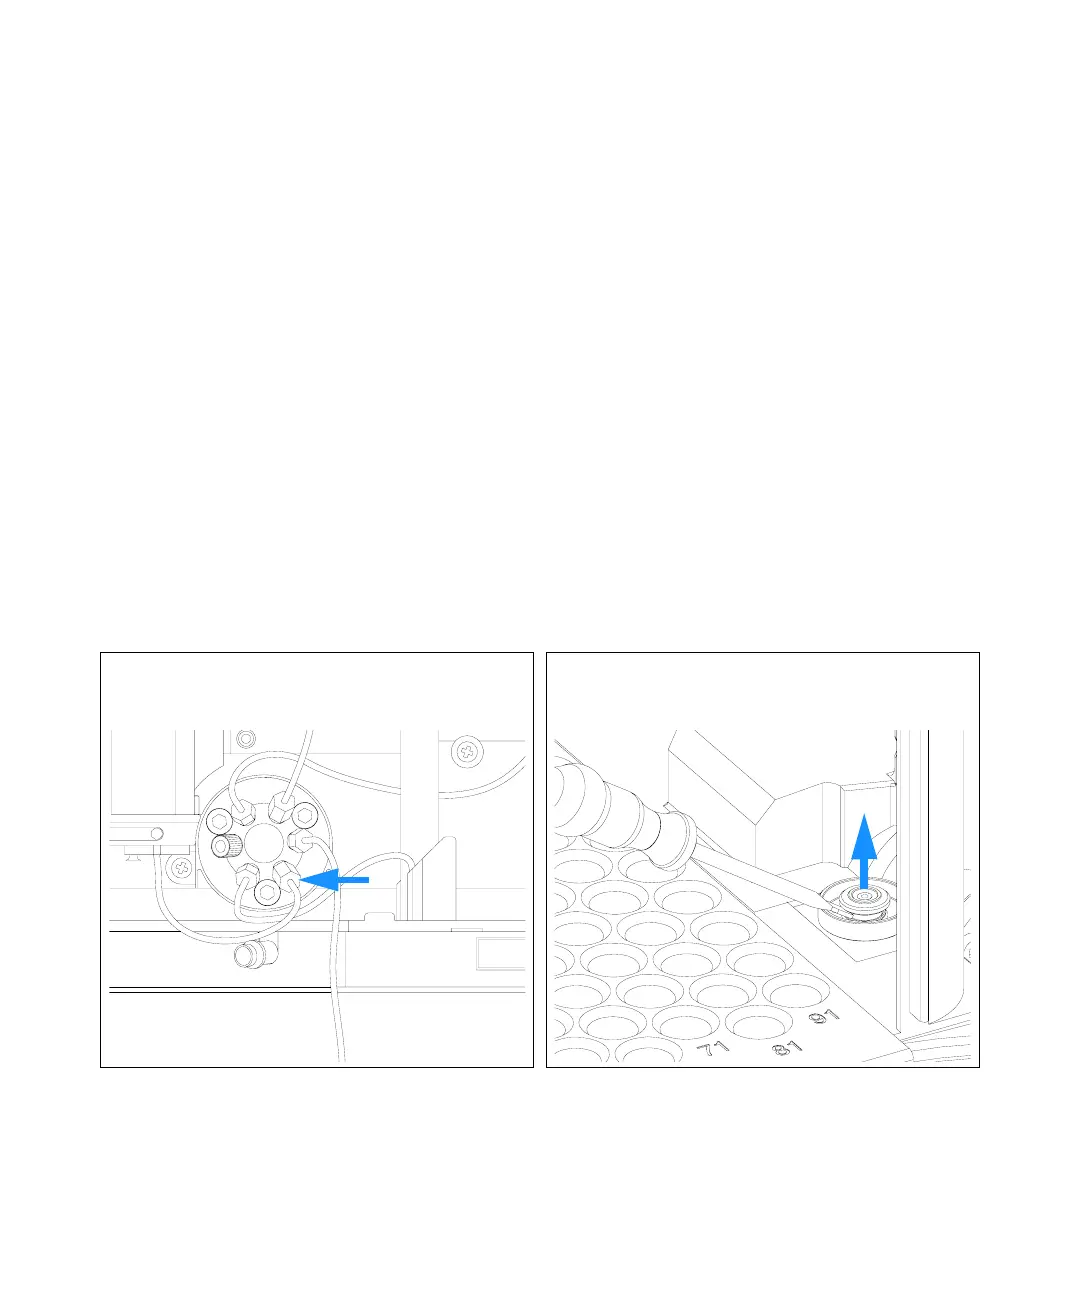
2 Use a small flat-head screwdriver to ease out the needle
seat.
CellFrame
CellFrame
 Loading...


