— 12 —
INSTALLATION
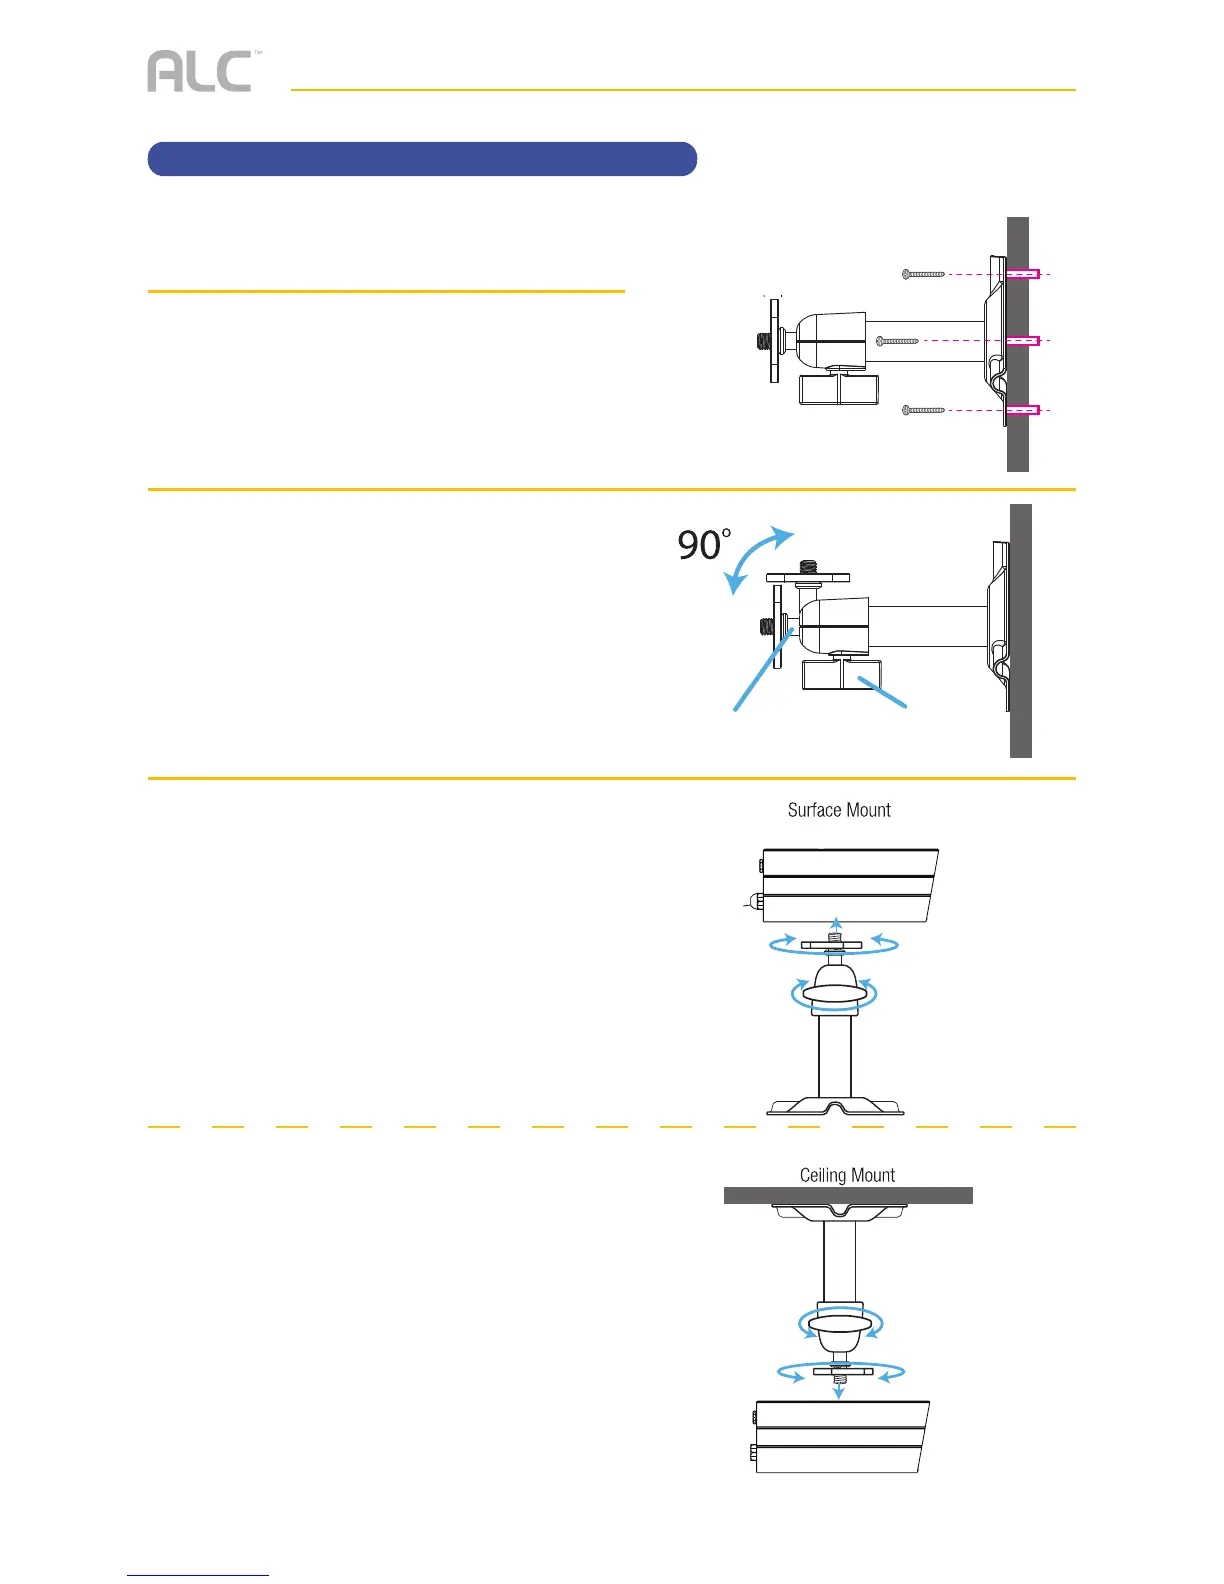
Installing the Camera(s)
u
If not mounting, but just using on a flat
surface (desk, table, etc.), skip to step 4.
v
Secure the multi-position Camera
Bracket to a stable surface, ceiling or
wall using the three supplied screws.
If needed, three anchors are also
included.
w
Loosen the T-Bolt on the Camera
Bracket and adjust viewing angle using
the Thumb Screw to rotate position.
x
BOTTOM/SURFACE MOUNT:
u Align Mounting socket on bottom of
the camera with T-Bolt and screw
camera onto the T-Bolt until it is in the
desired position.
v Tighten the Brace against the camera
to secure it in place.
w Set the desired camera angle and
then tighten the Thumb Screw.
CEILING MOUNT:
u Align Mounting socket on top of
the camera with T-Bolt and screw
camera onto it until it is in the
desired position.
v Tighten the Brace against the camera
to secure it in place.
w Set the desired camera angle and
then tighten the Thumb Screw.