Appendix E: Pluggable Transceivers
7750 SR-a4 and SR-a8 Installation Guide 227
Step 8. While holding the transceiver by its sides, slide the unit into the port at the correct
angle. If other transceivers are present, you may need to push on the face to fully
seat the transceiver. The transceiver is seated when it clicks into place. See
Figure 84. Table 112 describes the installation features.
Step 9. Remove the safety cap from the optical transceiver.
Step 10. Connect the network cable to the optical transceiver.
Installing a CFP
To install a CFP transceiver:
Step 1. Locate the CFP receptacle on the MDA-a card.
Step 2. Remove the CFP from its antistatic packaging.
Step 3. While holding the CFP by its sides, slide the unit into the port at the correct angle
until it clicks into place, as shown in Figure 86.
Figure 86: CFP Installation
Step 4. Tighten the captive screw on each side of the CFP.
Step 5. Remove the safety cap from the optical transceiver.
Step 6. Connect the network cable to the optical transceiver connector.
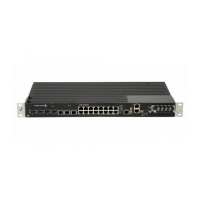
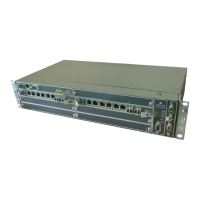
7750 SR-a4 Fan Tray
Pwr
Stat
Slot Lay
out
1/1 XP
1/2
Pwr
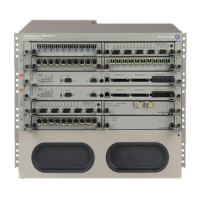
7750 MDA-aXP
1-100GE-CFP
Stat
Lnk
Pwr
7750 MDA-a
20-1GB-TX
Stat
Lnk
1
Act
2
Lnk
3
Act
4
Lnk
5
Act
6
Lnk
7
Act
8
Lnk
9
Act
10
Lnk
11
Act
12
Lnk
13
Act
14
Lnk
15
Act
16
Lnk
17
Act
18
Lnk
19
Act
20
Pwr
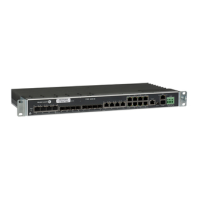
7750 SR-a
Stat
Pwr
Stat
7750 M
DA-aXP
10-10GB-SFP+
10
Lnk
Act
9
Lnk
Act
8
Lnk
Act
7
Lnk
Act
6
Lnk
Act
5
Lnk
Act
4
Lnk
Act
3
Lnk
Act
2
Lnk
Act
1
Lnk Act
Pwr
7750 M
DA-a
44-1GB-
CSFP/SFP
Stat
Lnk/Act
1
2
3
4
5
6
7
8
9
10
11
12
13
14
15
16
25
26
27
28
29
30
31
32
33
34
35
36
37
38
39
40
41
42
43
44
17
18
19
20
21
22
23
24
24541
Tx
Rx