Installing PSUs
7750 SR-a4 and SR-a8 Installation Guide 97
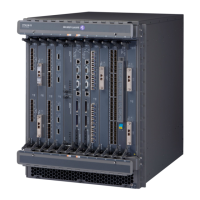
Figure 28: AC Power Cord Connection
To connect the AC power cable to the PSU:
Step 1. Verify that the AC cord meets your regional requirements. Do not use power cords
that do not meet these standards.The AC cord must be rated at 12A minimum for
use at 100-120V and 10A minimum for use at 220/240V.
Step 2. On the AC PSU, plug the AC power cord into the inlet on the front of each AC PSU,
as shown in key 1 of Figure 28.
Step 3. Engage the power cord retainer on the PSU inlet by lowering the retainer until it
fully secures the cord.
Step 4. Install the other components in the chassis, as described in Installing Components
on page 107 before you power up the system. Power up is described in Powering
Up, Initializing, and Configuring on page 123.
Warning: Do not apply power to the chassis. The chassis does not have an ON/OFF switch.
The unit will be powered on if you plug the power cord into an AC power source receptacle.
Key 2 in Figure 28 is shown as an example: do not plug the far end of the power cord into
an AC power source until all components are installed.
Table 41: AC Power Cord Connection Descriptions
Key Description
1 Power cord inserted in AC PSU inlet
2 Example of a remote AC power source receptacle
24554
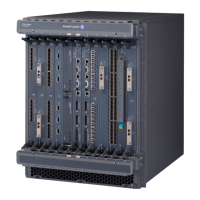
7750 SR-a4
Service Router
Slot Layout
1/1 XP
1/2 XP
1/3 1/4
CPM A
1
CPM B
Alarms
1PPS
ACO
LT
Critical
Lnk
DTE
Pwr
7750 CPM-a
Stat
Console
Mgmt OES
SyncE1/588
BITS
Compact Flash
DCE
Act Lnk Act
Major Minor
1
2