Appendix E: Pluggable Transceivers
7750 SR-a4 and SR-a8 Installation Guide 229
Figure 87: Removing a CFP
Step 6. Place the CFP on an antistatic mat, then wait about 5 minutes for the CFP to cool.
Step 7. Install a CFP replacement or re-insert the plug.
Step 8. Connect the network cable or place a safety cap over the optical transceiver.
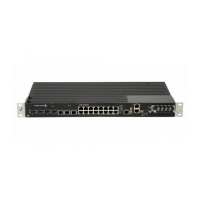
7750 SR-a4 Fan
T
ray
Pwr
Stat
S
l
ot Layout
1
/1 X
P
1/2
Pw
r
7750
MD
A-aXP
1
-
1
0
0
GE-
C
FP
Stat
L
nk
Pwr
7750 MDA-a
20-1GB-TX
Stat
L
n
k
1
Act
2
L
n
k
3
A
ct
4
L
n
k
5
Act
6
Lnk
7
Act
8
L
n
k
9
A
ct
10
Lnk
11
A
ct
1
2
L
nk
13
A
ct
14
Lnk
15
A
ct
16
L
n
k
17
A
ct
18
L
n
k
19
Act
20
Pw
r
7750 SR-a
Stat
Pwr
Stat
7
7
5
0
M
D
A
-a
XP
10-10GB-S
F
P
+
10
L
n
k
Ac
t
9
L
n
k
Ac
t
8
L
n
k
Ac
t
7
L
n
kAct
6
L
n
kAc
t
5
L
n
kAc
t
4
L
nk
Ac
t
3
L
nk
Act
2
LnkAct
1
Lnk
Ac
t
P
wr
7
7
5
0
MDA
-
a
44-1GB-
CS
F
P
/
S
F
P
S
t
a
t
Ln
k/
Act
1
2
3
4
5
6
7
8
9
1
0
1
1
1
2
1
3
1
4
1
5
1
6
2
5
2
6
2
7
2
8
2
9
3
0
3
1
3
2
3
3
3
4
3
5
3
6
3
7
3
8
3
9
4
0
4
1
4
2
4
3
4
4
1
7
1
8
1
9
2
0
2
1
2
2
2
3
2
4
24602
Tx
Rx
Note: If you are not replacing the CFP with a new transceiver, you must reinsert a plug into
the receptacle.