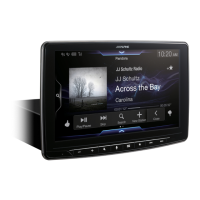
ALPINE iLX-F509E 68-41657Z84-A (EN)ALPINE iLX-F509E 68-41657Z84-A (EN)
52-EN
Camera Operation
(Optional)
When an optional camera is connected, the view of camera
video can be output to the monitor.
Rear camera, Front camera (or Side camera, etc.) can be
connected to this unit.
Make the Camera Select setting according to your
connected camera. For details, see “Setting the Reverse
Camera (Camera 1)”, “Camera 2 Setup” (page 22).
Rear camera:
If a rear camera is connected, when the vehicle is reversed,
the rear camera view (guide marks for vehicle width and
available distance) is displayed automatically on the screen
of this unit.
Front camera:
If a front camera is connected, it can assist to check the
condition in front of the car, such as when the road visibility
is bad.
Side camera:
If a side camera is connected, it is helpful to check the
condition of the road shoulder.
Other camera:
Set when connecting to a camera other than the Front
camera or Rear camera, such as a room camera.
You can adjust the quality of the camera image.
Setting items: Brightness / Colour / Contrast
See “Video Setup” (page 23).
Rear Camera Operation
Displaying the rear view video while
the car is in reverse
1 Shift the gear lever to the reverse (R) position.
The rear view image is displayed while the car remains
in reverse.
2 If you shift the gear lever to a position other
than reverse (R), the monitor returns to the
previous screen.
• Never depend solely on the camera when backing up. Always
turn and look and only use the camera for additional
assistance.
• This function is effective when the reverse wire is properly
connected.
• You can perform a Guide Adjustment for the rear view image.
For details, see “Camera Guide Setup” (page 22).
Displaying the Camera Image from the
HOME screen
1 Press the (CAM) button.
The Camera view image is displayed.
2 Touch the screen when the image from the
camera is displayed.
The operation screen is displayed on the screen.
3 Touch [Rear].
The Rear Camera view image is displayed.
• Touch [
] to return to the previous screen.
• You can perform a Guide Adjustment for the rear view image.
For details, see “Camera Guide Setup” (page 22).
Guide Display ON/OFF Setting
1 Touch the screen when the image from the
camera is displayed.
The operation screen is displayed on the screen.
• After a 5-second time-out, the operation screen
returns to the camera display screen.
2 Touch [Guide (Orange)] on the Rear camera
display screen.
The guide disappears, and then the [Guide (Orange)]
switch changes to [Guide].
3 Touch [Guide] to turn on the guide.
aution Display
een when the image from the
a is displayed.
ation screen is displayed on the screen.
ond time-out, the operation screen
ns to the camera display screen.
Caution].
ouch, the caution location moves to the top or
he screen.
uide Display ON/OFF Setting
een when the image from the
a is displayed.
ation screen is displayed on the screen.
ond time-out, the operation screen
ns to the camera display screen.
itch] on the Rear camera display
ch guide appears, and then the [Hitch] switch
o [Hitch (Orange)].
Hitch Guide
itch (Orange)] to turn off the guide.