ALPINE iLX-F509E 68-41657Z84-A (EN)ALPINE iLX-F509E 68-41657Z84-A (EN)
53-EN
Displaying the Camera Image fr
HOME screen
1 Press the (CAM) button.
The Camera view image is displayed.
2 Touch the screen when the image fr
camera is displayed.
The operation screen is displayed on the scr
3 Touch [Rear].
The Rear Camera view image is displayed.
• Touch [
] to return to the previous screen.
• You can perform a Guide Adjustment for the rea
For details, see “Camera Guide Setup” (page 22).
Guide Display ON/OFF Setting
1 Touch the screen when the image fr
camera is displayed.
The operation screen is displayed on the scr
• After a 5-second time-out, the opera
returns to the camera display screen.
2 Touch [Guide (Orange)] on the Rear c
display screen.
The guide disappears, and then the [Guide (
switch changes to [Guide].
3 Touch [Guide] to turn on the guide.
Adjusting the Caution Display
Location
1 Touch the screen when the image from the
camera is displayed.
The operation screen is displayed on the screen.
• After a 5-second time-out, the operation screen
returns to the camera display screen.
2 Touch [Caution].
• For each touch, the caution location moves to the top or
bottom of the screen.
Hitch Guide Display ON/OFF Setting
1 Touch the screen when the image from the
camera is displayed.
The operation screen is displayed on the screen.
• After a 5-second time-out, the operation screen
returns to the camera display screen.
2 Touch [Hitch] on the Rear camera display
screen.
The hitch guide appears, and then the [Hitch] switch
changes to [Hitch (Orange)].
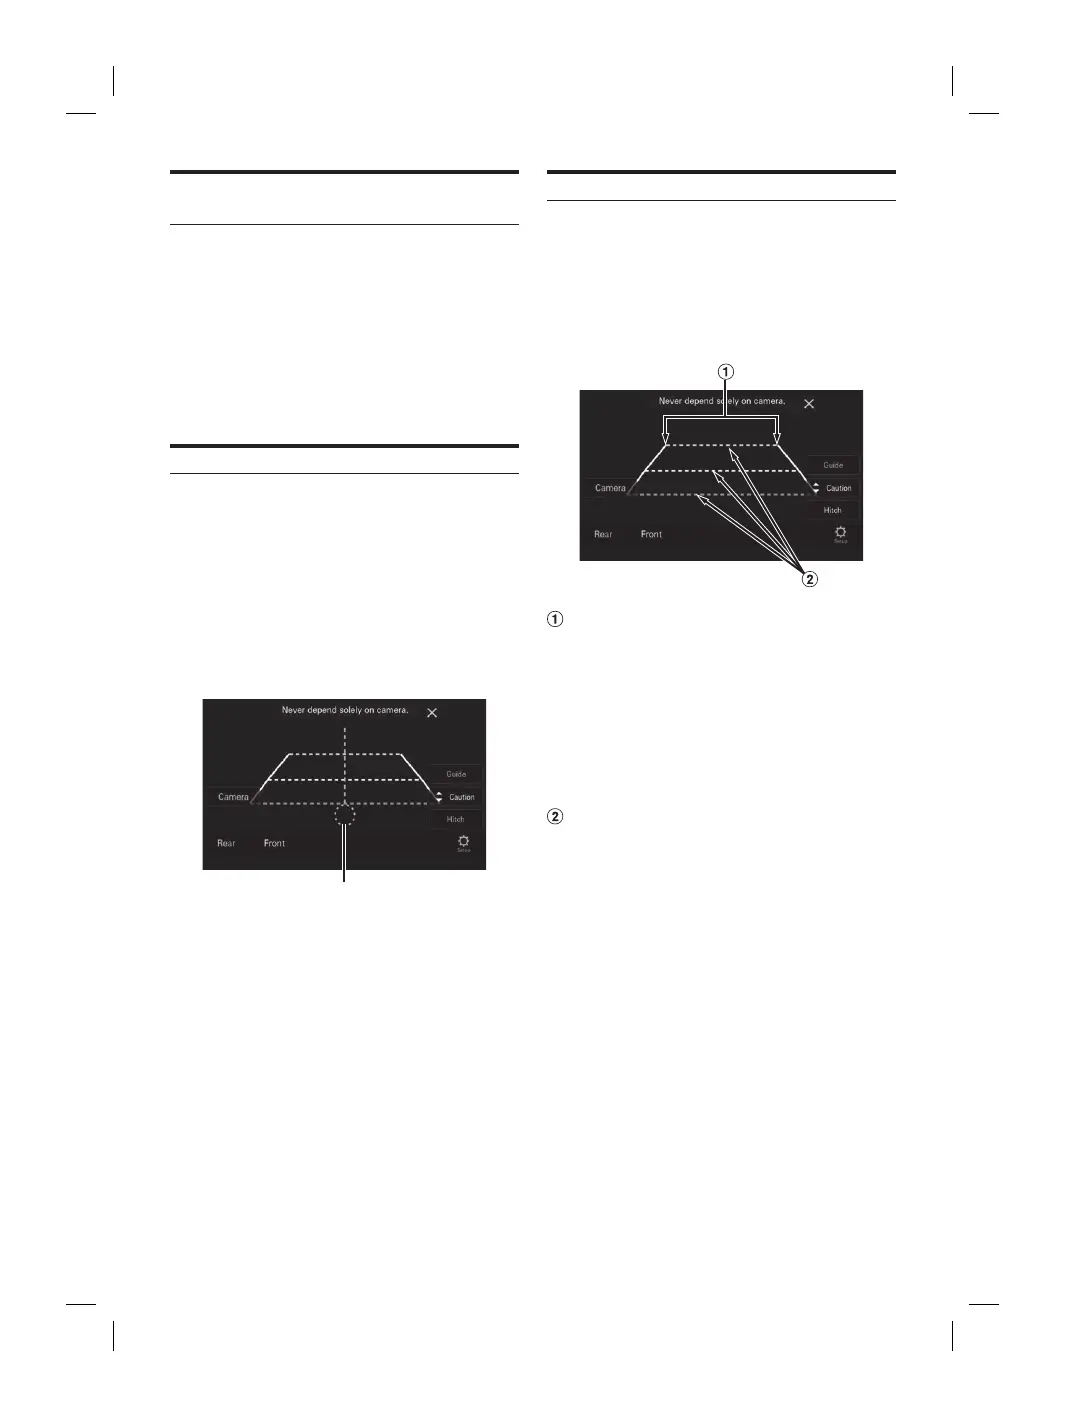
Hitch Guide
3 Touch [Hitch (Orange)] to turn off the guide.
About the Rear Camera Guide
To display the guide, set “Guide Display ON/OFF Setting”
(page 52) to On. Also, to adjust the guide, see Camera
Guide Setup” (page 22).
■
Indication mark meaning
When the car is put into reverse gear, the monitor switches
to the rear view camera image. Guides appear to help
visualize the car’s width and distance from the rear bumper.
Car width extension lines (red, yellow and
green in order of distance)
If properly calibrated, the marks indicate the car’s width.
This helps guide the car’s path when backing up in a
straight line.
The marks represent the distance from the rear of the
car (from the rear end of the bumper).
• The marks do not move in synchronization with the
steering wheel.
• Set the marks to suit the car’s width.
Distance guidance lines
The marks represent the distance from the rear of the
car (from the rear end of the bumper).
• The marks do not move in synchronization with the
steering wheel.
• We recommend that you measure the actual distance
to the marks when parked on a level surface.
• Depending on the condition of the car or road surface, the
range of vision may vary.
• The camera has a limited range of vision. Objects at extreme
angles to the camera (e.g. under the bumper or at opposite
ends of the bumper) may not be in the its field-of-vision.
• The rear camera image may have a tint which is different
from the actual surroundings.
• Depending on the car, the guidance may deviate to the right
or left. This is not a malfunction.