Upgrading Modero Firmware
38
NXD-500i 5" Modero Wall/Flush Mount Touch Panel with Intercom
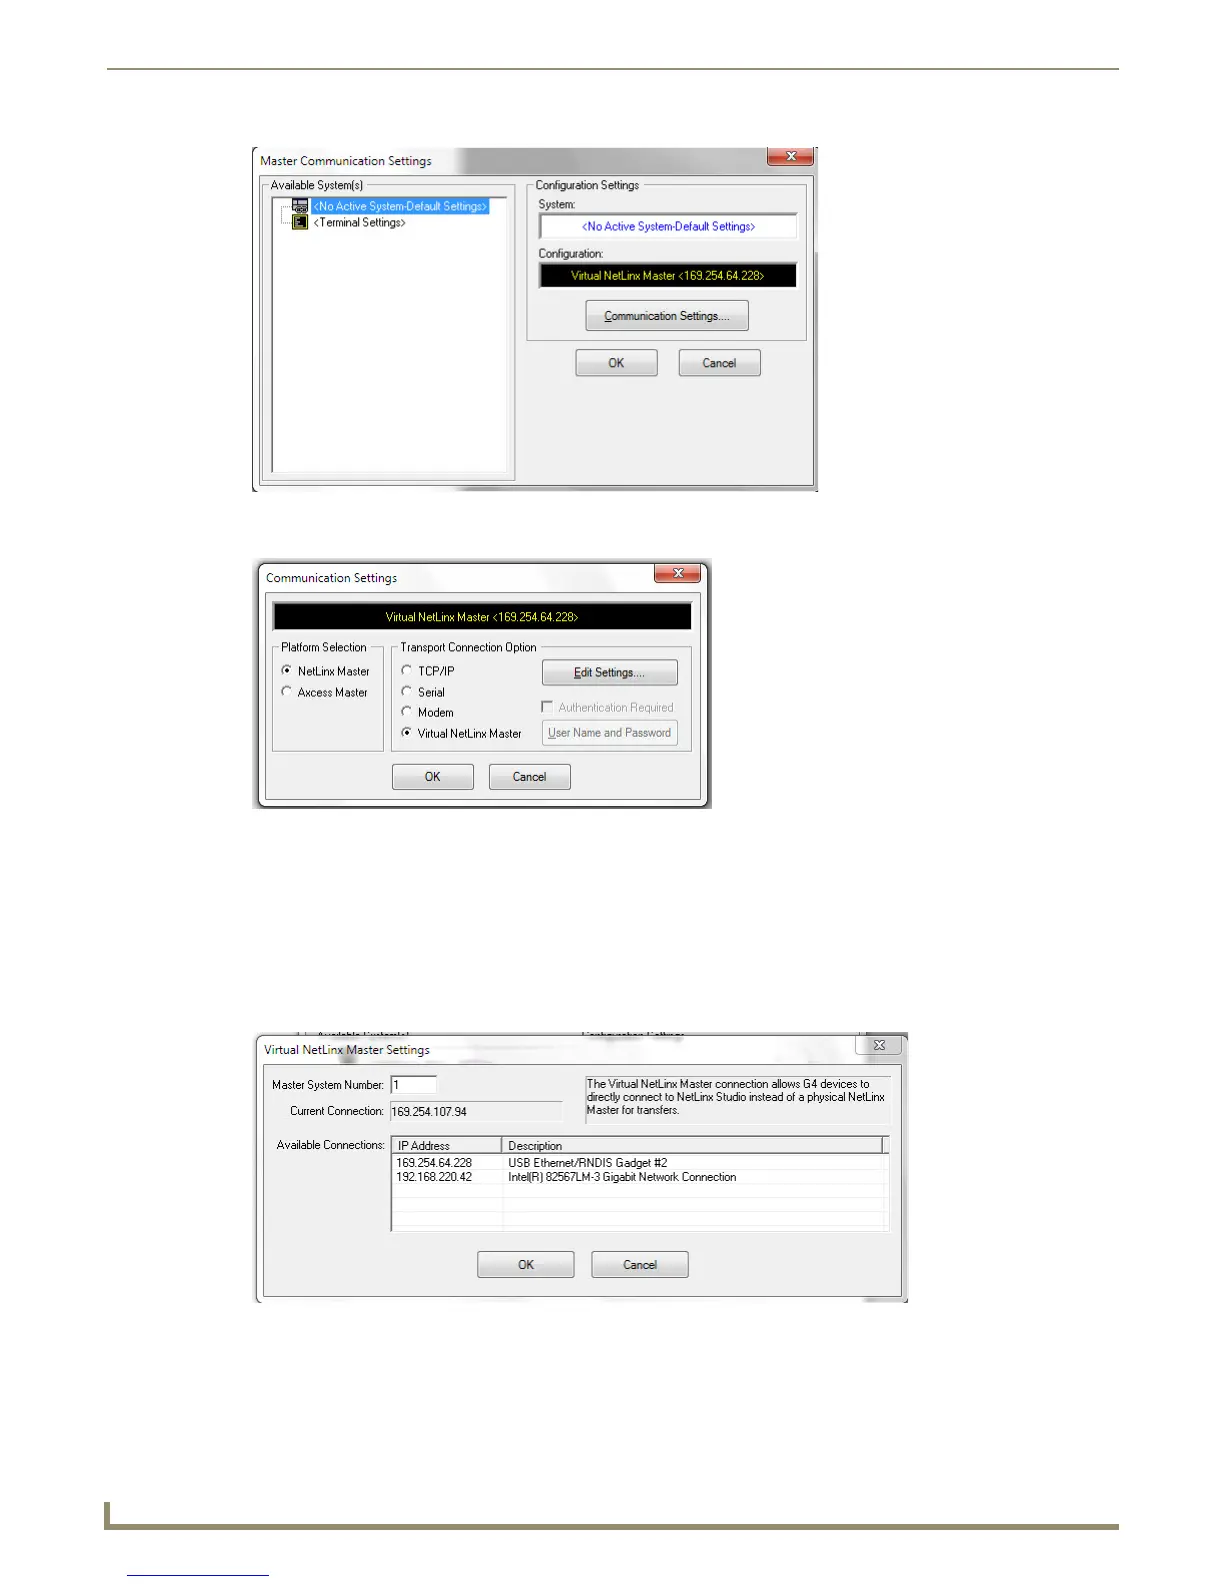
3. Click the Communications Settings button to open the Communications Settings dialog (FIG. 34).
4. Click on the NetLinx Master radio button from the Platform Selection section to work as a NetLinx Master.
5. Click on the Virtual Master radio box from the Transport Connection Option section to configure the PC to
communicate directly with a panel.
Everything else, such as the Authentication, is greyed-out because the communication is not going through the
Master’s UI.
6. Click the Edit Settings button on the Communications Settings dialog to open the Virtual NetLinx Master Settings
dialog (FIG. 33).
7. Enter the System number (default is 1).
8. Click OK three times to close the open dialogs, save the settings, and return to the main NetLinx Studio application.
FIG. 33 Master Communication Settings dialog box
FIG. 34 Communication Settings dialog box
FIG. 35 Virtual NetLinx Master Settings dialog
 Loading...


