Setup Pages and Descriptions
48
NXD-500i 5" Modero Wall/Flush Mount Touch Panel with Intercom
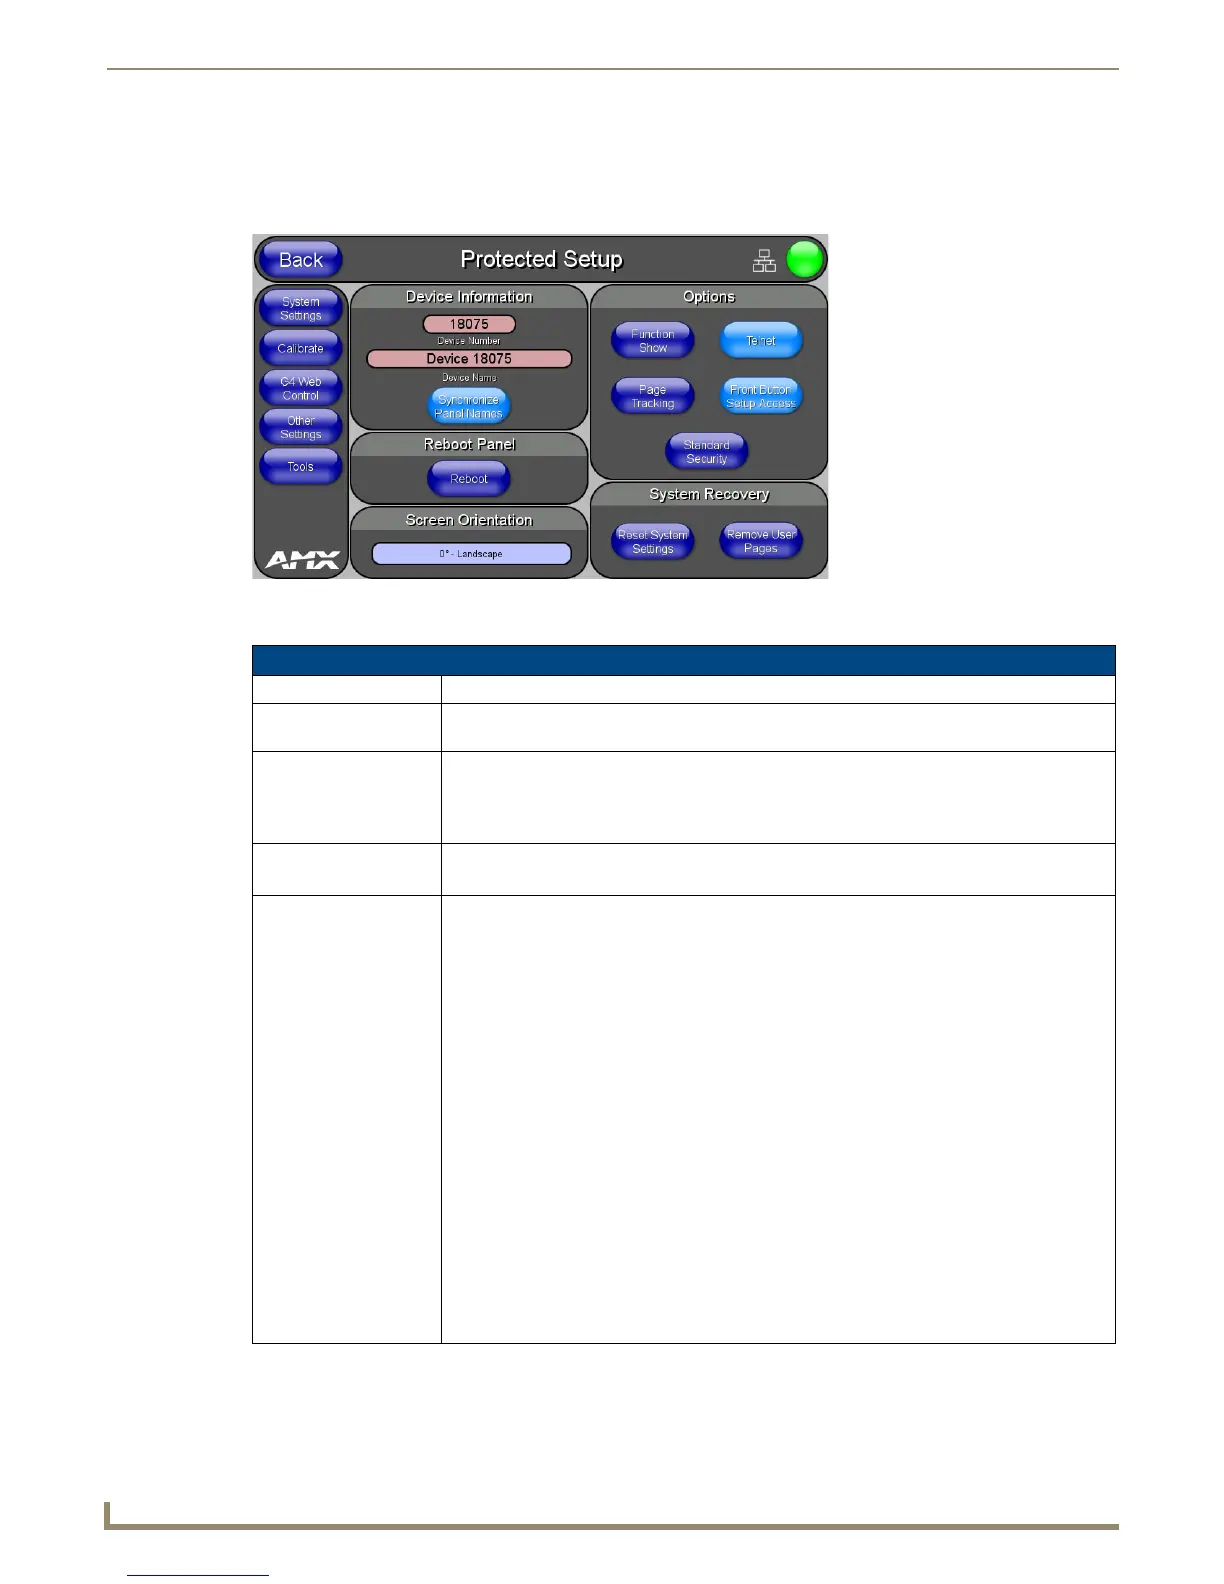
Protected Setup Page
The Protected Setup page (FIG. 46) centers around the properties used by the panel for proper communication with the
NetLinx Master. Enter the factory default password (1988) into the password keypad to access this page.
The elements of the Protected Setup page are described in the table below:
FIG. 46 Protected Setup page-showing default values
Protected Setup Page
Back: Saves the changes and returns to the previously active touch panel page.
Wired icon: The icon to the left of the Connection Status Icon displays that the current connection to the
Master is Wired (image of three networked computers).
Connection Status icon: This visual display of the connection status allows the user to have a current visual update of
the panel’s connection status regardless of what page is currently active.
A Lock only appears on the icon if the panel has established a connection with a currently
secured target Master, requiring a username and password.
Device ID: • Number: Opens a keypad that is used to set and display the current device number.
• Name: Opens a keypad that is used to set and display the current device name.
Options: Allows selection of various touch panel features:
• The Function Show button enables the display of the channel port and channel code in the
top left corner of the button, the level port and level code in the bottom left corner, and the
address port and address code in the bottom right corner (see FIG. 48 for an example of the
function locations).
• Use the Page Tracking button to toggle page tracking. When enabled, the touch panel
sends page data back to the NetLinx Master, or vice versa depending on the touch panel
settings.
• Use the Telnet button to enable or disable the telnet server on the panel. This feature
focuses on direct telnet communication to the panel.
• Use the Front Button Setup Access button to activate the grey Front Setup Access
button (located below the LCD) to access the firmware pages.
- Default condition is On.
- Press and hold this grey button for 3 seconds to access the Setup page.
- Press and hold this grey button for 6 seconds to access the Calibration page.
• Use the Security button to display one of three security settings: Standard, Secure, and
DoD.
Pressing this button opens a popup window allowing changes to the Security Profile.
Note: Refer to the Security Settings on page 50 for important information on using this
feature.
 Loading...


