Digital Video Recorder User Manual
97
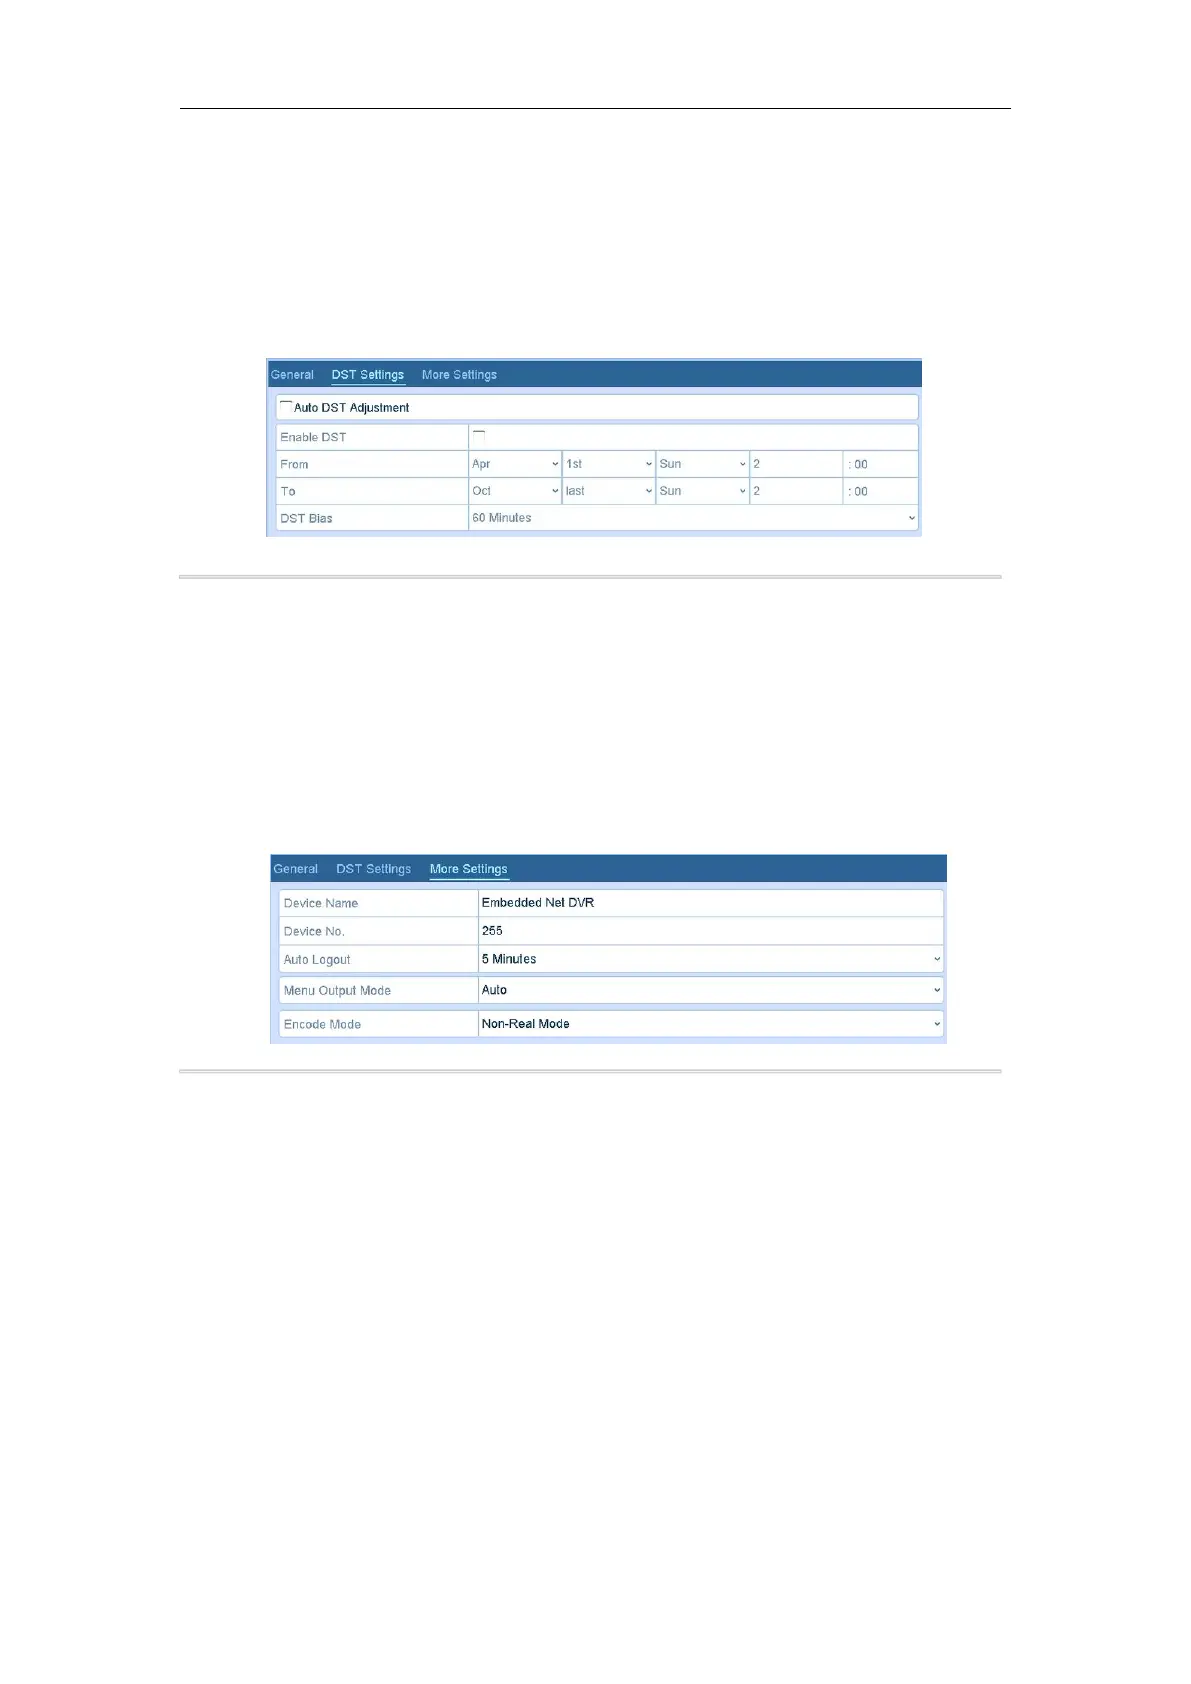
14.2 Configuring DST Settings
Steps:
1. Enter the General Settings interface.
Menu >Configuration>General
2. Choose DST Settings tab.
Figure 14. 2 DST Settings Interface
You can check the checkbox before the Auto DST Adjustment item.
Or you can manually check the Enable DST checkbox, and then you choose the date of the DST period.
14.3 Configuring More Settings
Steps:
1. Enter the General Settings interface.
Menu > Configuration > General
2. Click the More Settings tab to enter the More Settings interface.
3. Configure the following settings:
• Device Name: Edit the name of DVR.
• Device No.: Edit the serial number of DVR. The Device No. can be set in the range of 1~255, and the
default No. is 255.
• CVBS Output Brightness: Adjust the video output brightness via the CVBS interface.
• Auto Logout: Set timeout time for menu inactivity. E.g., when the timeout time is set to 5 Minutes, then
the system will exit from the current operation menu to live view screen after 5 minutes of menu
inactivity.
• Menu Output Mode: You can choose the menu display on different video output.
• Click the Apply button to save the settings.
14.4 Managing User Accounts
Purpose:
There is a default account in the DVR: Administrator. The Administrator user name is admin and the password is
set when you start the device for the first time. The Administrator has the permission to add and delete user and
configure user parameters.