Digital Video Recorder User Manual
45
5.7 Configuring HDD Group
Purpose:
You can group the HDDs and save the record files in certain HDD group.
Steps:
1. Enter HDD setting interface.
Menu>HDD>Advanced
2. Select Advanced on the left bar.
Check whether the storage mode of the HDD is Group. If not, set it to Group. For detailed information,
please refer to Chapter 12.3 Managing HDD Group.
3. Select General in the left bar.
Click to enter editing interface.
4. Configuring HDD group.
1) Choose a group number for the HDD group.
2) Click Apply to save your settings.
3) Click OK to back to the upper level menu.
Repeat the above steps to configure more HDD groups.
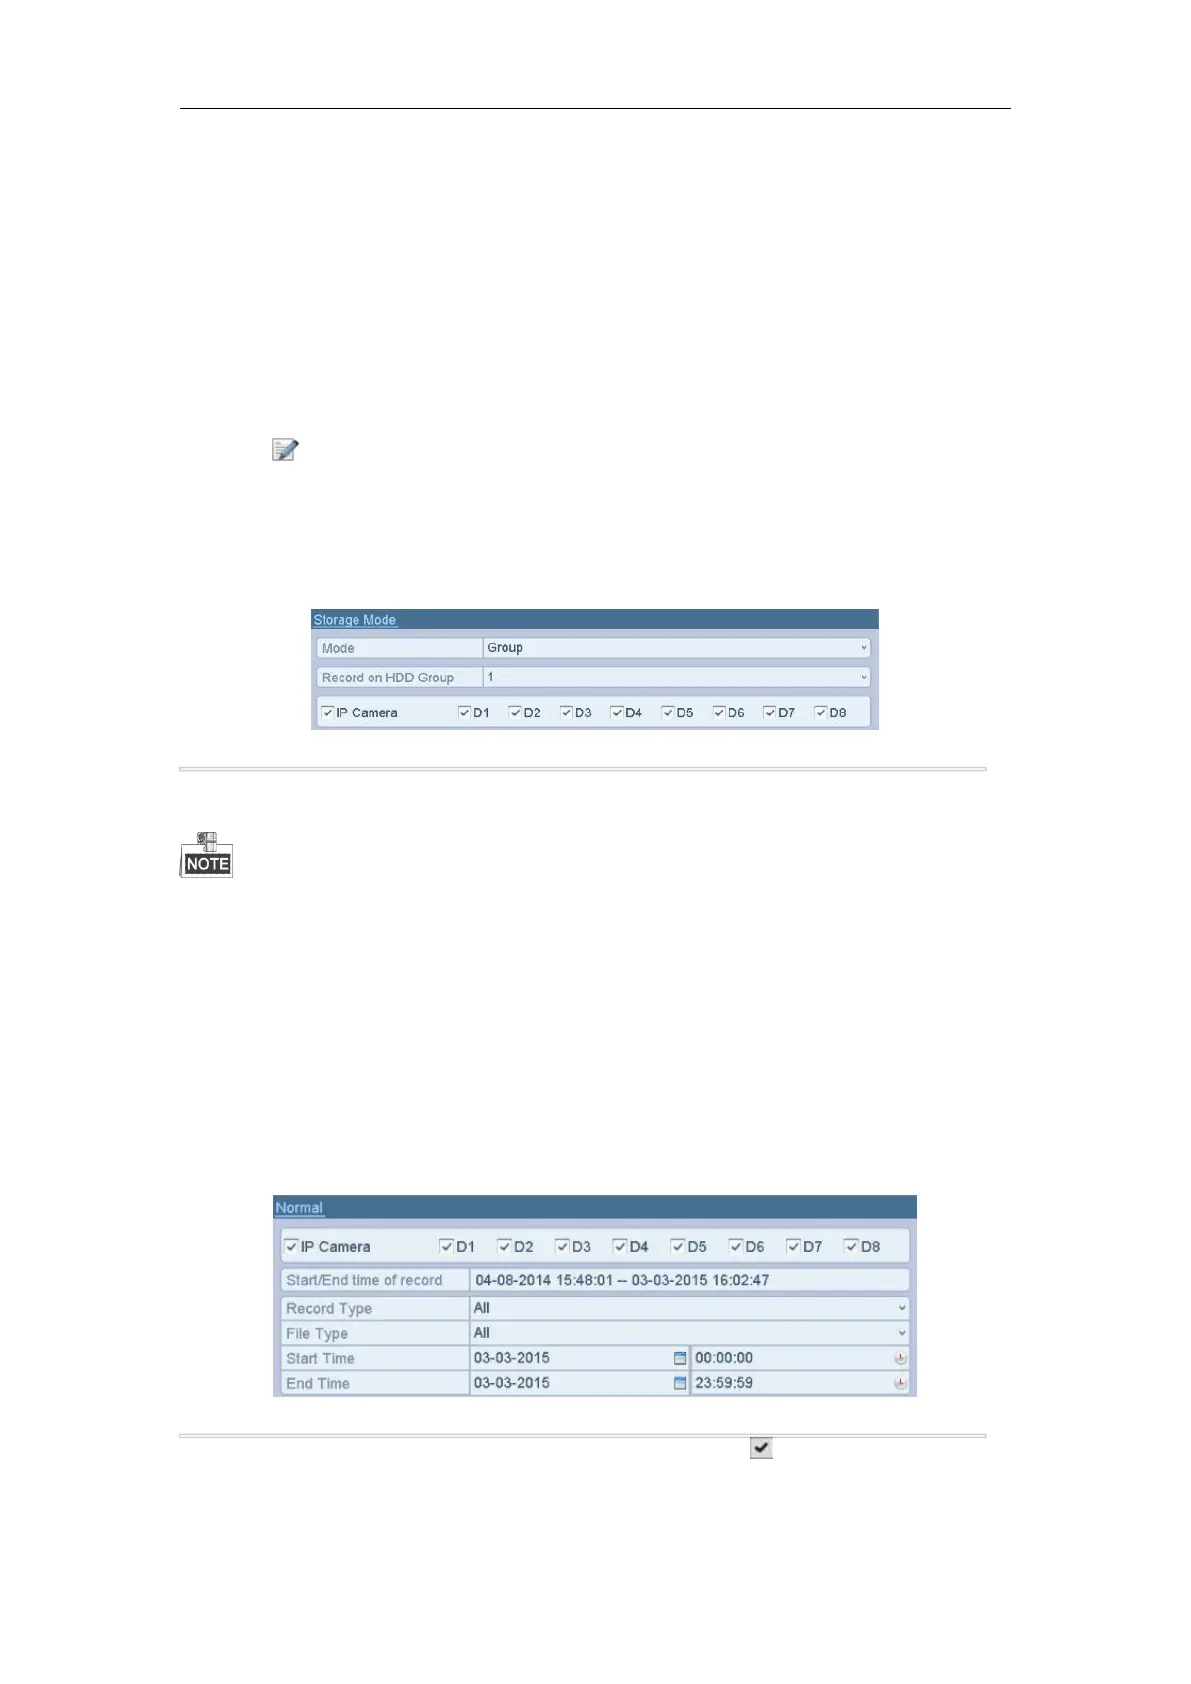
5. Choose the Channels which you want to save the record files in the HDD group.
1) Select Advanced on the left bar.
Figure 5. 19 HDD Advanced
2) Choose Group number in the dropdown list of Record on HDD Group
3) Check the channels you want to save in this group.
4) Click Apply to save settings.
After you have configured the HDD groups, you can configure the Recording settings following the procedure
provided in Chapter 5.2-5.7.
Purpose:
You can lock the recorded files or set the HDD property to Read-only to protect the record files from being
overwritten.
Protect file by locking the record files
Steps:
1. Enter Playback setting interface.
Menu> Export
2. Select the channels you want to investigate by checking the checkbox to .
3. Configure the record type, file type, start time and end time.
4. Click Search to show the results.