EasyManuals Logo

Arlo Go 2 User Manual

Arlo Go 2
73 pages
To Next Page IconTo Next Page
To Previous Page IconTo Previous Page
Page #14 background imageLoading...
Page #14 background image
14Get Started
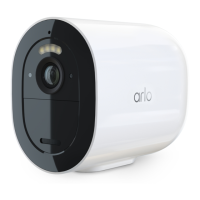
Arlo Go 2 LTE/WiFi Security Camera
User Manual
3. Remove the screw mount.
4. Use a 15/64 inch (6 mm) drill bit to drill three holes into the wall or ceiling.
5. Place the screw mount back onto the wall or ceiling, and align it with the drilled holes.
6. While holding the wall plate, use a Phillips-head screwdriver to fasten a screw into each
hole.
7. Screw your Go 2 Camera clockwise into the screw mount.
8. Tilt and swivel to adjust the angle of the camera.
9. Twist the thumb screw and the grip clockwise to tighten the camera position.

Table of Contents

Other manuals for Arlo Go 2

Questions and Answers:

Question and Answer IconNeed help?

Do you have a question about the Arlo Go 2 and is the answer not in the manual?

Arlo Go 2 Specifications

General IconGeneral
TypeIP security camera
Built-in lightYes
Placement supportedOutdoor
Connectivity technologyWireless
Maximum operating distance91 m
Form factorBullet
Mounting typeCeiling/wall
Product colorWhite
Country of originChina
Ethernet LANNo
Mobile network generation4G
Field of view (FOV) angle130 °
Detection distance7 m
Alert notification typeE-mail, Push notification
LED typeIR
Infra-red wavelength850 nm
Night vision distance7.62 m
Number of illumination LEDs2
Total megapixels2 MP
Maximum resolution1920 x 1080 pixels
Number of cameras1
Digital zoom12 x
Power source typeBattery
Operating temperature (T-T)-20 - 45 °C
Sensor type-
Harmonized System (HS) code8525890000
Weight and Dimensions IconWeight and Dimensions
Depth120 mm
Width64.2 mm
Height86 mm
Weight490 g
Package depth179 mm
Package width161 mm
Package height115 mm
Package weight792 g

Related product manuals