3.2
Power Supply Installation
The NC4000 can be powered from one or two power supplies. One power supply provides
sufficient DC power to run the RF amplifier and plug-in modules. Two power supplies provide
redundancy if one power supply fails. The power supply includes test points for AC input, and +3.3,
+5, +12, and +24 VDC outputs.
Note
If the NC4000 is powered from a single power supply, always install that
power supply on the left.
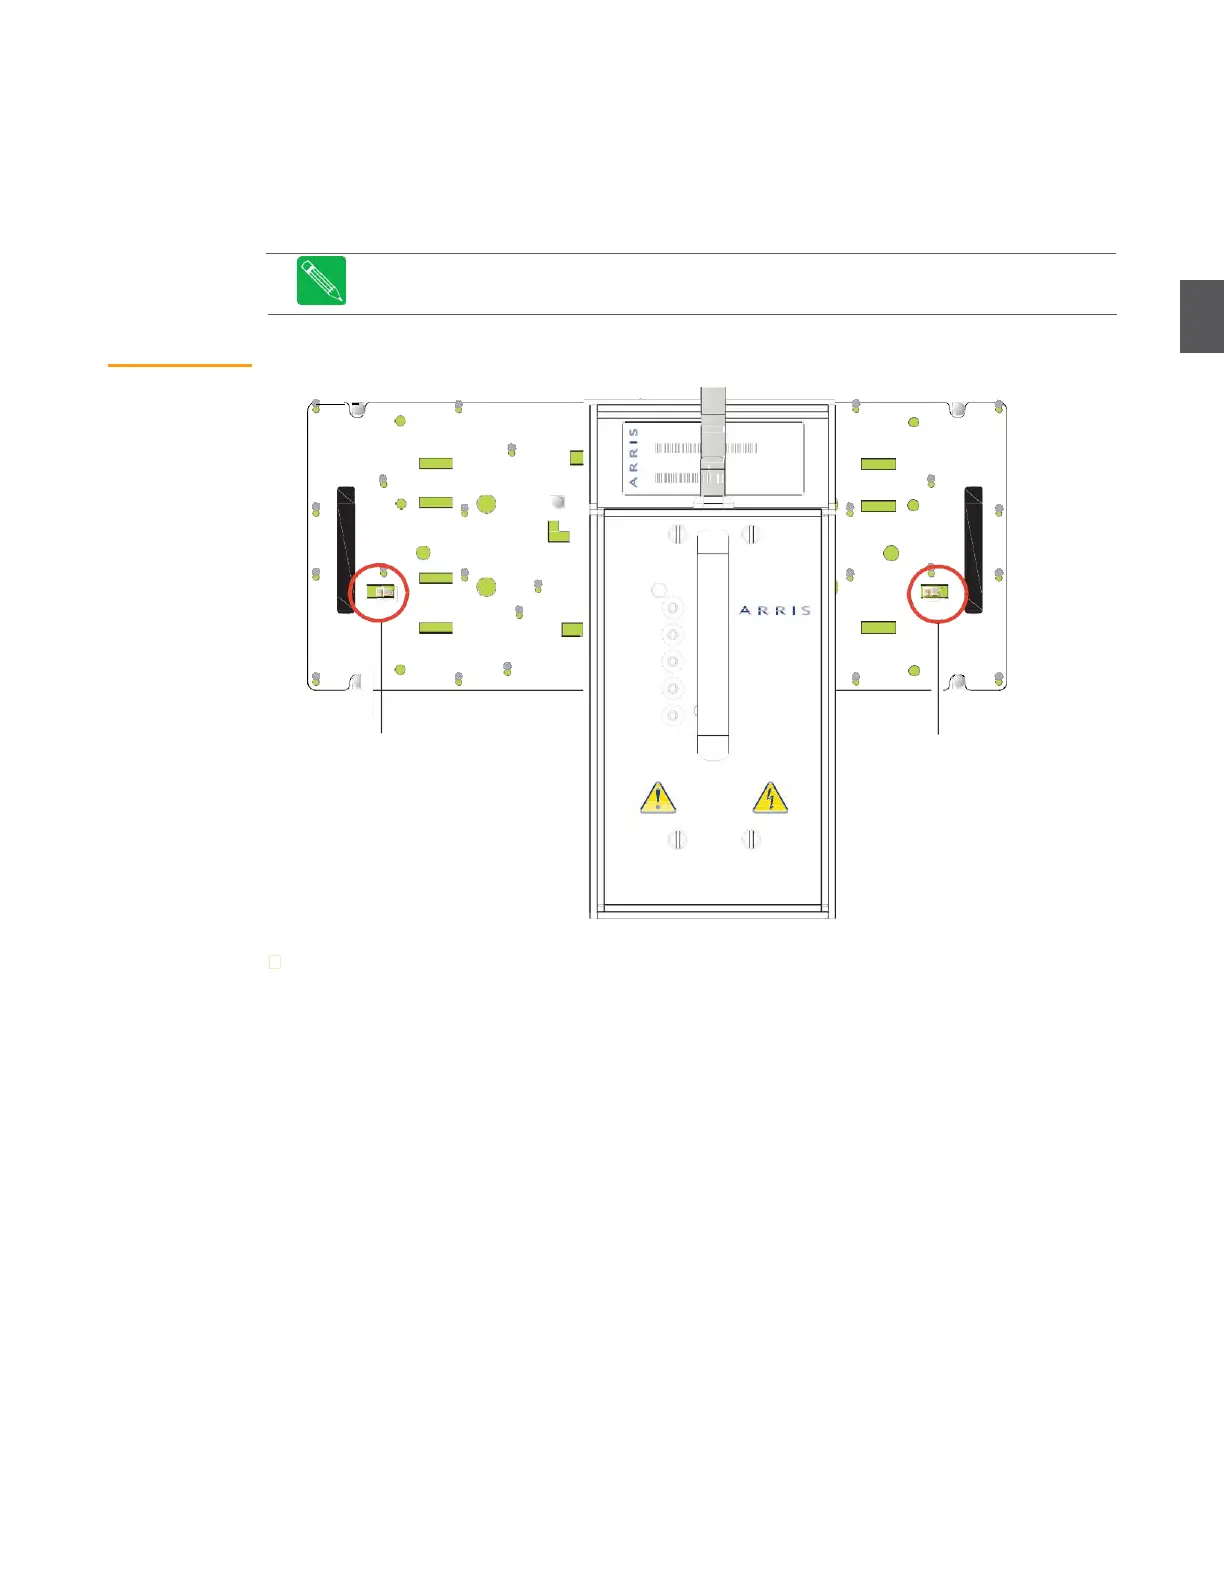
Figure 3.2
Installing Power
Supplies
MODEL N E
PS4001
SERIAL N ER
PS4001.**
Rev.
Left side power supply
AC input lead plugs in
here
Right side power supply
AC input lead plugs in
here
To install a power supply:
1.
Orient the power supply so that the multi-pin connector mates with the corresponding
connector in the lid. Carefully apply minimal downward pressure until the power supply
connector seats to the corresponding connector in the lid.
2.
Use a flat tip screw driver to tighten the four screws that hold the power supply in the lid.
3.
Plug the AC input lead (from the power supply) into the appropriate AC connector on the
RF amplifier circuit board.
4.
Install the applicable fuse(s) to route AC power to the power supply(s). See
3.2.1 AC Power
Distribution Fuses on page 3-4 for details.
5.
With AC power applied to the NC4000, measure the voltages at the test points on the
power supply.
ELECTRIC SHOCK HAZARD
SERVICE BY QUALIFIED PERSONNEL ONLY