Protected by copyright. Copying for private or commercial purposes, in part or in whole, is not
permitted unless authorised by AUDI AG. AUDI AG does not guarantee or accept any liability
with respect to the correctness of information in this document. Copyright by AUDI AG.
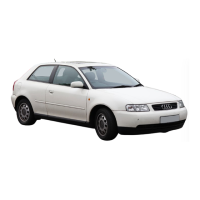
- Remove tunnel brace.
- -> Bend aside or break off section -A- of support at break section -B-.
- Deburr holes drilled in sections -C- and -D- of the support.
- Mask over all resulting sharp edges e.g. with adhesive tape so that is no possibility of injury.
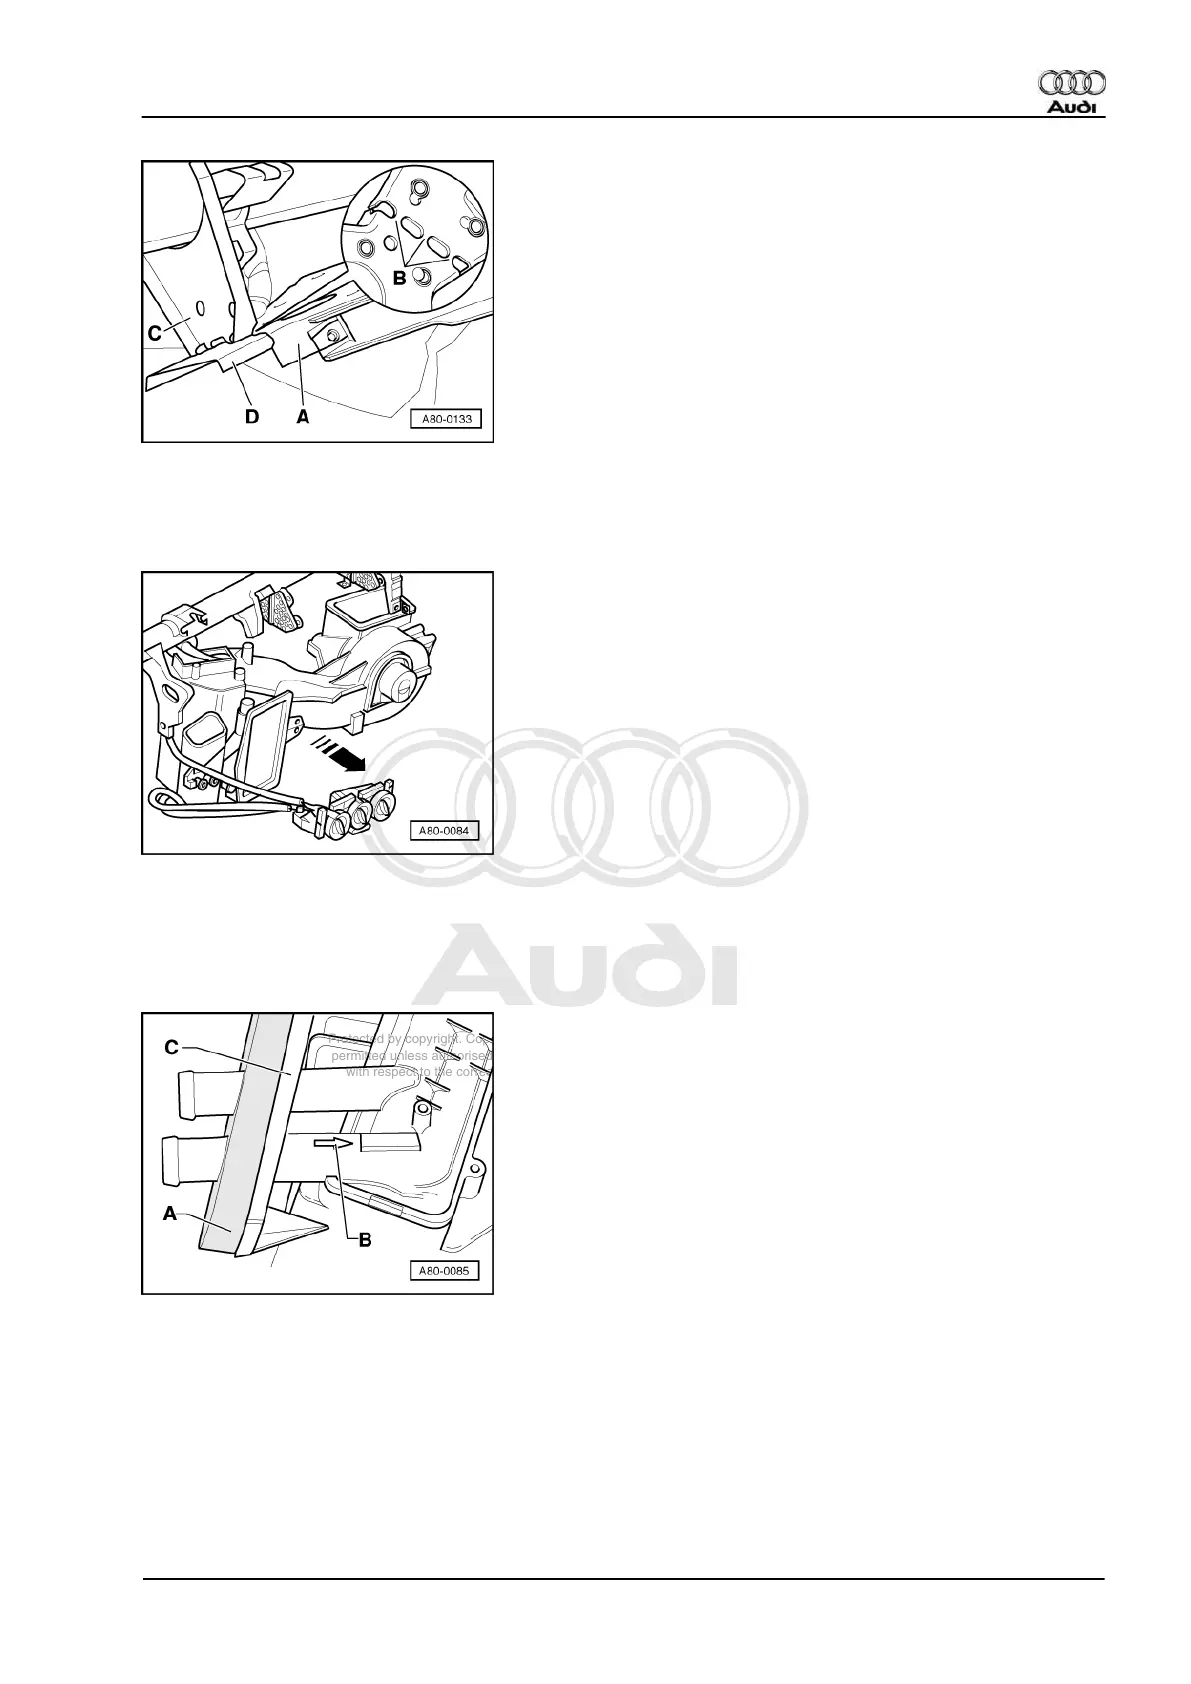
- Disconnect all the electrical connections between body and heater at the connectors.
- -> Remove heater towards passenger's side.
Installation notes:
◆ Check all seals on the heater for damage before installation and replace any damaged seals.
◆ When installing the heater, ensure that the intake duct gasket makes contact with the vehicle body.
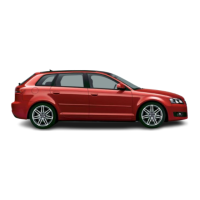
◆ -> Replace gasket -A- and check for correct positioning on contact surface -C-.
◆ The refrigerant hoses are to be connected on the correct side. Different connection and flow direction of the
refrigerant dependent on the type of heat exchanger => Page 117 . This illustration shows a heat exchanger
for a vehicle without map-controlled cooling and without quick release couplings (flow direction marked with
arrow -B-).
◆ After assembling, all cable ties that were removed in order to take out the heater must be refitted in their
original positions.
Audi A3 1997 ➤
Heating, Air Conditioner - Edition 06.2000
3.1 - Removing and installing heater 121