Procedure
1. Log in to the Avaya SBCE web administration portal.
2. Navigate to Device Specific Settings > DMZ Services > Relay Services > Reverse
Proxy.
3. Click Add.
4. In Service Name, enter a name for the profile.
5. Select the Enable check box to enable the reverse proxy profile.
6. In Listen IP, select the external B1 interface and the Avaya SBCE external leg IP
addresses.
7. In Listen Port, enter 443.
8. In Listen Protocol, select HTTPS.
9. In Listen TLS Profile, select the TLS server profile that you created.
An example of the TLS profile name is webservicesTLSProfile.
10. Connect IP: Select the internal A1 interface and the Avaya SBCE internal leg IP address.
11. In Server Protocol, select HTTPS.
12. In Server TLS Profile, select the TLS client profile that you created.
An example of the TLS client profile name is certificateAuthorityTLSProfile.
13. Select the Rewrite URL check box.
14. Click Add at the bottom of the page to create a set of rules and configure the rules as
described in
External traffic rules for a single FQDN deployment on page 114.
15. Click Finish.
Related links
External traffic rules for a single FQDN deployment on page 114
Reverse proxy configuration checklist for a single FQDN deployment on page 109
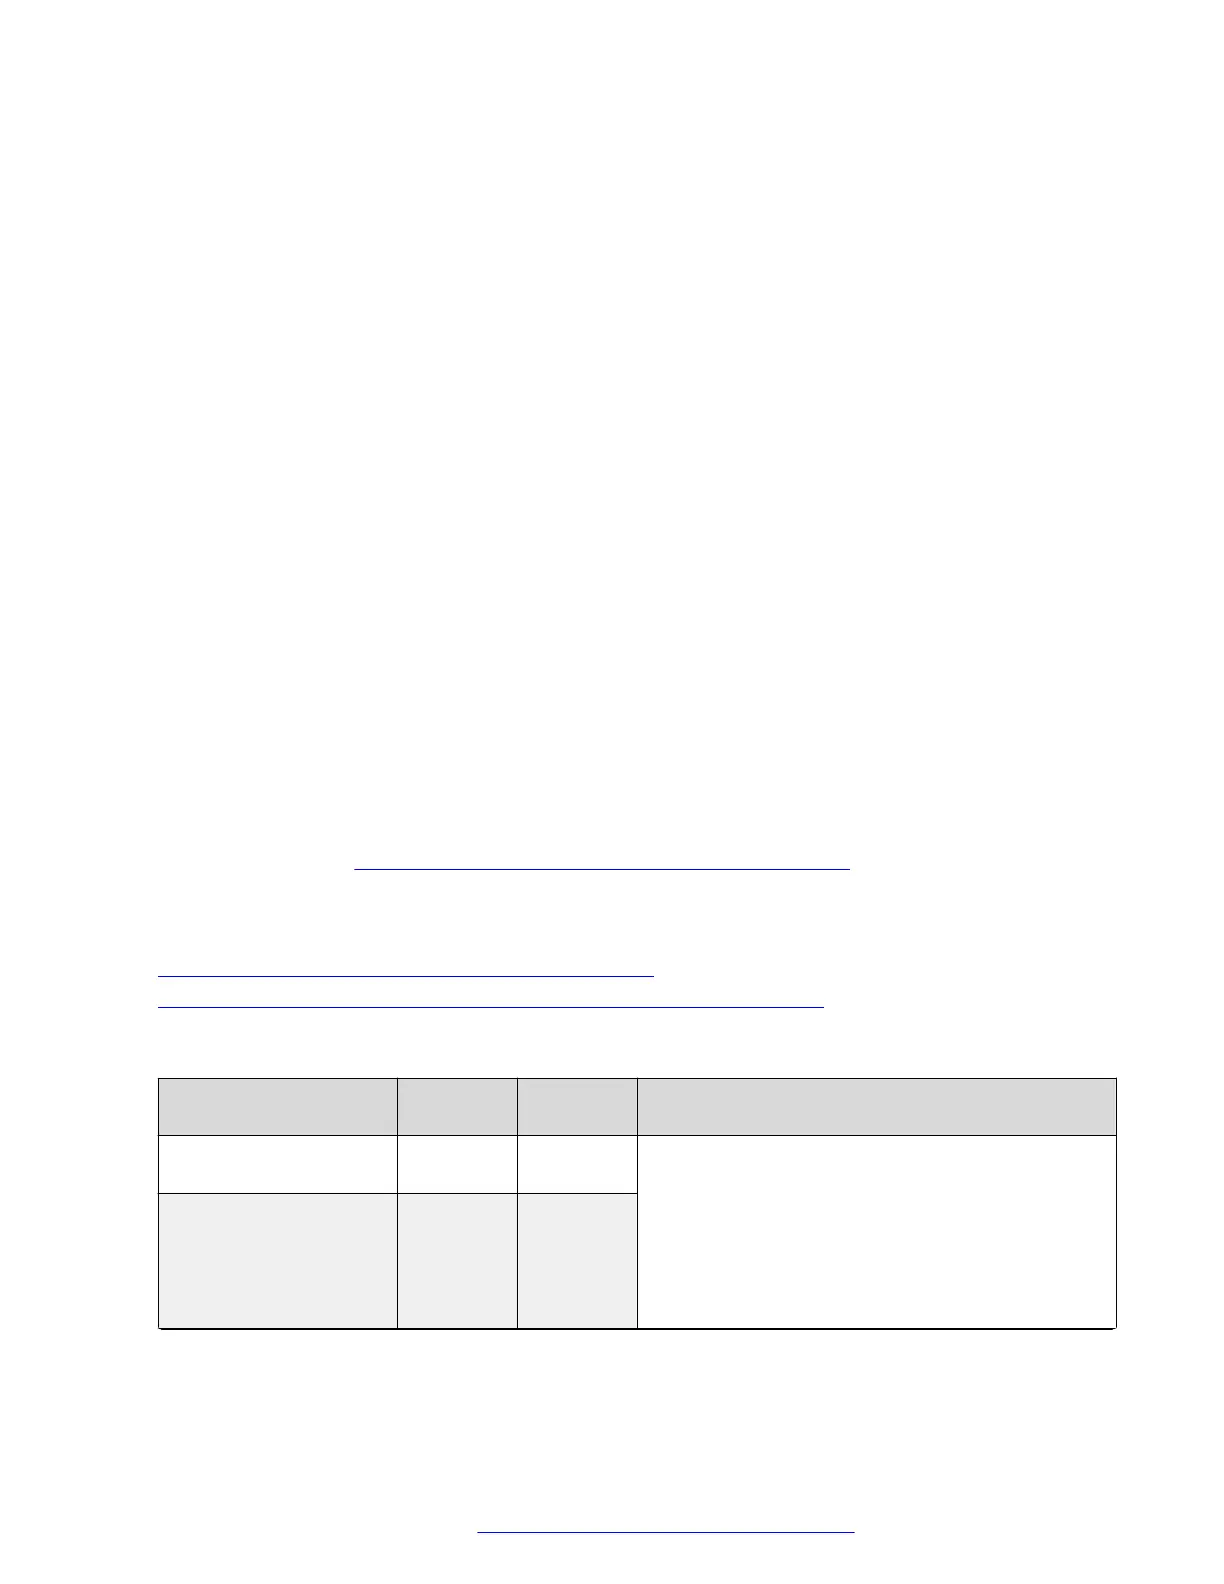
External traffic rules for a single FQDN deployment
Server Address
White list
URL
URL
replace
Description
<Equinox Management
FQDN>:443
/uwd/
rest
/uwd/
rest
Equinox Conference Control (UCCS) Avaya
Equinox
®
Conferencing Management FQDN
resolves to the virtual IP of the Avaya Equinox
®
Conferencing Management Server.
If you are using a standalone system, this FQDN
resolves to the virtual IP address. For example:
conferencing_management.company.com.
<Equinox Management
FQDN>:443
/uwd/ws /uwd/
rest
Table continues…
Avaya Session Border Controller for Enterprise configuration
October 2018 Deploying the Avaya Aura
®
Web Gateway 114
Comments on this document? infodev@avaya.com



 To Next Page