QUICK START MENU
-21-
2) DETECTION TIMER
Use ▲ / ▼ to change the setting (ON / OFF). When it’s set to “ON”, press “ENTER” to go to its submenu for further
settings.
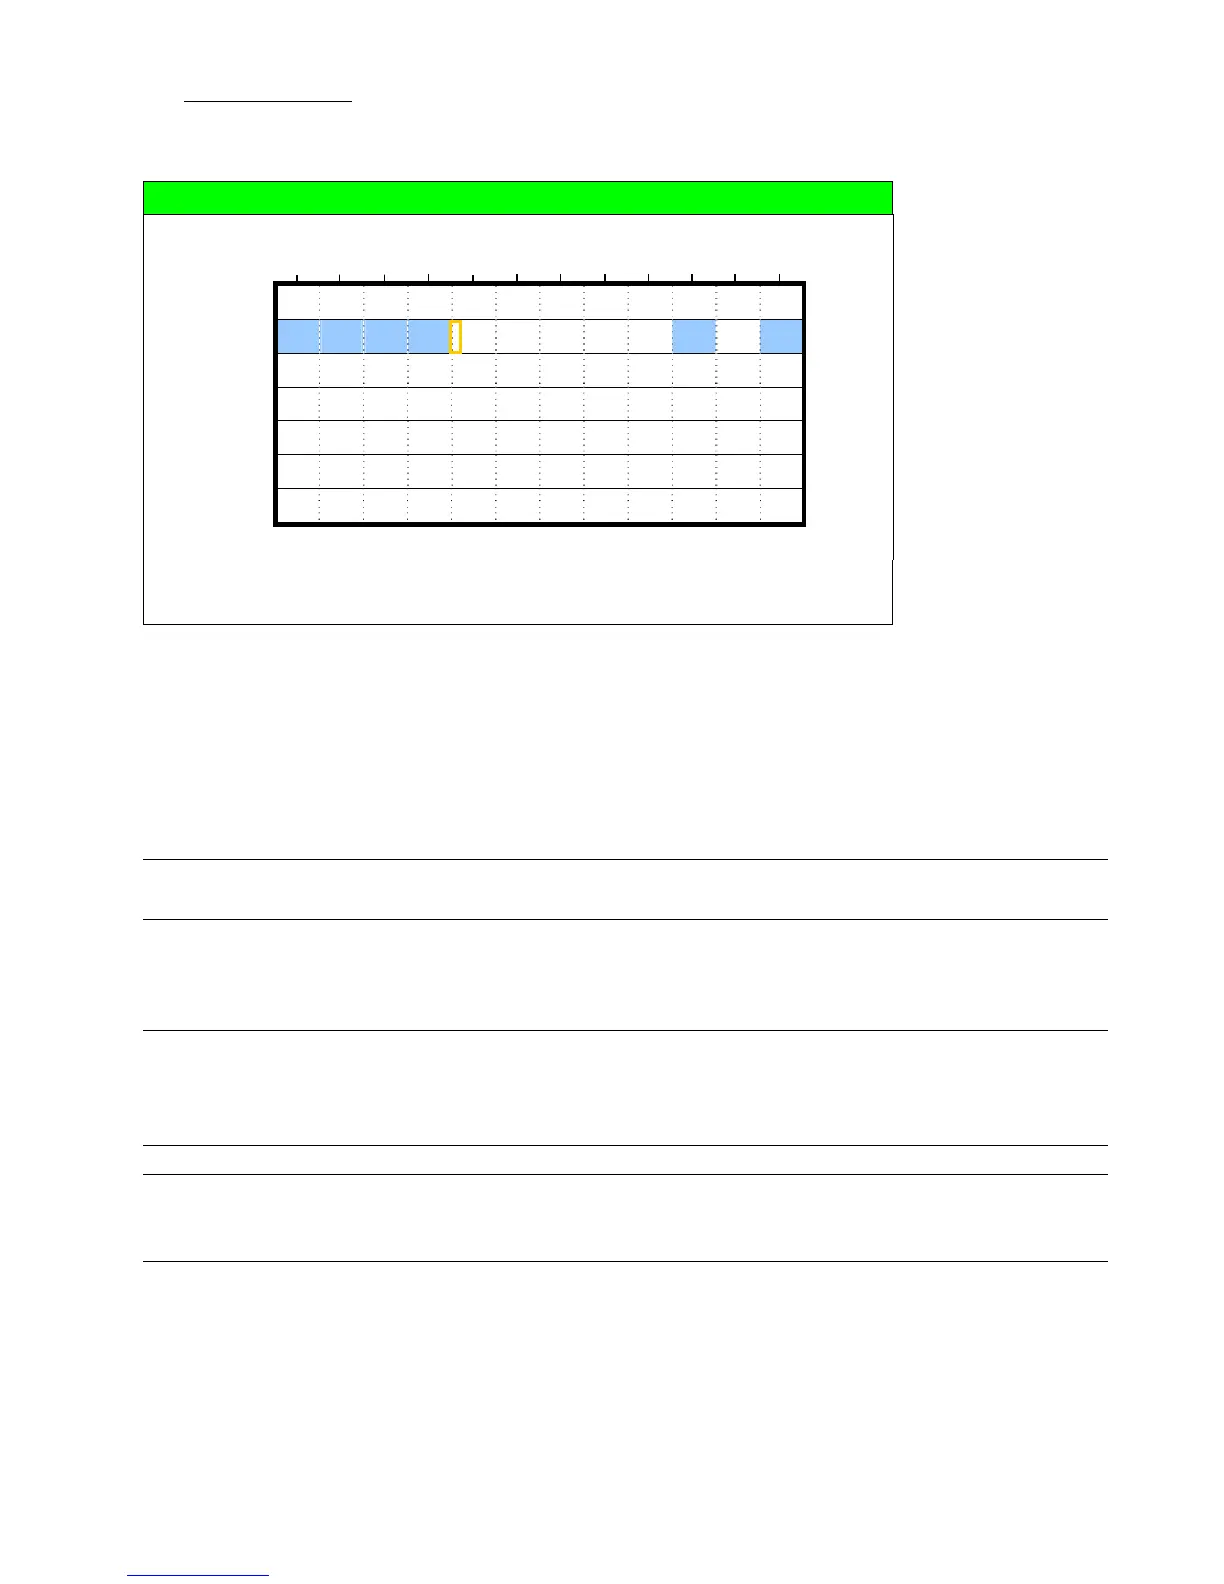
DETECTION TIMER
0 2 4 6 8 10 12 14 16 18 20 22 24
SUN
MON
TUE
WED
THU
FRI
SAT
PLEASE CONSULT YOUR INSTALLER FOR ADVANCE SETTINGS
uv s t MOVE SELECT
X axis
0 ~ 24 hours. Each time interval within a square is two hours (divided into four 30-minutes).
Y axis
Monday ~ Sunday.
Operation
Move to the start time point, and press “ENTER” to set the start time point (marked in red
color). Then, press ▲ / ▼ / ◄ / ► to set the timer-recording schedule. After setup, press
“ENTER” again to create an ending time point (marked in yellow color) and press “MENU” to
exit.
Note: This function here is only for event record timer setup and activation. For motion detection function
setup and activation, please refer to section “7.1.2 Detection” at page 24.
6.4 Date
In this menu list, you can set up the system date and time for this device.
Note: Please DO NOT change the date or time of your DVR after the recording function is activated.
Otherwise, the recorded data will be disordered and you will not be able to find the recorded file
to backup by time search. If users change the date or time accidentally when the recording
function is activated, it’s recommended to clear all HDD data, and start recording again.
Note: The DVR time might get reset when the DVR battery is low or even running out of power. If so,
please replace the DVR battery, CR2032, right away as instructed in “APPENDIX 6 DVR BATTERY
REPLACEMENT” at page 58.