ADVANCED MENU
~36~
2) END TIME
Select the end time of the backup.
3) AVAILABLE SIZE
Display the available capacity in the inserted USB flash drive.
4) CHANNEL
Select channels by pressing “ENTER” to change the symbol in front of the channel number.
Symbol “ ” means that this channel is selected to backup.
Symbol “ □ ” means that this channel is not selected to backup.
5) HDD NUM
Press “ENTER” to select the HDD containing the data you need.
6) START
Press “ENTER” to start copying the chosen data to the USB flash drive.
7.4.2 DISK BACKUP (Selected Models Only)
Before making disk backup, please check if the type of your CD or DVD is CD-R or DVD-R. The maximum number
of backup files in the CD or DVD is 41.
Note: During the backup process, a file player will also be copied into your disk, and you will see a
message “BACKUP PLAYER” shown on the screen.
Move to “DISK BACKUP”, and press “ENTER”. You will see a similar screen as the following:
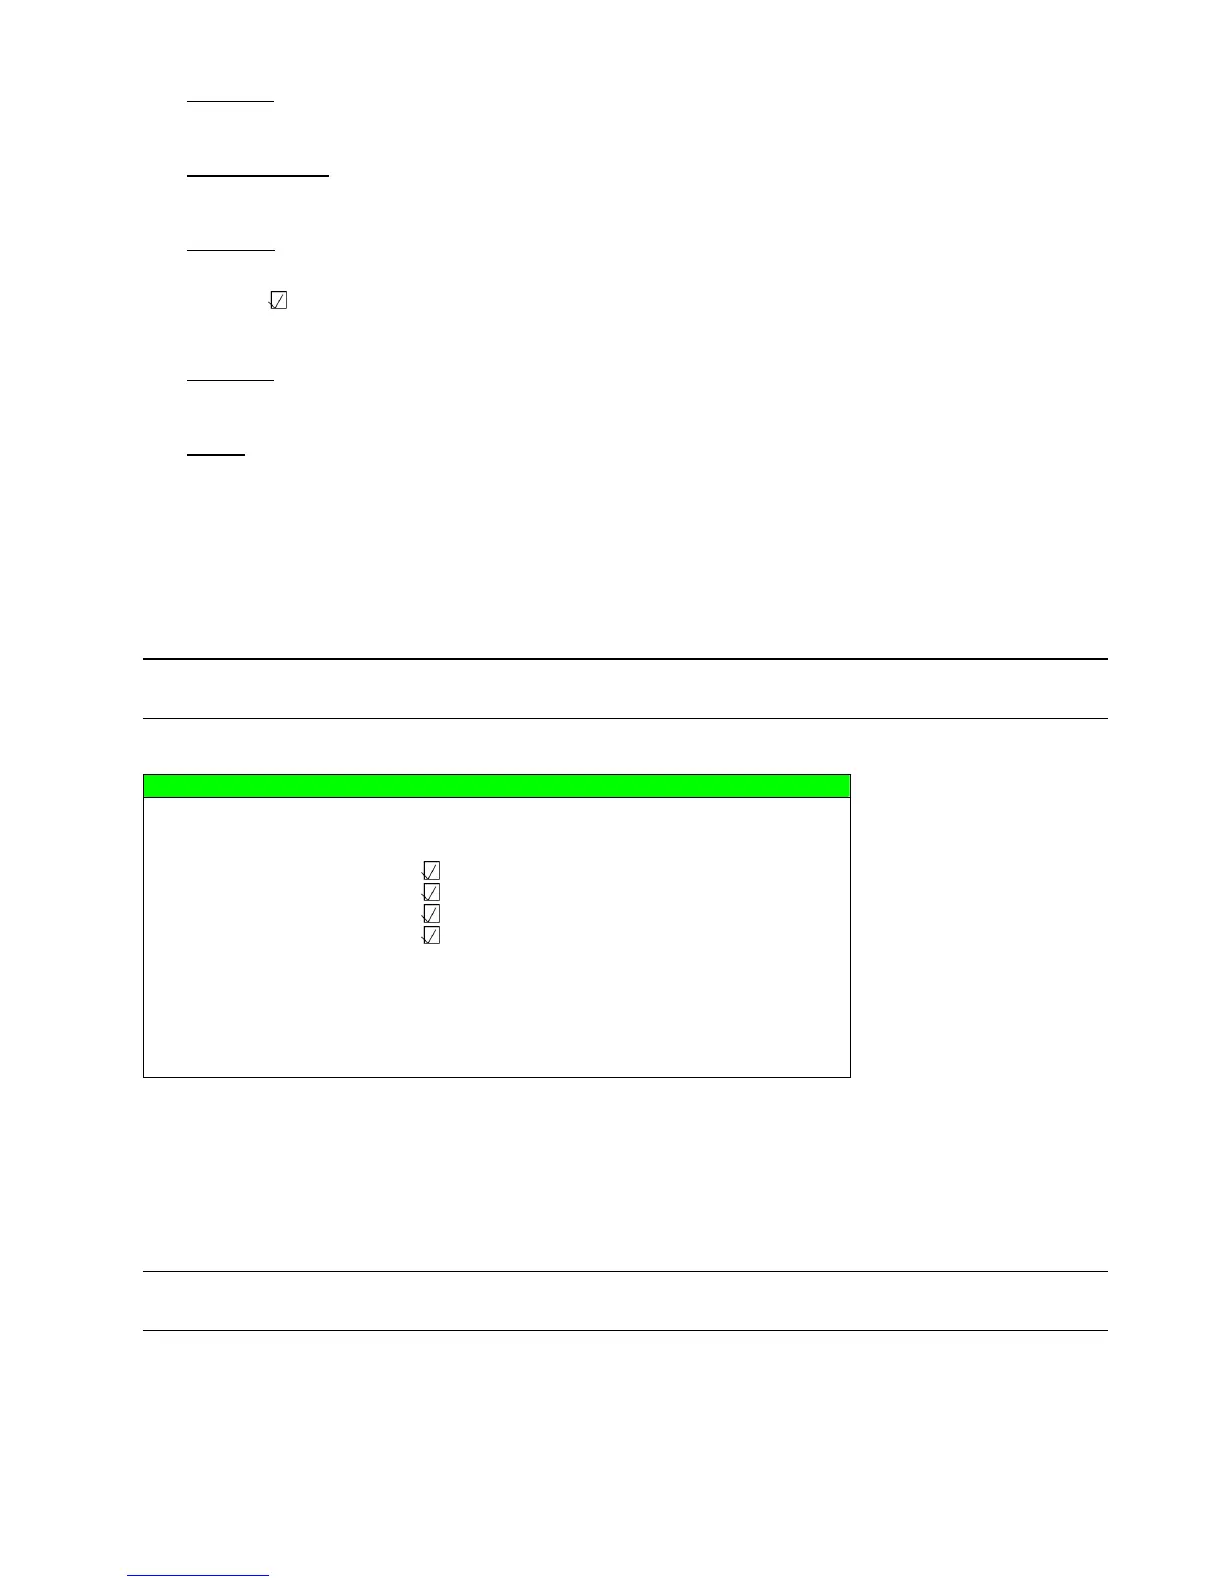
DISK BACKUP
START TIME 2008 / APR / 24 19:00:05
END TIME 2008 / APR / 24 21:00:05
AVAILABLE SIZE 3.79 GB
CHANNEL 01 □ 02 □ 03 □ 04
05 □ 06 □ 07 □ 08
09 □ 10 □ 11 □ 12
13 □ 14 □ 15 □ 16
HDD NUM ALL HDD
START
PLEASE CONSULT YOUR INSTALLER FOR ADVANCE SETTINGS
uv SELECT s BACK t NEXT ENTER
The submenu items and their functions are almost the same as USB BACKUP. For the description of the submenu
items, please refer to the previous page.
The process below describes how to make a disk backup:
a) Press “EJECT” to open the disk tray. Put a CD or DVD into the DVD writer, and press “EJECT” again to close
the disk tray.
Note: Check if the type of your CD or DVD is CD-R or DVD-R. The maximum number of backup files in
the CD or DVD is 41.
b) Press “MENU”, and go to “ADVANCE” J “BACKUP”. Select “DISK BACKUP”, and you will see the submenu
items almost the same as USB BACKUP.
For the description of the submenu items, please refer to “5.8.1. USB BACKUP”.
c) Set the start time, end time, channels and HDD.
d) Move to “START”, and press “ENTER” to start backup.