2.2 Design and Testing
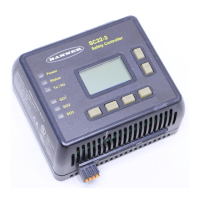
The XS/SC26-2 Safety Controllers are designed for up to Category 4 PL e (ISO 13849-1) and Safety Integrity Level 3 (IEC
61508 and IEC 62061) safeguarding applications. It has been extensively tested to ensure that it meets these standards
as well as IEC 61131-2 and UL 61131-2 product performance requirements. The Safety Controller incorporates:
• Redundant microcontrollers
• Redundant input signal detection circuitry
• Redundant safety output control circuitry
The safety circuit performance of a specific safety or safeguarding application is determined by the devices used and their
interconnection to the Safety Controller.
2.3 Interface
Onboard Interface
Personal Computer (PC) Interface
• Displays configuration summary, including terminal
assignments and network settings
• Provides access to fault diagnostics
• Allows reading and writing the configuration file
from and to the SC-XM2 drive
• Used to configure the Safety Controller
• Automatically generates wiring and ladder logic
diagrams as the configuration progresses
• Allows reading and writing the configuration file
from and to the Safety Controller and the SC-XM2
drive
See Onboard Interface on page 64 for details. See PC Interface Overview on page 15 for details.
2.4 USB Connections
The micro USB port on the Base Controller is used to connect to the PC (via the SC-USB2 cable) and the SC-XM2 drive to
read and write configurations created with the PC Interface.
2.5 Ethernet Connections
Ethernet connections are made using an Ethernet cable connected from the Ethernet port of the Base Safety Controller
(Ethernet models only) to a network switch or to the control or monitoring device. The Safety Controller supports either
the standard or crossover-style cables. A shielded cable may be needed in high-noise environments.
2.6 Configuring the Safety Controller
The Safety Controller is configured using the PC Interface. The configuration process comprises three main steps:
1. Define the safeguarding application (risk assessment).
• Determine the required devices
• Determine the required level of safety
2. Build the configuration.
• Assign the configuration name, file name, date, and author name
• Add safety and non-safety input devices, choose circuit connections and other attributes
• Add Logic Blocks
• Add Function Blocks
• Connect inputs and outputs to Function and Logic Blocks
• Adjust I/O and Function Blocks' parameters
• Set optional Safety Output On- or Off-time delays
• Assign status output signals, if needed
• Assign virtual outputs, if using Ethernet (Ethernet models only)
3. Confirm the configuration on the Safety Controller.
XS/SC26-2 Safety Controller
7