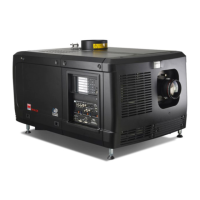
9. Starting up
9.1 Switching on the DP-1500 projector
Process:
1. Make sure that the DP- 1500 projector is installed u pon a stable pedes tal. See chapter "Positioning the DP-1500 at port window ",
page 24.
2. Make sure that the exhau st s ystem is properly installed. See chapter "Installation of the exhaust s ystem", page 27.
3. Make sure that the right lens is installed for your application. See chapter "Lenses & lens holder", pag e 33.
4. Make sure that the lamp and lamp ho use are correctly installed. See chapter "Lamp & lamp house", page 45.
5. Make sure the projector is correctly connected to the power net. See chapter "Electrical set up of the DP -1500", pag e 29.
6. Check if a video source is c onnected w ith the projector. See chapter "Source input ports of the DP-1500 pro jector", page 70.
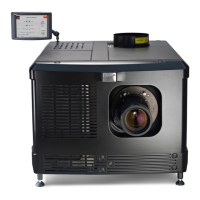
7. Check if the com municator touch panel is installed. See c hapter "Communicator touch panel", page 7 1.
8. Press the powe r switch to switch on the projector. A s a result the projector starts up in standby. So, the lamp is off and the
dowser o pen. No internal pattern is selected. The comm unicator touch panel starts its initialization proc edure..
- When ’0’ is visible, the projector is switched off.
- When ’1’ is visible, the projector is switched on.
9. Press the standby button on the local k eypad or use the commun icator touch panel to activate the lam p. As a result the applied
source will be displayed.
CAUTION: See user’s guide of the Communicator Touch Panel to operate and control the DP-1500 projector.
78 R59770091 DP-1500 06/01/2009
 Loading...