3. Physical installation
1
2
3
3
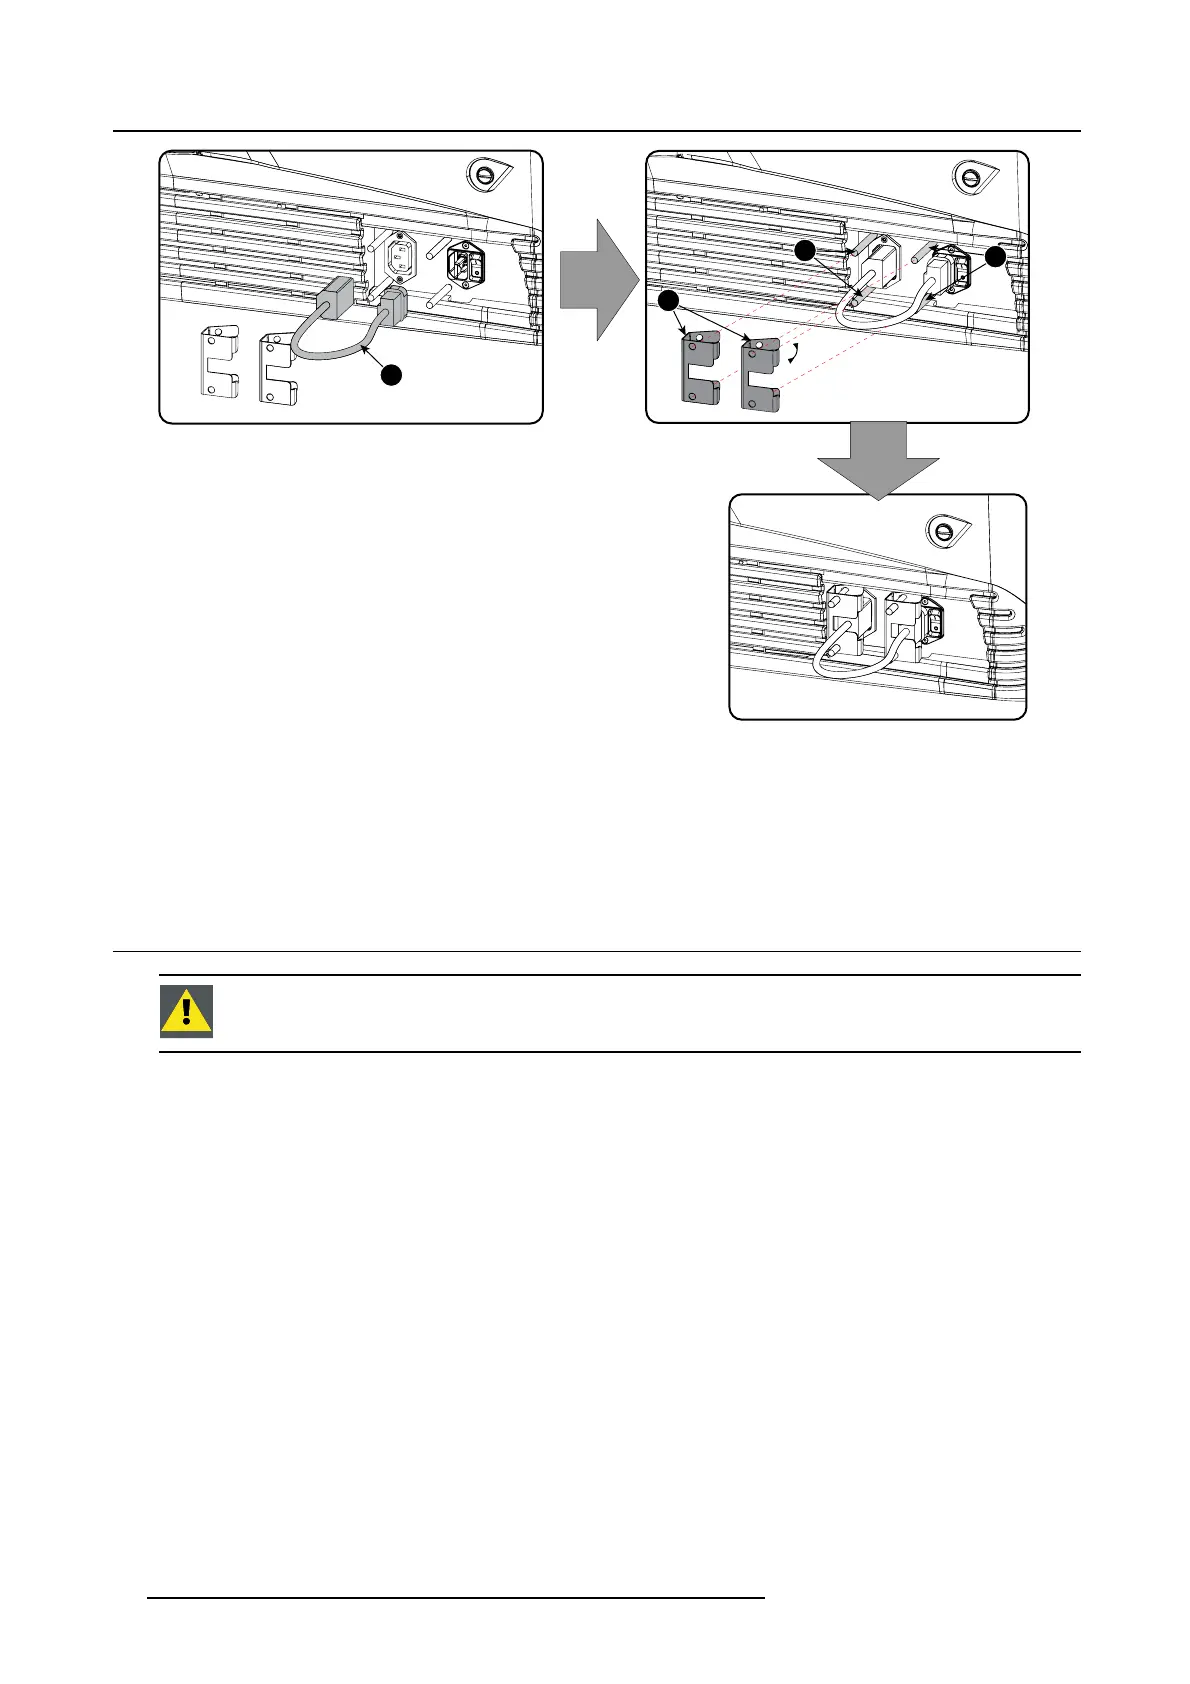
Image 3-11
Power loop through connection
2. Secur e both plugs o f the s hort cable with a fixation spring (2). Handle as follow:
- Squeeze the fixation spring together.
-Slidethefixa t io n spring on the fixation pins (3) while squeez ing together and push it against the power plug.
- Release the fixation spring.
3.6 Connecting a UPS to the projector electronics
WARNING: On ly use UPS units wh ich are suitable for the B-series projector. S ee chapter ”General”, “Instal-
lation requirements” for more information about the requirements of the UPS.
How to connect the UPS
1. Install the UPS according to the instructions of the manufacturer a nd the local regulations.
2. C onnect the powe r output cord from the UPS unit to the UPS inlet s ocket of the projector (right s ocket).
Connect directly (A) or drag the cable behind the front cover so that the front cover can be removed w ithout removing the UPS
INLET cable (B).
24
R5905067 DPXK-19B/23B/P 17/09/2012
 Loading...


