4. Lamp & Lamp House
5. The lamp parameters can be edited by the user under per sonnel maintenance and responsibility. If you want to change these
parameters, check the check box in front of Edit lamp parameters (11).
The current parameter fields become active (12).
6. C lick in an input field and change to the des ired value.
7. C lick Reset lamp (13).
4.8 Realignment of the lamp in its reflector (manual Lamp H ouse)
Each xenon lamp installation requires a realignment of the lamp in its reflector for optimal performance of the
xenon lamp in the B-series pro jector. Furthermore, it is recom m ended to realign the lamp after the first run
time of 100 and 200 hours. Especially the Z-axis of the lamp.
How to realign
1. R emov e the lam p cover to get ac cess to the X -, Y- and Z-axis adjustm ent thumbscrews of the lam p.
2. Sw itch on the projector and start up the lam p.
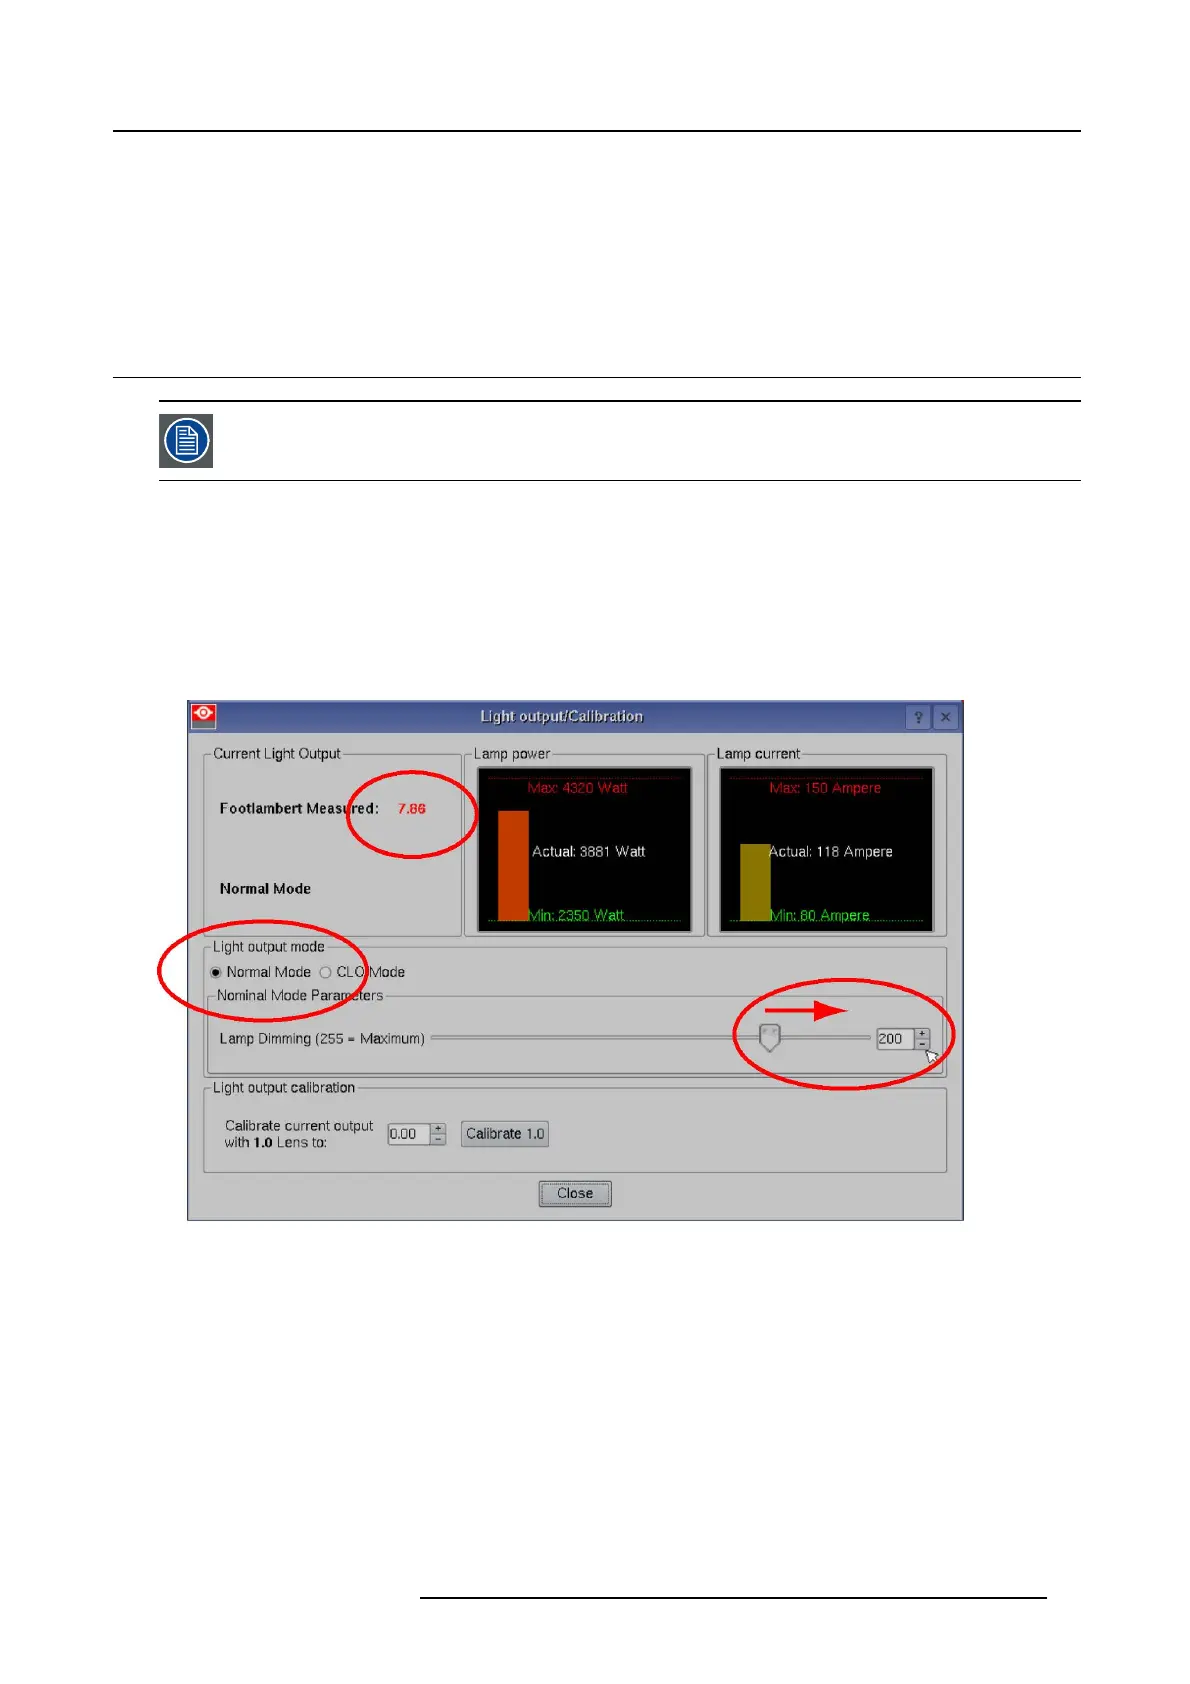
3. Go via the Comm unicator touch panel to the menu “Insta lla ti on” > “Lamp ” > “Light output”.
4. Set the “Light output mode”innormal mode and the “Lamp Dimming” on maximum (255).
Note: This window on the Com municator touch panel shows in the upper left corner the m easured value of the built-in light
sensor of the projector.
Image 4-28
Light mode selection
5. Adjust th e X-axis (ref X image 4-29), the Y-axis ( ref Y im age 4-29) and the Z-axis (ref Z image 4-2 9) for ma ximum cur rent light
output (Footlambert M easur ed). Carefully turn the thum bscrew for m axim um light output. O nce over the maximum, turn slightly
in oppos ite direction to reach t he maximum light output again. Do this for each dire ction and repeat this adjustment cycle twice.
R5905067 DPXK-19B/23B/P 17/09/2012
43
 Loading...


