14
Projection lens selection and Installation
When installing the lens into the projector, be sure to remove the lens cap from the back of the optional lens before
installing the optional lens into the projector. Failure to do so will cause damage to the projector.
Installing or removing the optional lens
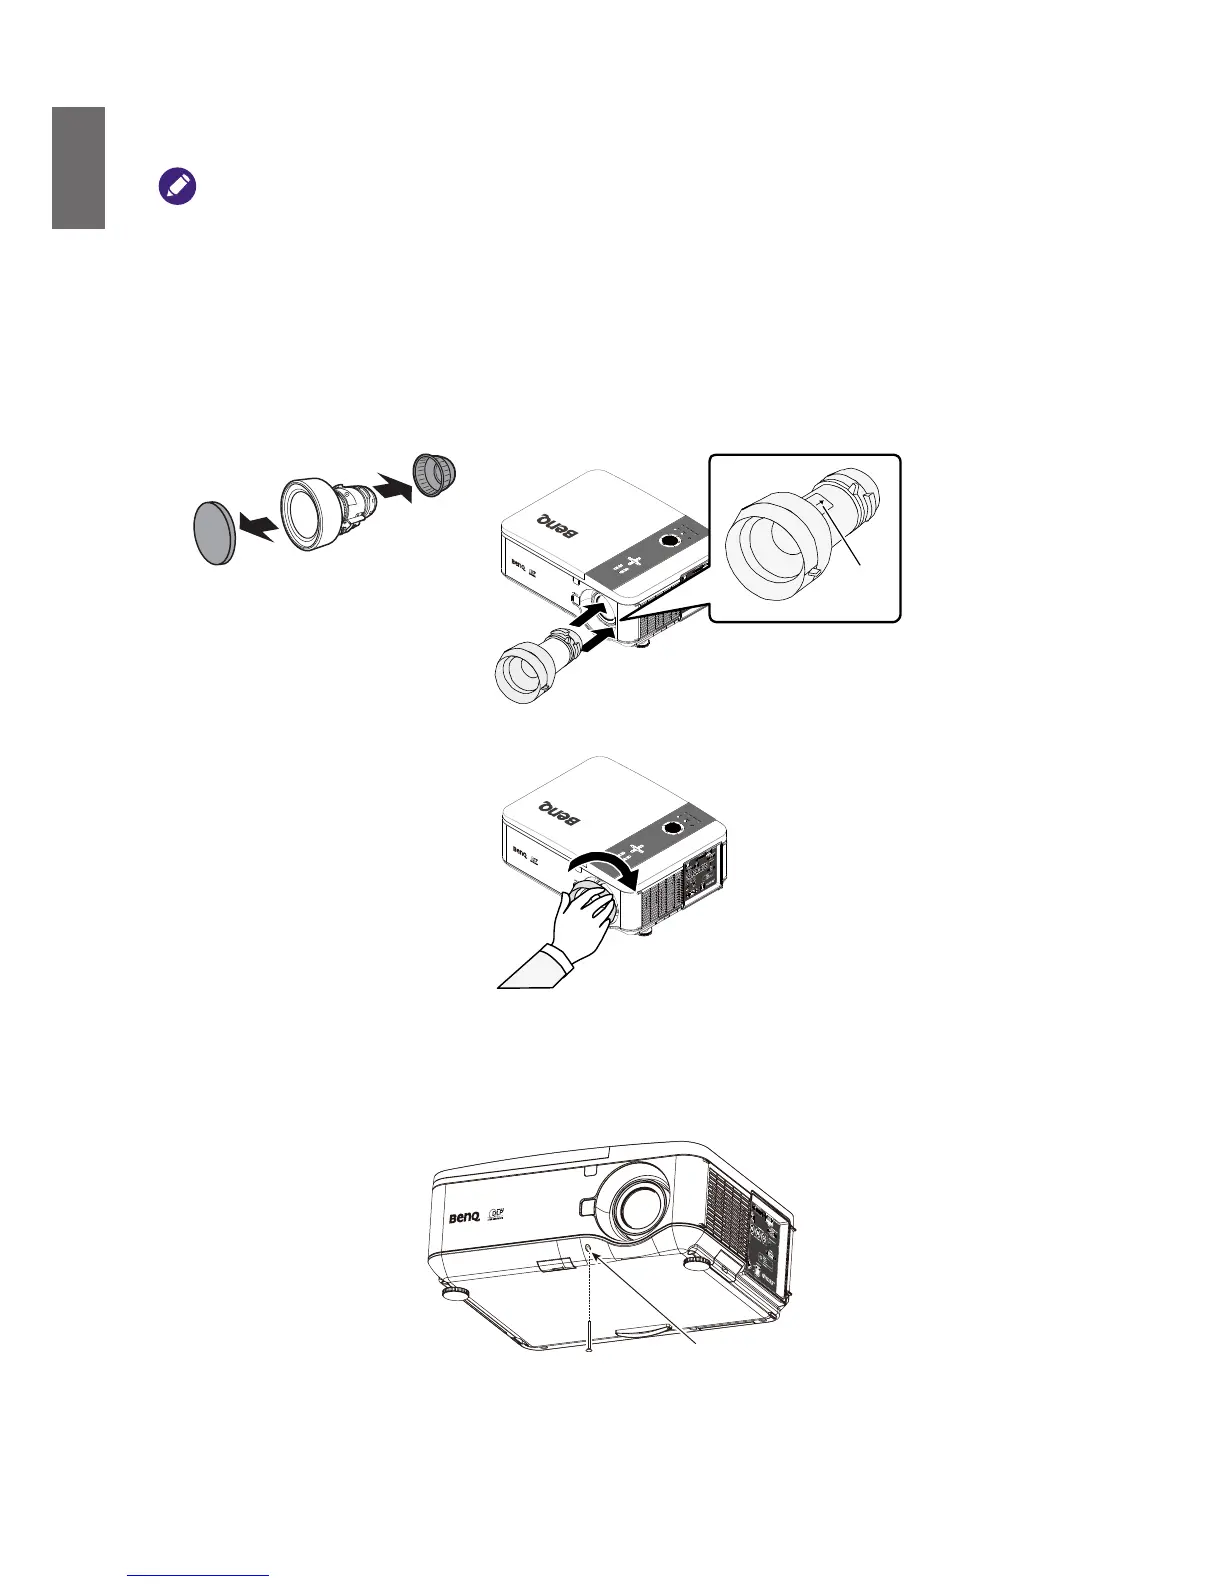
Installing the new lens
1. Remove the lens cap.
Insert the Lens with arrow mark on top.
Arrow
mark
2. Rotate the Lens clockwise till click sound twice.
Using the Anti-theft Screw
Using the anti-theft screw to prevent theft of the lens. Tighten the supplied anti-theft screw on the
front bottom.
Anti-theft screw



 To Next Page