1 Bobbin cover
2 Stitch plate
3 Attachment base for
special accessories
4 Presser foot
5 LED-sewing light
6 Needle clamp
7 «Quick reverse»-button
8 «Pattern end»-button
9 «Start/Stop»-button
10 Thread guide
11 Slide Speed Control
12 Thread take-up cover
13 «Needle stop»-button
up/down
14 «Pattern begin»-button
15 Thread take-up lever
16 Pre-tension stud
17 Display
18 «Sewing support»-buttons
⦁
«Home»-button
⦁
«Setup»-button
⦁
«Tutorial»-button
⦁
«Creative Consultant»-
button
⦁
«Help»-button
⦁
«eco»-button
⦁
«clr»-button
19 «Needle position»-buttons
20 Stitch length knob
21 Stitch width knob
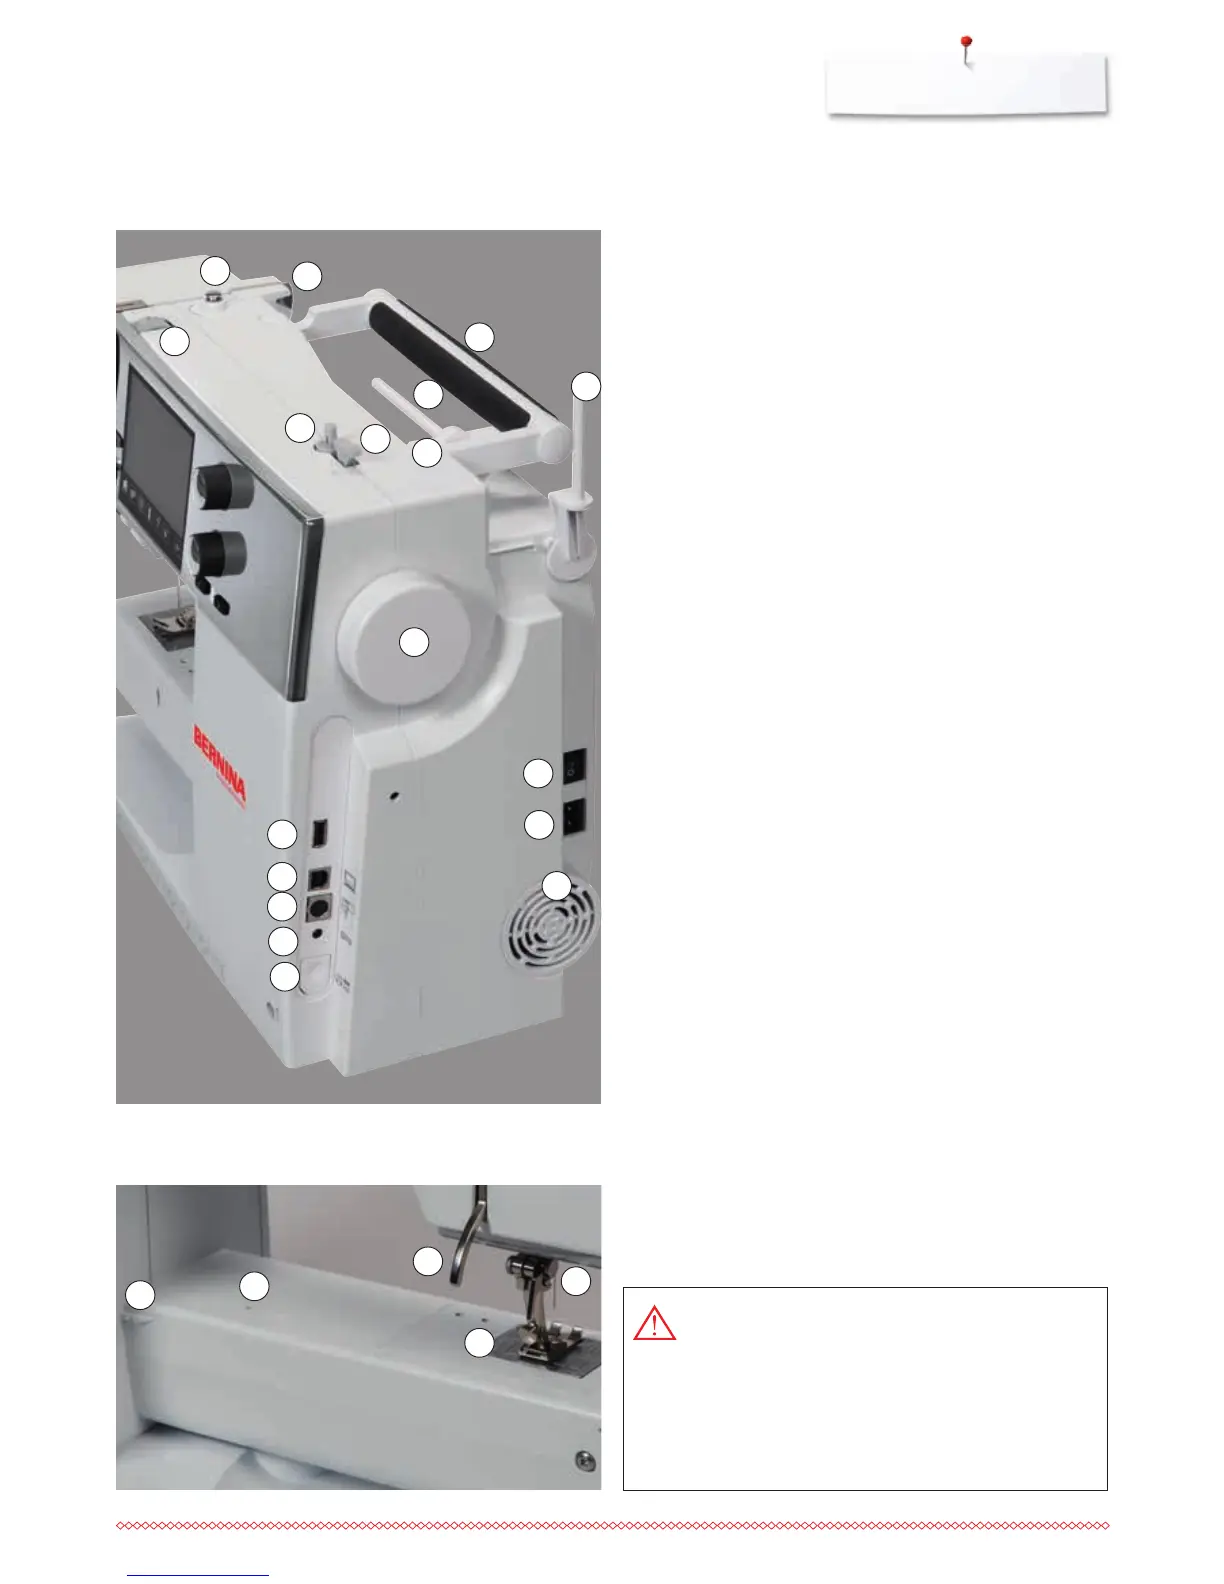
22 Carrying handle
23 Bobbin winder
24 Thread cutter on bobbin
winder
25 Presser foot lifter
connection
26 Rear thread guide
27 Horizontal spool pin
28 Vertical spool pin
29 Eyelet thread guide
30 Handwheel
31 Thread tension adjustment
wheel
32 Power switch On «I»/
Off «0»
33 Power plug socket
34 USB-connection
35 PC-connection for
embroidery software
36 Connection for embroidery
module
37 Foot control socket
38 Feed dog drop
39 Air vents
40 Needle threader
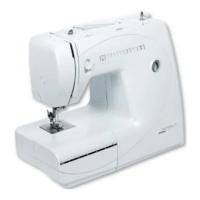
41 Feed dog
42 Cutter for lower thread
43 Presser foot pressure
adjustment wheel
44 Headframe fixing screw
45 Thread cutter on the head
frame (left)
46 Slide-on table socket
47 Opening for darning hoop
connection
48 Presser foot lever
49 BSR-connection
USA/Canada only: The sewing computer has a
polarized plug (one blade wider than the other). To
reduce the risk of electrical shock, this plug is
intended to fit in a polarized outlet only one way. If
the plug does not fit fully in the outlet, reverse the
plug. If it still does not fit, contact a qualified
electrician to install the proper outlet. Do not
modify the plug in any way!
48
47
2
49
46
16
23
24
26
22
28
27
29
30
35
34
36
32
33
39
37
38
31