28 support@solowavedesign.com
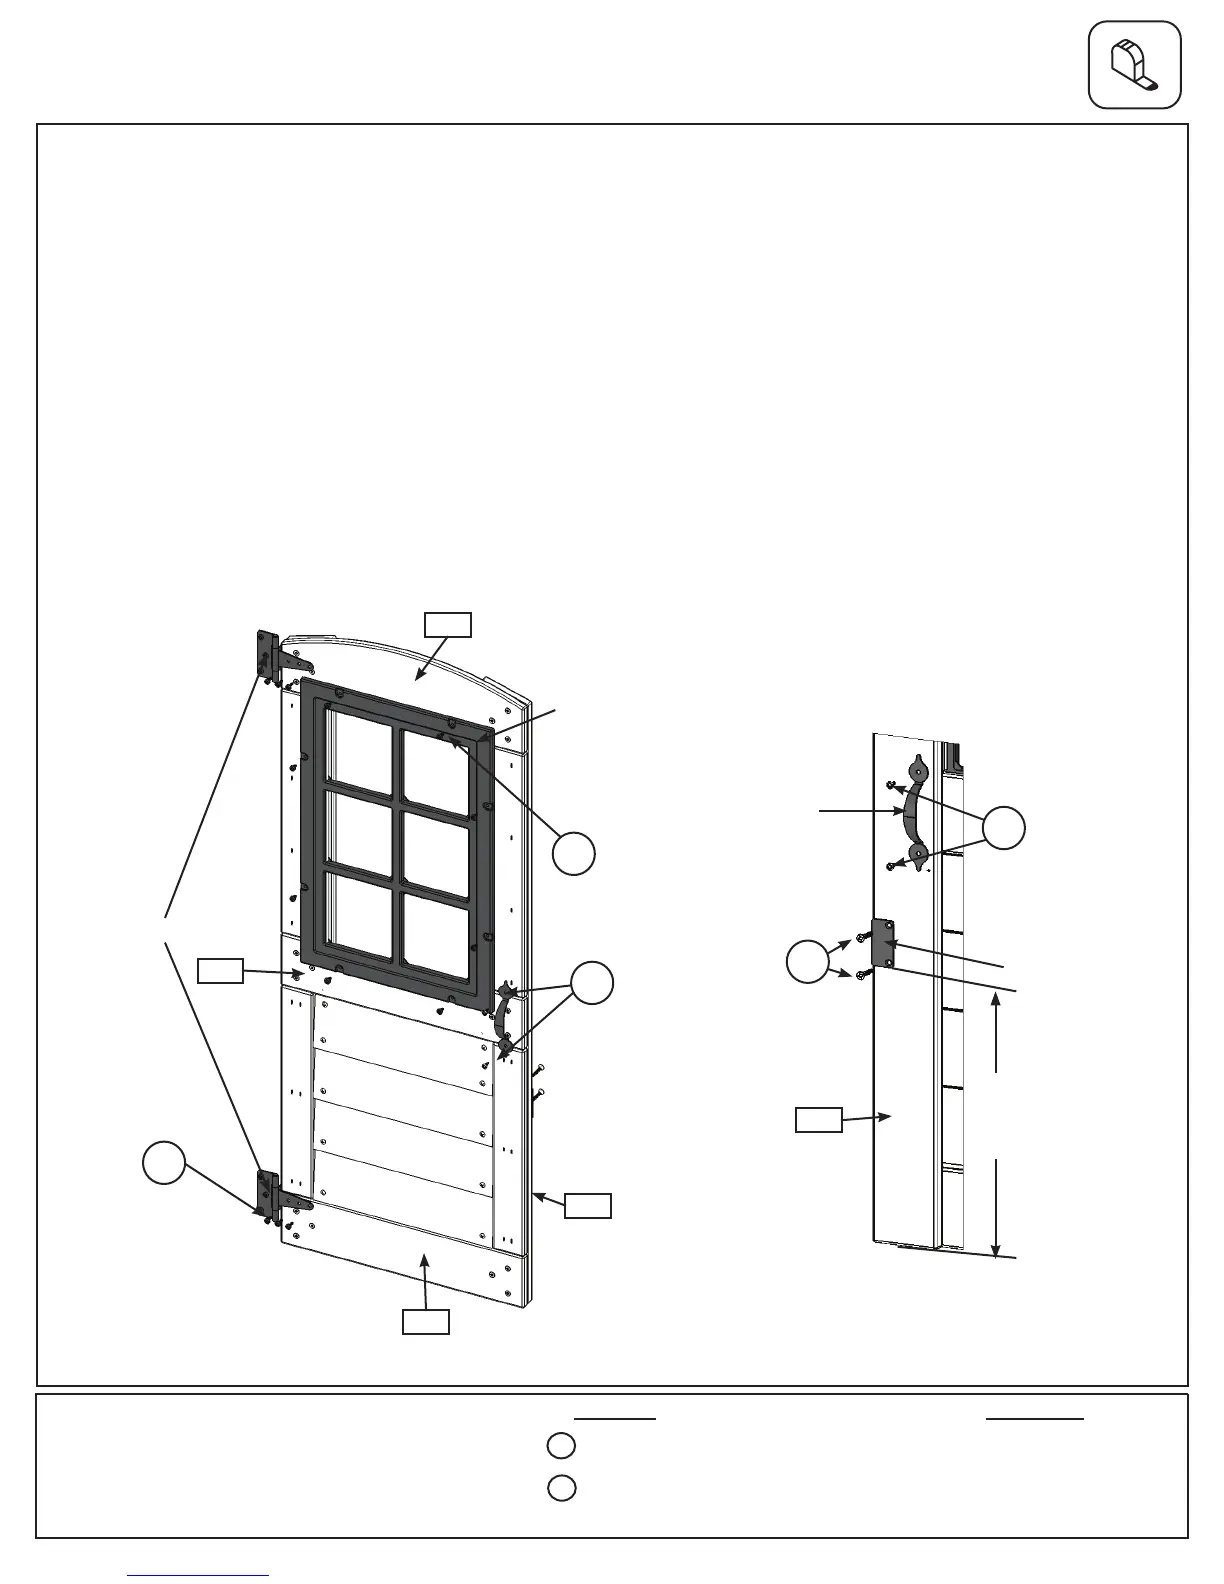
Step 6: Door Assembly
Part 2
F: OntheoutsidefaceoftheDoorAssemblyplaceSmallWindowinthewindowgapandattachwith8(S13)#6x
5/8”PanScrews.(g.6.3)
G: OntheoutsideoftheDoorAssemblyplace1DoorHandlecentredoverthetop(2052)DoorCross,asshown
ing.6.3,thenattachwith2(S13)#6x5/8”PanScrews.
H: OntheoppositesidefromtheDoorHandle,ontheoutside,place1DoorHingeushtothetopofthelower
(2052)DoorCrossand1DoorHingecentredon(2053)DoorArch,asshowning.6.3,thenattachwith3(S13)
#6x5/8”PanScrewsperhinge.
Note:HingestopsmustbetighttotheDoorAssembly.
I: OntheinsideofDoorAssembly,measure12-5/16”upfromthebottomof(2057)DoorSideRightandattach
CatchPlateusing2(S18)#6x1”WoodScrews.(g.6.4)
J: PlaceasecondDoorHandleontheinsideoftheDoorAssemblyatapproximatelythesamespotastherst
thenattachwith2(S13)#6x5/8”PanScrews.(g.6.4)
Hardware
18 x #6 x 5/8” Pan Screw
2 x #6 x 1” Wood Screw
S13
Other Parts
2 x Door Handle
2 x Door Hinge
1 x Small Window
1 x Catch Plate
2052
Fig. 6.3
OutsideView
2053
DoorHandle
InsideView
CatchPlate
Fig. 6.4
S18
SmallWindow
DoorHinge
S13
x8
2057
2057
S13
S18
S13
x3per
hinge
12-5/16”
S13
2052