63 support@solowavedesign.com
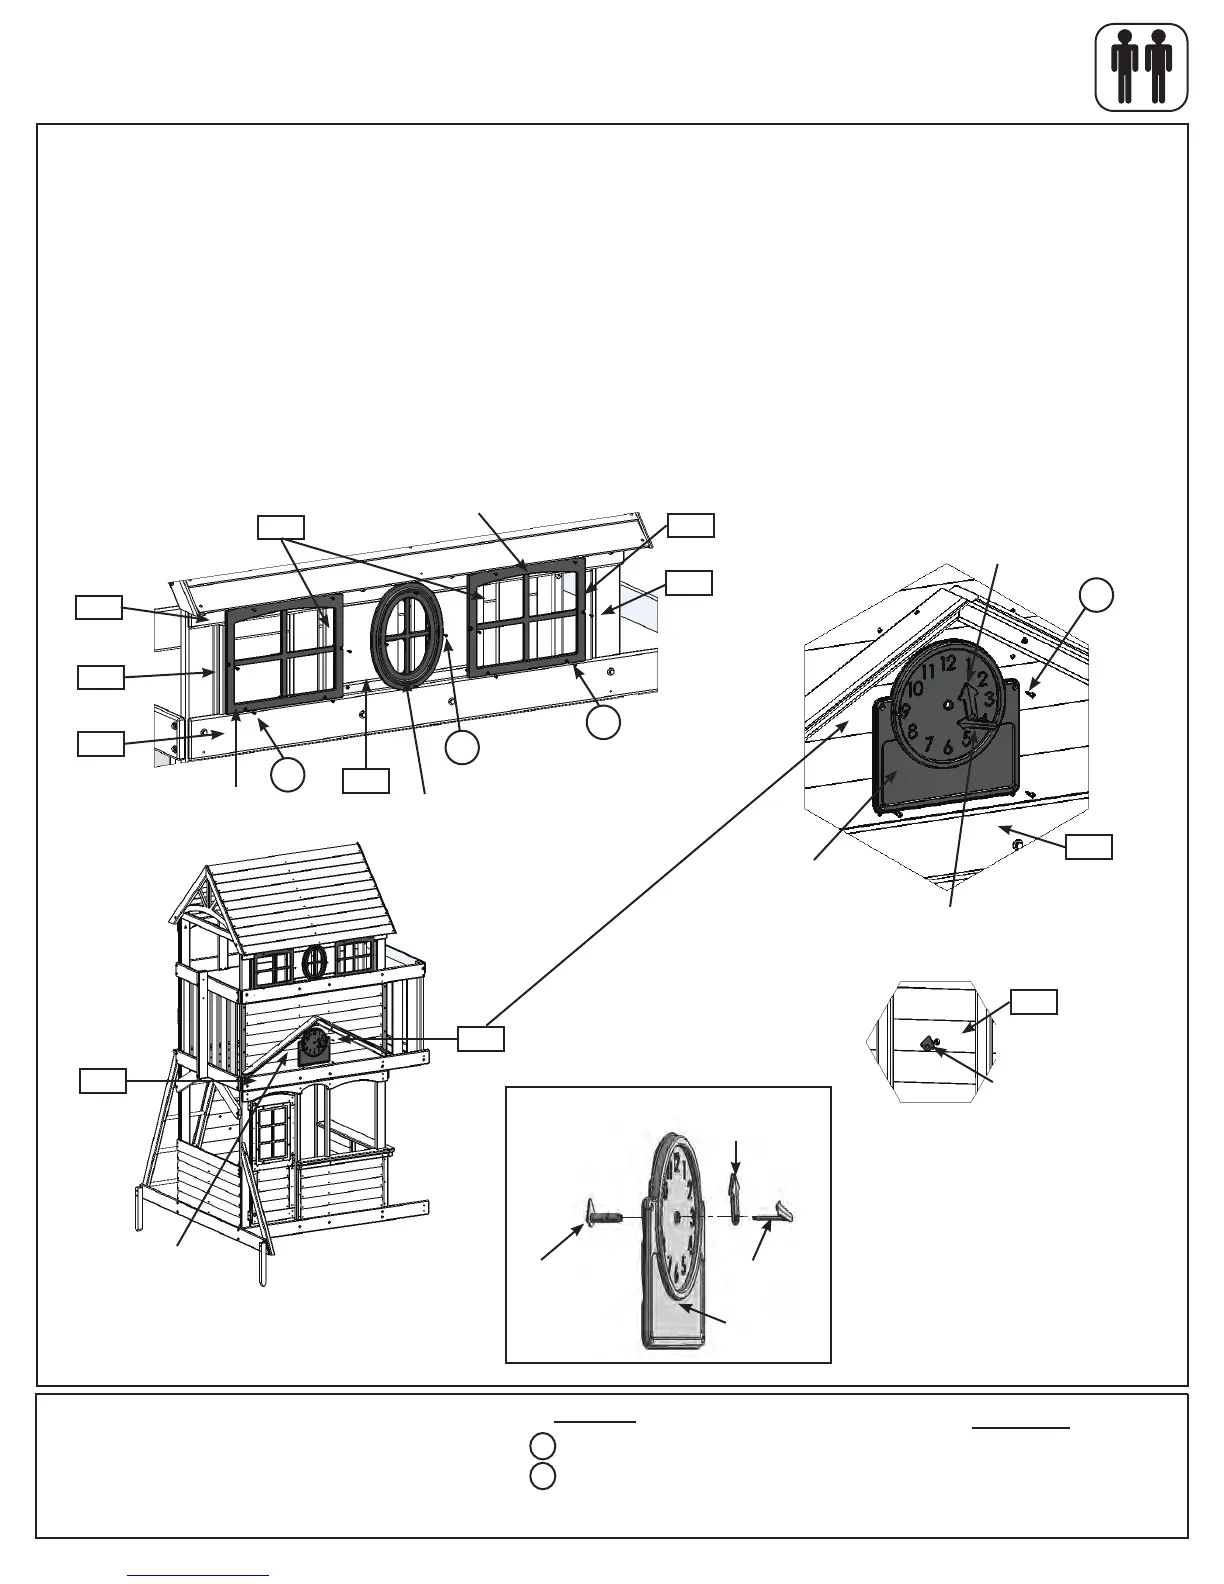
Step 26: Attach Windows and Clock to Fort
Hardware
16 x #6 x 5/8” Pan Screw
4 x #8 x 1” Pan Screw
S13
Other Parts
2 x Arch Top Window
1 x Oval Window
1 x Clock Assembly
S10
A:OntheFrontWallsideoftheassemblyplace2ArchTopWindowsintheoutsidewindowgapsbetween(2145)
BackTopand(2125)MiddleFrontandattachto(1740)WindowBraces,(2119)OvalWindows,(2145)BackTop
and(0389)WindowFramewith6(S13)#6x5/8”PanScrewsperwindow.(g.26.1and26.2)
B:PlaceOvalWindowincentrewindowgapandattachtoboth(2119)OvalWindows,(2145)BackTopand
(0389)WindowFramewith4(S13)#6x5/8”PanScrews.(g.26.2)
C:PlaceClockFacebetween(2124)FrontFloorandroofsupportdetailsnugtothesiding.Theholeintheclock
shouldlineuptotheholein(2162)Siding-Clock.Attachwith4(S10)#8x1”PanScrews.(g.26.1and26.3)
D:FrominsidetheassemblyinsertClockKnobintheholein(2162)Siding-Clock,thenwith1personinsidethe
fortand1outsideplaceHourHandoverClockKnobmakingsuretheyarelinedupproperly.Finally,pressMinute
HandoverHourHand.(g.26.3,26.4,26.5and26.6)
Fig. 26.1
x4
Front Wall
2145
Fig. 26.2
Fig. 26.3
Fig. 26.4
1740
2119
1740
0389
2125
S13
S13
x6
S13
x6
OvalWindow
Inside View
2124
2162
Holeinclock
sidinglinesupto
holeinclock.
2162
Knobconnectsto
minute/hourhands.
S10
x4
2124
2153
Clock
ArchTopWindow
HourHand
MinuteHand
Fig. 26.5
Knob
Clock
HourHand
MinuteHand
ArchTop
Window