36 support@solowavedesign.com
HardwareWood Parts
6 x 1/4 x 2” Hex Bolt
(1/4” lock washer, 1/4” at washer, 1/4” t-nut)
2 x 1/4 x 3-3/4” Hex Bolt
(1/4” lock washer, 1/4” at washer, 1/4” t-nut)
2 x 1/4” t-nuts
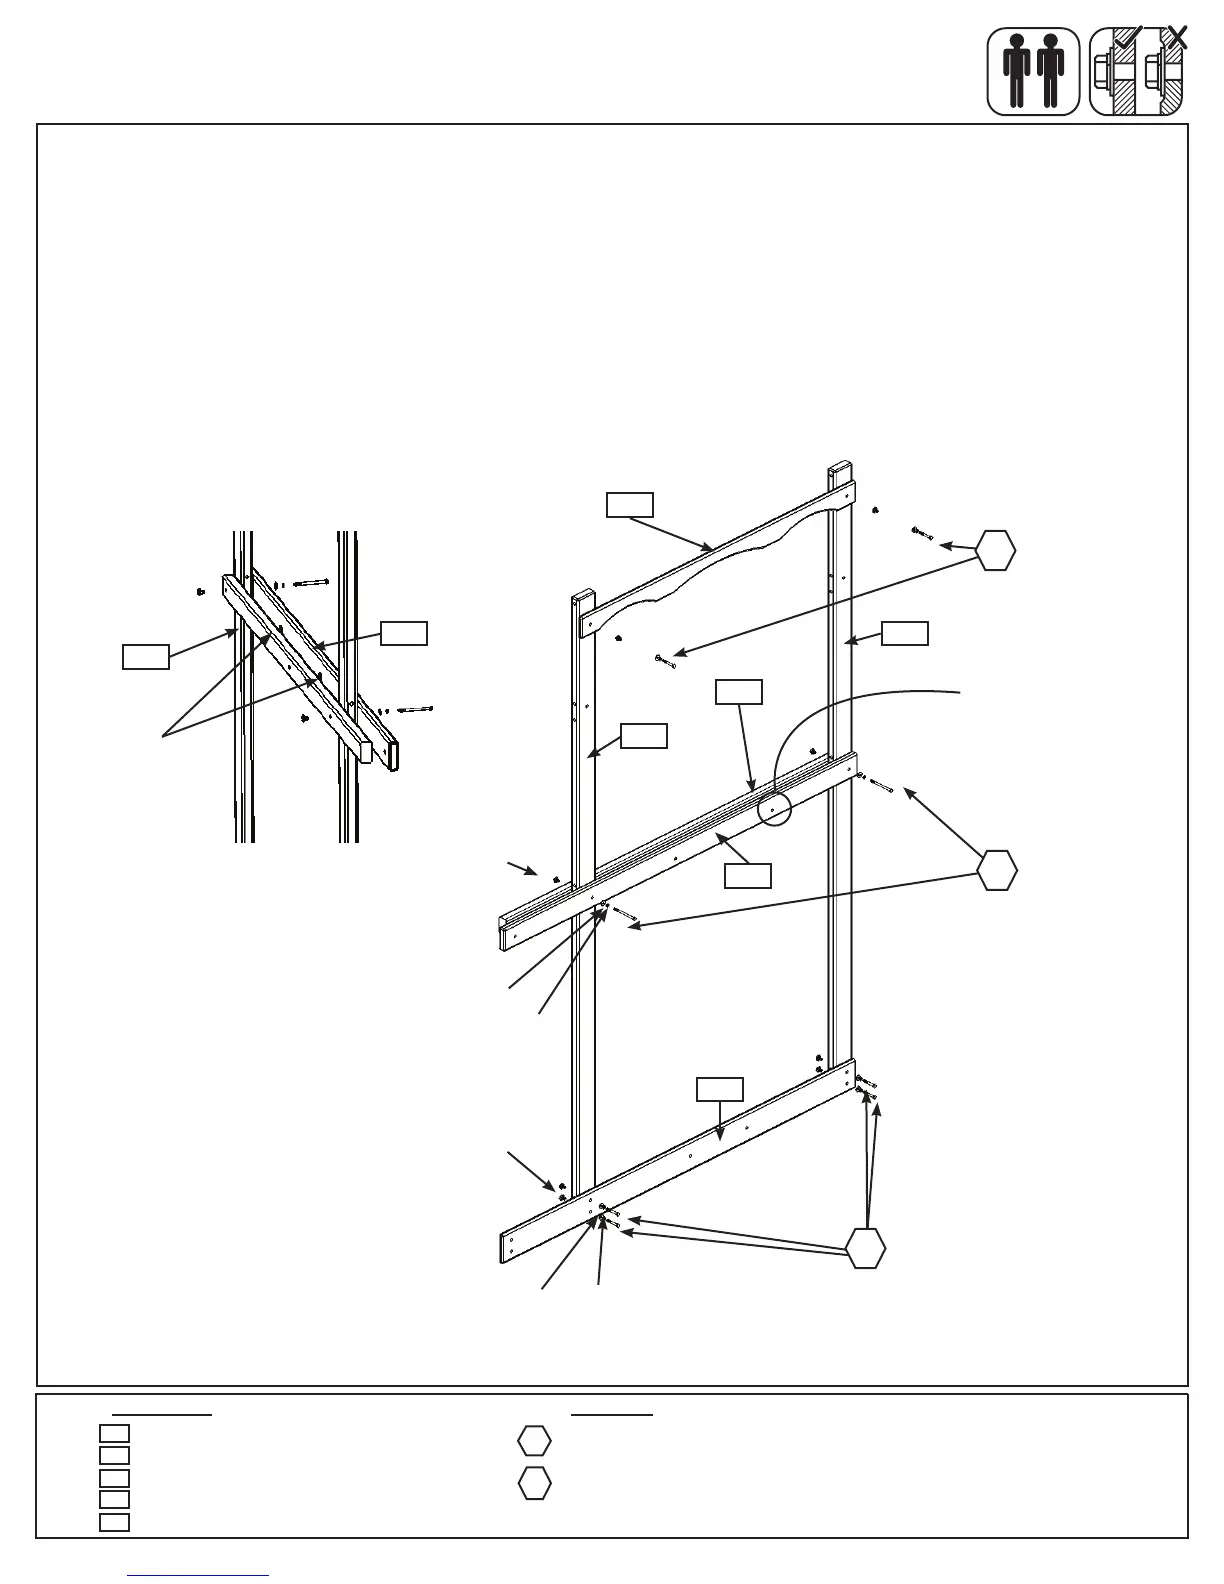
Step 10: Back Wall Assembly
Part 1
1 x Floor Front Back 2 x 3 x 64-1/4”
1 x Back Floor 5/4 x 4 x 67”
1 x Front Back Ground 1 x 5 x 67”
1 x Back Top 1 x 4 x 52”
2 x Post 2 x 4 x 96-1/2”
2120
2150
2145
2153
2123
2145
Fig. 10.1
1/4”lock
washer
1/4”at
washer
1/4”t-nut
A:Attach2-1/4”t-nutstocentreboltholesin(2123)BackFloorpriortoattachingtoposts.Whenattachingthe
postsmakesuretheT-nutsareinbetweenthe(2120)FloorFrontBackandthe(2123)BackFloor.(g.10.1and
10.2)
B:Looselyattach2(2153)Poststo(2150)FrontBackGroundwith4(H2)1/4x2”HexBolts(withlockwasher,
atwasherandt-nut)andto(2145)BackTopwith2(H2)1/4x2”HexBolts(withlockwasher,atwasherand
t-nut),asshowning.10.1.
C:Withahelperlooselyattach(2123)BackFloorontheoutsideoftheassemblyand(2120)FloorFrontBack
ontheinsideoftheassembytoboth(2153)Postswith2(H15)1/4x3-3/4”HexBolts(withlockwasher,at
washerandt-nut).(g.10.1)
H2
H15
H2
1/4”lock
washer
1/4”at
washer
1/4”t-nut
2120
2123
2150
2153
2153
Notice hole locations
Fig. 10.2
1/4”t-nuts
Back View
2120
2123
Front View
H15
H2
Note the t-nuts
are on the inside
of the board.