57 support@solowavedesign.com
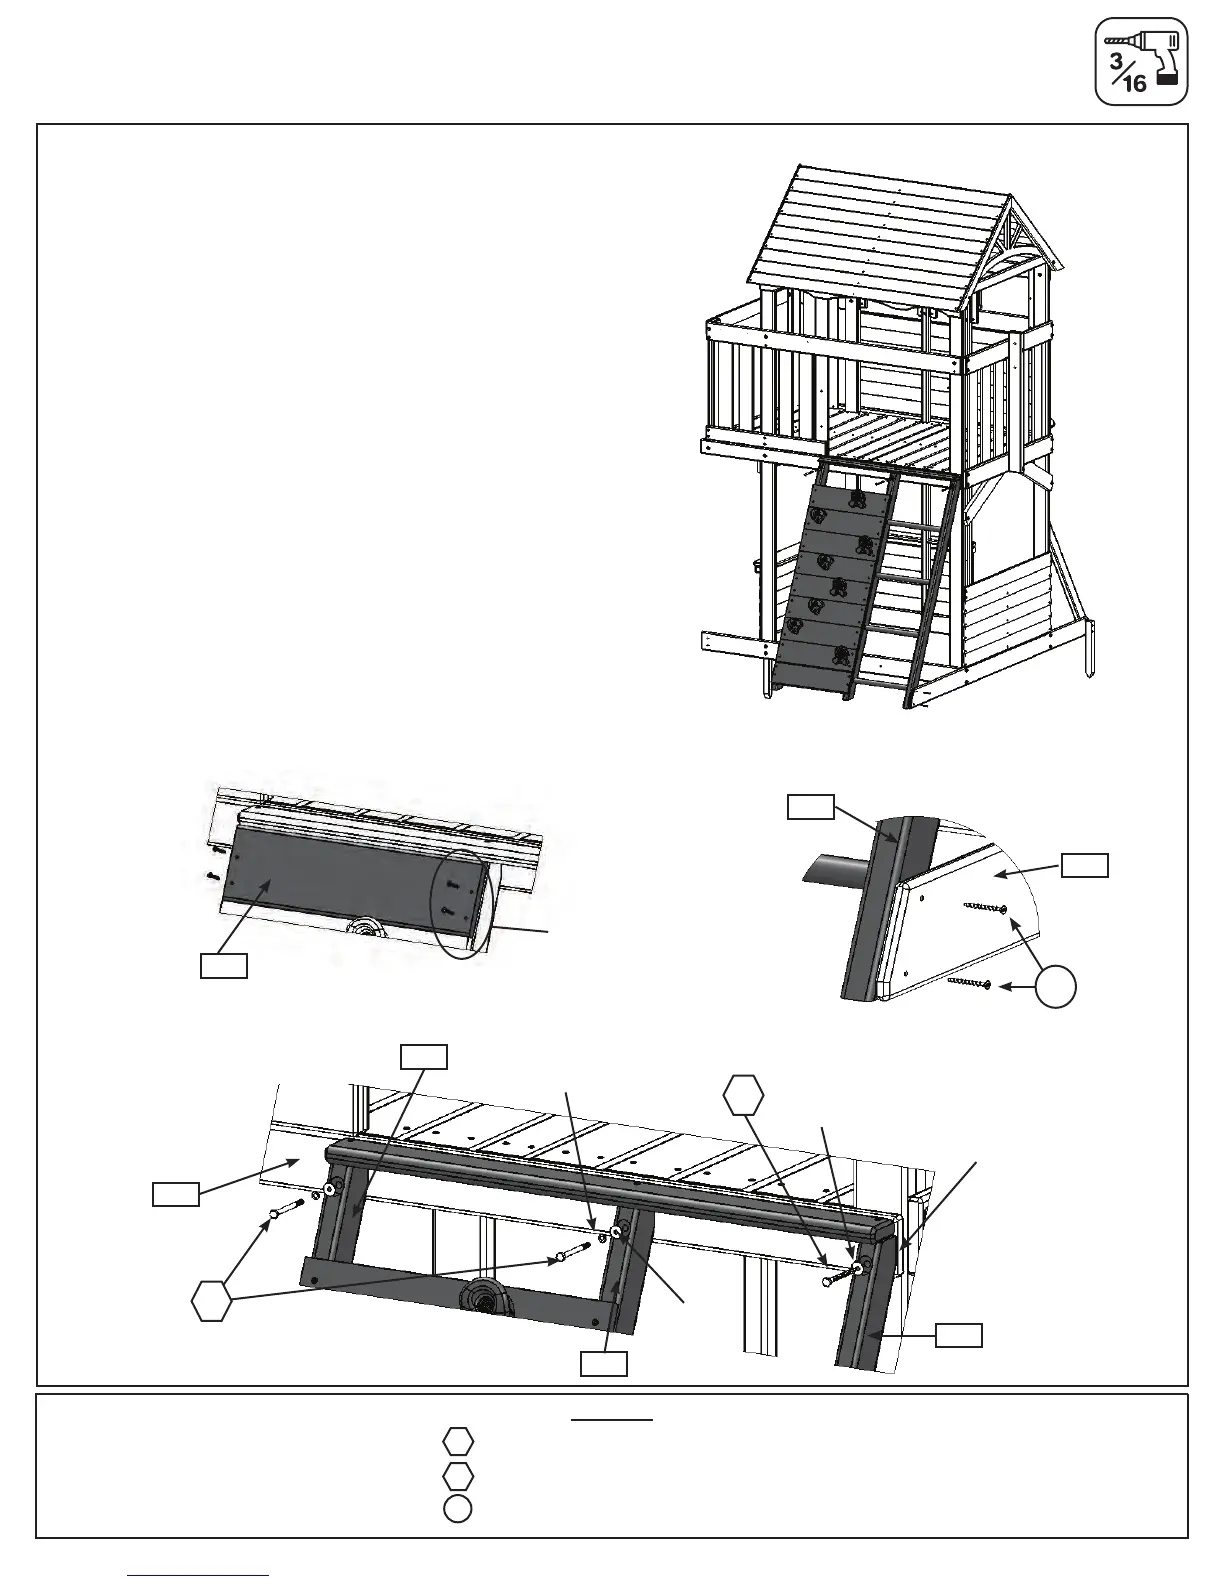
Step 22: Attach Access Ladder/Rockwall Assembly to Fort
Pre-drill all holes using a 3/16” drill bit before
installing the Lag Screws
A:Remove(2149)TopBottomRockwallfromthetop
oftheAccessLadderRockwall,previouslyassembled
inStep2.Settheboardandscrewsaside,theywill
bere-attached.(g.22.1and22.2)
B:PlacetheAccessLadderRockwallinopening
ontheBackWall,attachto(2123)BackFloorwith
1(H12)1/4x3”HexBolt(withlockwasherandat
washer,t-nutpreviouslyinstalled)inboth(2101)
AccessLadderLeftand(2117)RockRailandthen1
(LS3)1/4x3”LagScrew(withatwasher)in(2100)
AccessRailRight.(g.22.1and22.2)
C:Re-attach(2149)TopBottomRockwalltothe
sameplaceitwasremoved.Noticescrewholesare
towardsthebottomoftheboard.(g.22.3)
D:Attach(2157)GroundSWSideto(2100)Access
RailRightwith2(S15)#8x1-3/4”WoodScrews.
(g.22.4)
Hardware
1 x 1/4 x 3” Lag Screw (1/4”at washer)
2 x 1/4 x 3” Hex Bolt (1/4” lock washer, 1/4”at washer, t-nuts previously installed)
2 x #8 x 1-3/4” Wood Screw
LS3
Fig. 22.3
1/4”at
washer
Back Wall
Fig. 22.1
Fig. 22.2
2157
2100
2100
1/4”lock
washer
2123
S15
LS3
H12
Fig. 22.4
Flush
(T-nutspreviously
installed)
1/4”at
washer
H12
2101
2117
Notehole
orientation
2149
S15