31 support@solowavedesign.com
Overlapcedarroong
2156
1-1/2”
Roof Supports
removed for clarity
Flushtoedge
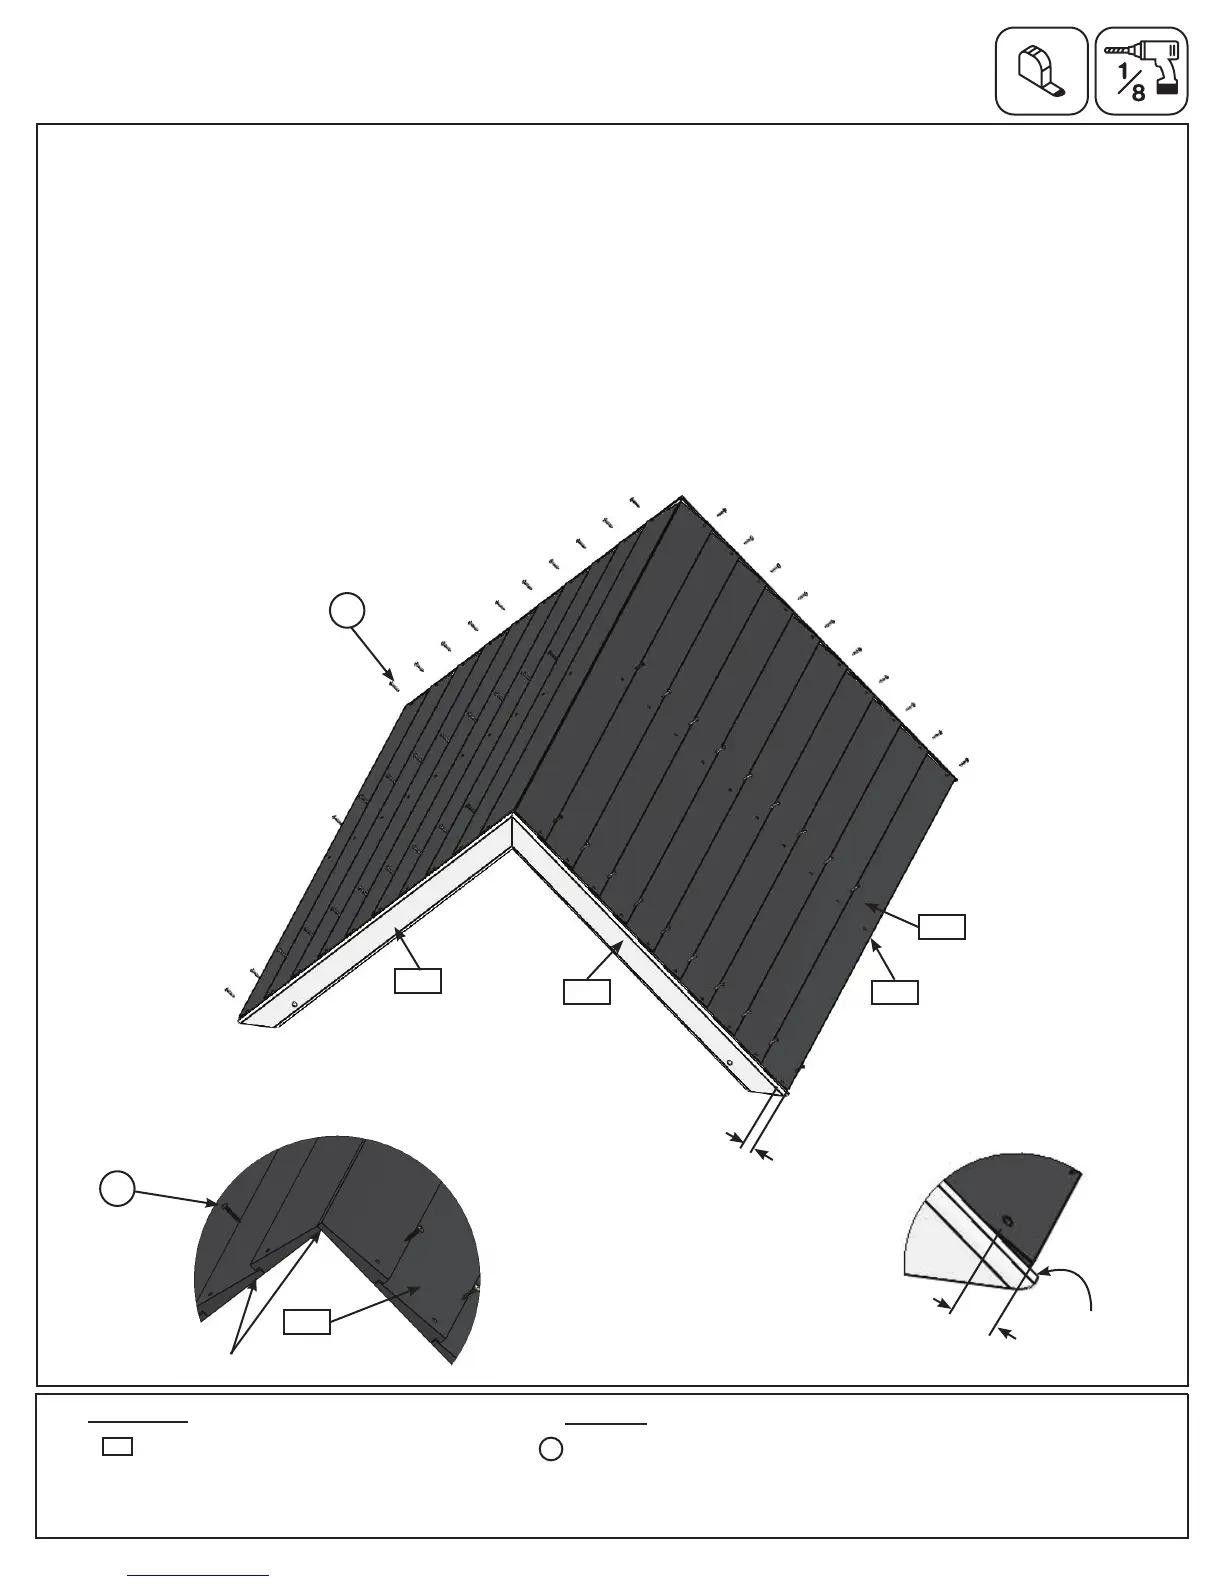
Step 8: Roof Assembly
Part 2
D:StartingatthetopoftheRoofSupportAssemblyattach1(2156)RoongoneachsideoftheRoofSupport
Assemblieswith3(S0)#8x7/8”TrussScrewsperboard.(g.8.2)Besuretooverlapthetopoftheboardsso
therearenogaps.(g.8.2and8.3)
E:Drillahole1-1/2”upfromthebottomofthe2bottom(2156)Roong(forbottomrowonly). Attach1(2156)
RoongatthebottomoftheRoofSupportAssemblyoneachside,makingsuretheyareushtoeach(2146)Roof
SupportRightand(2132)RoofSupportLeftwith3(S0)#8x7/8”TrussScrewsperboard.(g.8.2and8.4)
F: Ononesideoftheassemblyevenlyspaceandattach8(2156)Roong,leavingnogaps,with3(S0)#8x7/8”
TrussScrewsperboard.Thereshouldbe10(2156)Sidingonthisside.(g.8.2)
G: Ontheothersideoftheassemblyevenlyspaceandattach8(2156)Roong,leavingnogaps,with3(S0)#8x
7/8”TrussScrewsperboard.(g.8.2)
Fig. 8.4
Wood Parts
Hardware
60 x #8 x 7/8” Truss Screw
20 x Roong 3/8 x 3-1/2 x 53-13/16”
2156
S0
Fig. 8.2
Fig. 8.3
2132
2146
1-1/2”
S0
S0
x60
2156
x20
2161
(hidden)