39 support@solowavedesign.com
Step 11: Swing Wall Assembly
Part 2
1 x 1/4 x 2” Hex Bolt (1/4” lock washer, 1/4” at washer, 1/4” t-nut)
4 x 1/4 x 3” Lag Screw (1/4” at washer)
1 x 1/4 x 2-1/2” Lag Screw (1/4” at washer)
2 x Gusset II 5/4 x 4 x 18-1/2”
1 x Lower Diagonal 2 x 3 x 37”
2113
0369
Note: Pre-drill all holes using a 3/16” drill bit before installing the lag screws.
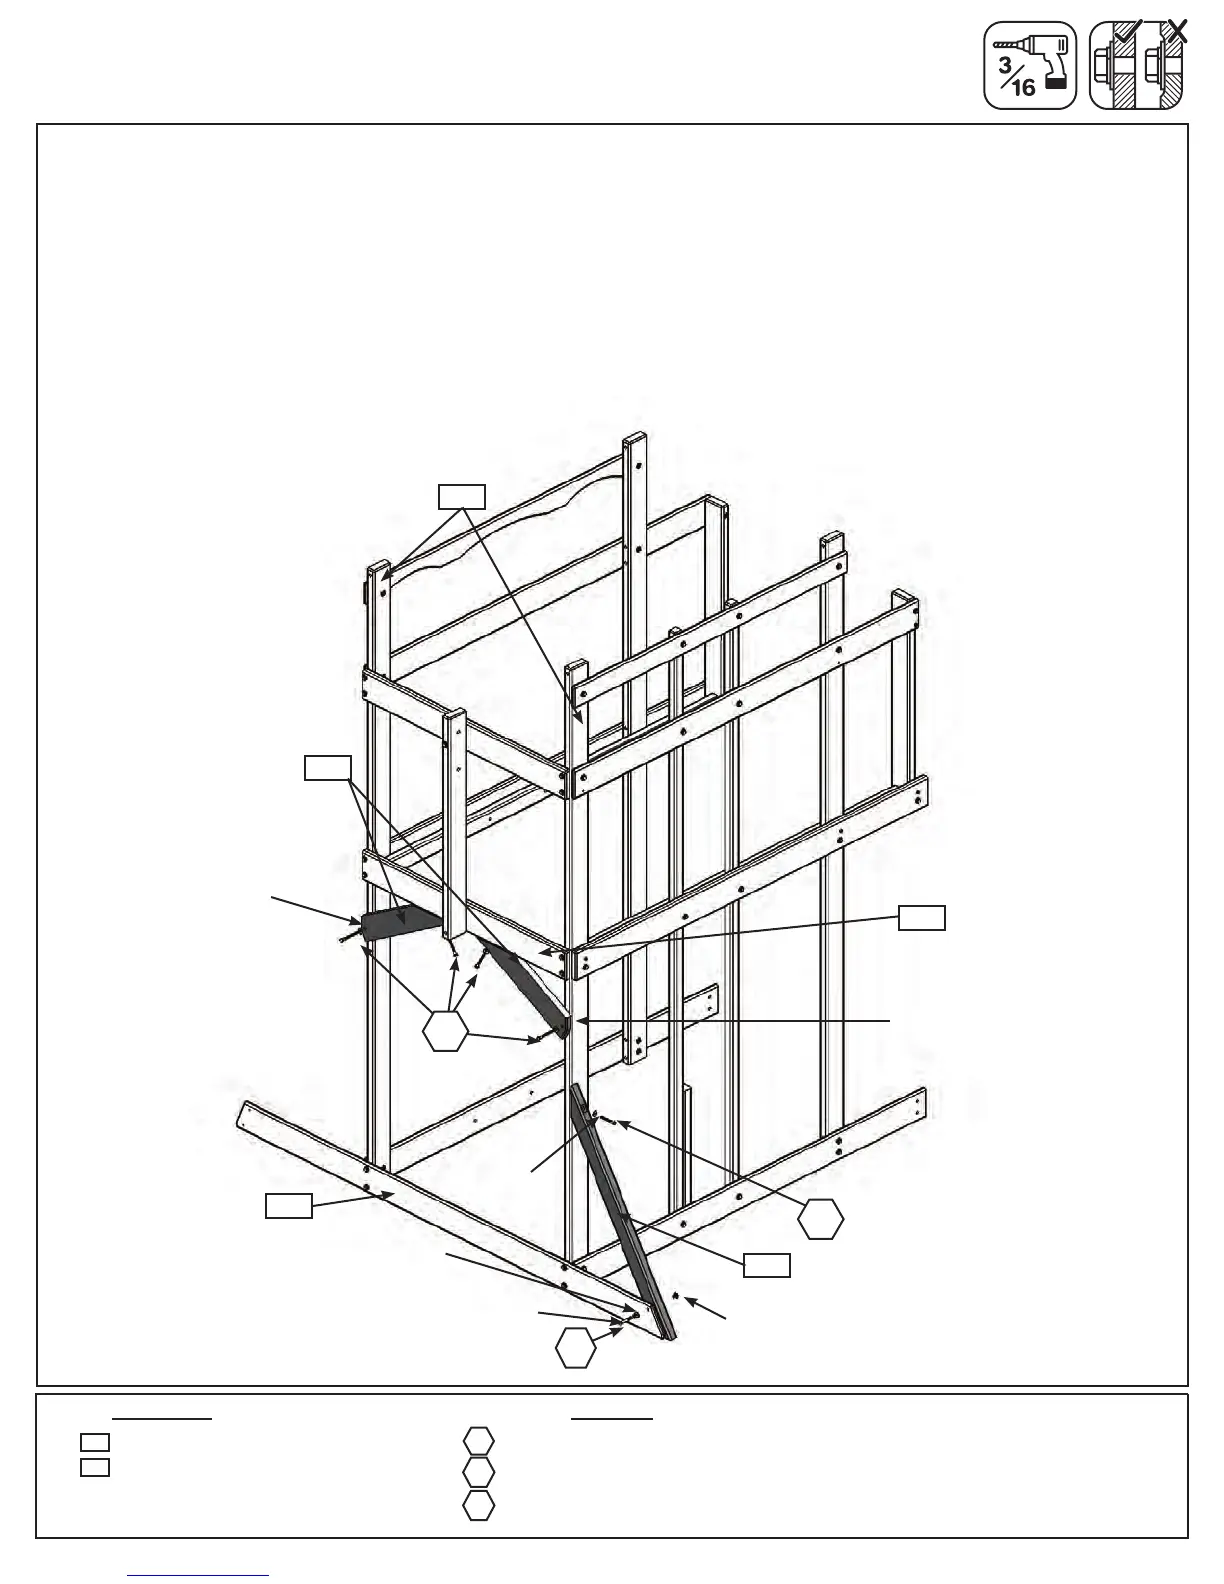
D:Attach(0369)LowerDiagonaltotheendof(2157)GroundSWSideontheFrontWallsidewith1(H2)1/4x
2”HexBolt(withlockwasher,atwasherandt-nut)andto(2153)Postwith1(LS2)1/4x2-1/2”LagScrew(with
atwasher).(g.11.2)
E:Tighttothebottomof(2126)SWFloorandbevellededgesushtooutsideedgeof(2153)Posts,attach1
(2113)GussettIItoeachsideusing2(LS3)1/4x3”LagScrews(withatwasher)pergusset.(g.11.2)
HardwareWood Parts
H2
1/4”lock
washer
1/4”at
washer
1/4”
t-nut
Fig. 11.2
2153
1/4”at
washers
LS3
H2
LS2
2126
2113
0369
LS2
LS3
2157
Front Wall
Flush
Flush
1/4”at
washer