18
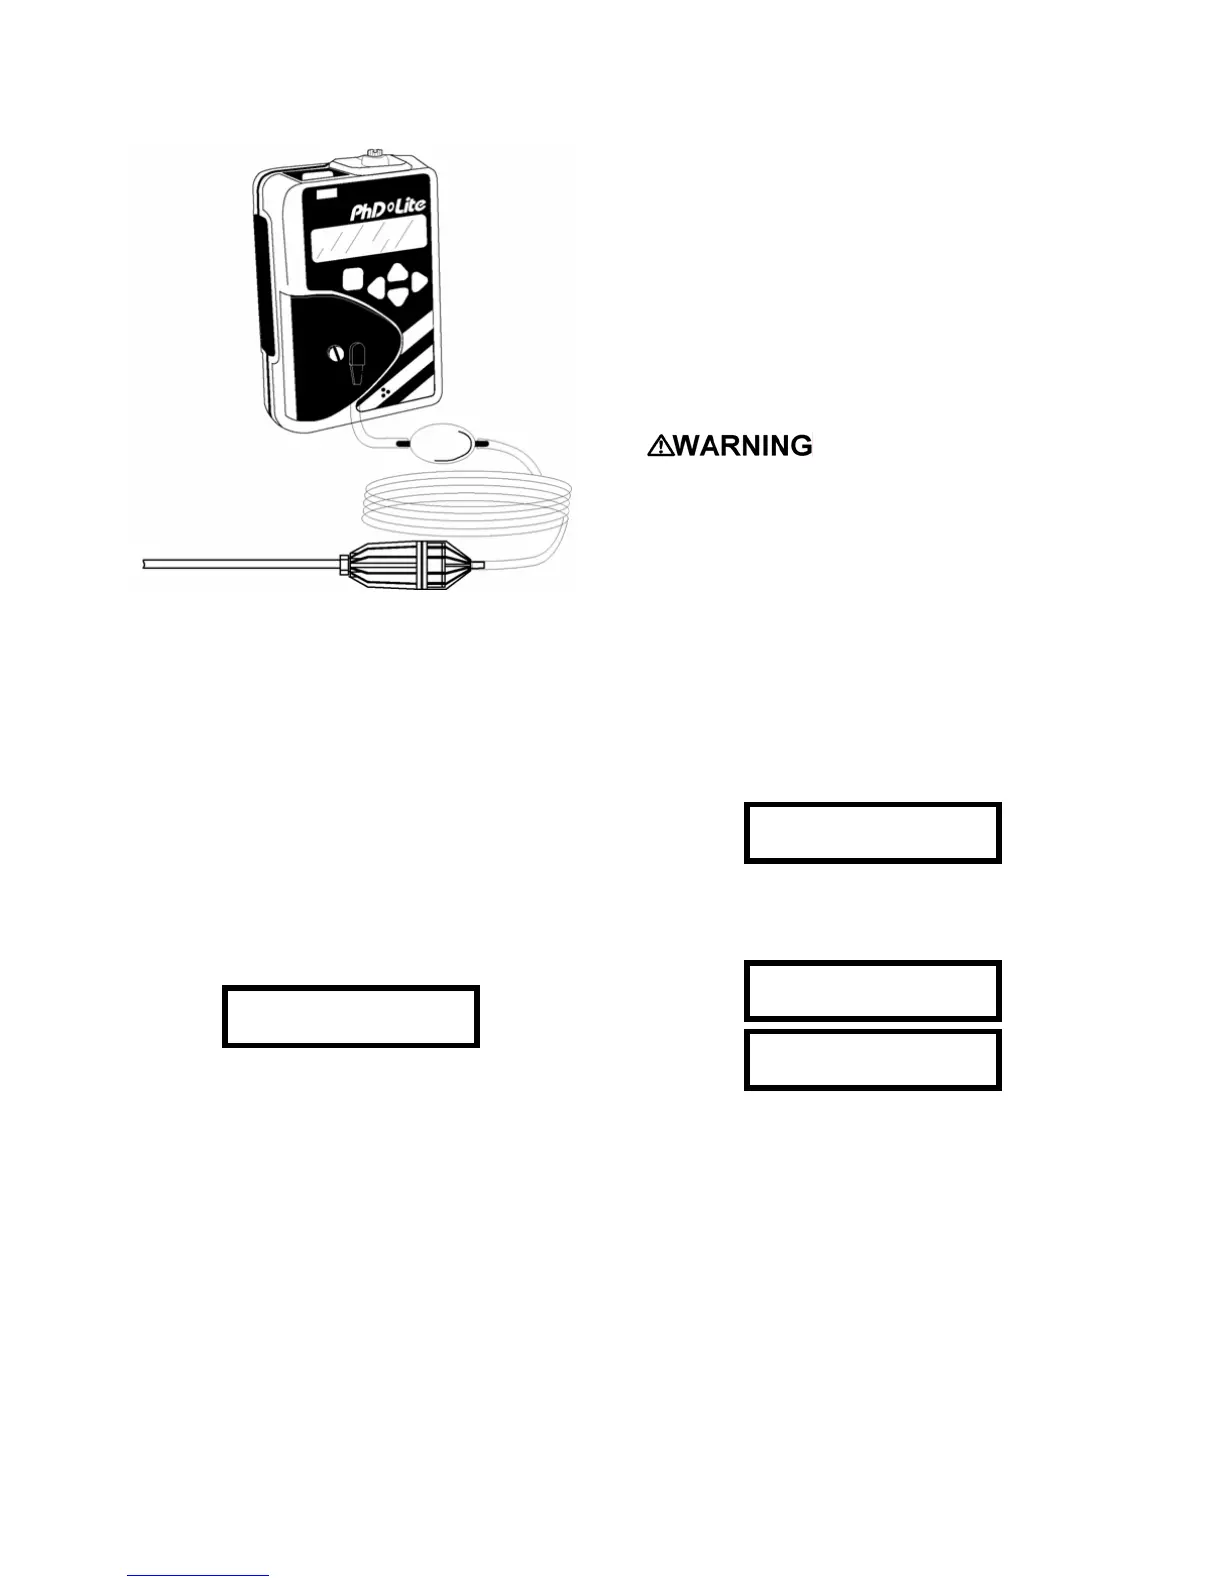
Figure 2.5.1.2. PhD Lite with hand-aspirated
sample draw kit attached
CAUTION: Hand aspirated remote sampling only
provides continuous gas readings for the area in
which the probe is located when the bulb is being
continuously squeezed.
Note: Each time a reading is desired, it is necessary
to squeeze the bulb a sufficient number of times to
bring a fresh sample to the sensor compartment.
2.5.2. Motorized sample draw pump
Use of the motorized sample draw pump allows the PhD
Lite to continuously monitor remote locations. The
pump is powered by the PhD Lite battery. When the
pump is attached and functioning normally, an animated
“
” icon will appear in the upper left hand corner of the
LCD display.
O
2
LEL CO
H
2
S
20.9 0 0 0
CAUTION: Never perform remote sampling with
the PhD Lite without the sample probe assembly.
The sample probe handle contains replaceable
filters designed to block moisture and remove
particulate contaminants. If the pump is operated
without the probe assembly in place, contaminants
may cause damage to the pump, sensors and
internal components of the PhD Lite.
The sample draw pump includes a pressure sensor
designed to protect the PhD Lite from exposure to water
or other liquids. If there is a change in pressure in the
sample draw assembly due to fluid intake or other
blockage, the pump immediately shuts down. After a
few seconds audible and visible alarms indicating a low
flow condition will also be activated.
CAUTION: Insertion of the sample draw tube
into a fluid horizontally or at a low angle may lead to
water ingress and may cause damage to the PhD
Lite.
The pressure sensor in the sample draw pump is
designed to detect pressure changes while the sample-
draw probe is being held in a vertical position. If the
probe is held horizontally or at a low angle while
inserted into a fluid, a pressure drop sufficient to cause
the pump to shut down may not be generated, and
water could be drawn into the pump assembly causing
damage to the pump, sensors and internal components
of the PhD Lite.
To avoid potential damage, care must be taken to keep
the probe vertical whenever fluids may be present.
Use only the following pumps
with the PhD Lite:
54-26-0101 (Standard), 54-26-0102 (Plated)
2.5.2.1 Using the continuous sample draw pump
1. Connect the pump to the hose and probe assembly
as shown below in Figure 2.5.2.1.
2. Slide the pump onto the PhD Lite as shown in
Figure 2.5.2.2.
3. Make sure the pump is securely attached. Tighten
the captive screw.
4. Turn on the PhD Lite. The pump will be activated
automatically when properly attached to the PhD
Lite. The display will indicate that the pump has
been detected.
Pump Detected
5. When prompted cover the end of the sample draw
probe assembly with a finger. If there are no leaks
in the sample draw components, a message will be
displayed indicating that the pump test passed.
Pump Testing
Block Sample
Pump Test Passed
Press Mode
6. Insert the end of the sample probe into the location
to be sampled.
7. Wait long enough for the pump to have drawn the
sample through the entire length of hose, and for
the sensors to have stabilized. (Allow one second
for each foot or three seconds for each meter of
sample hose for the sample to reach the sensors)
8. Note the gas measurement readings