33
3.6.1 Entering the View Menu
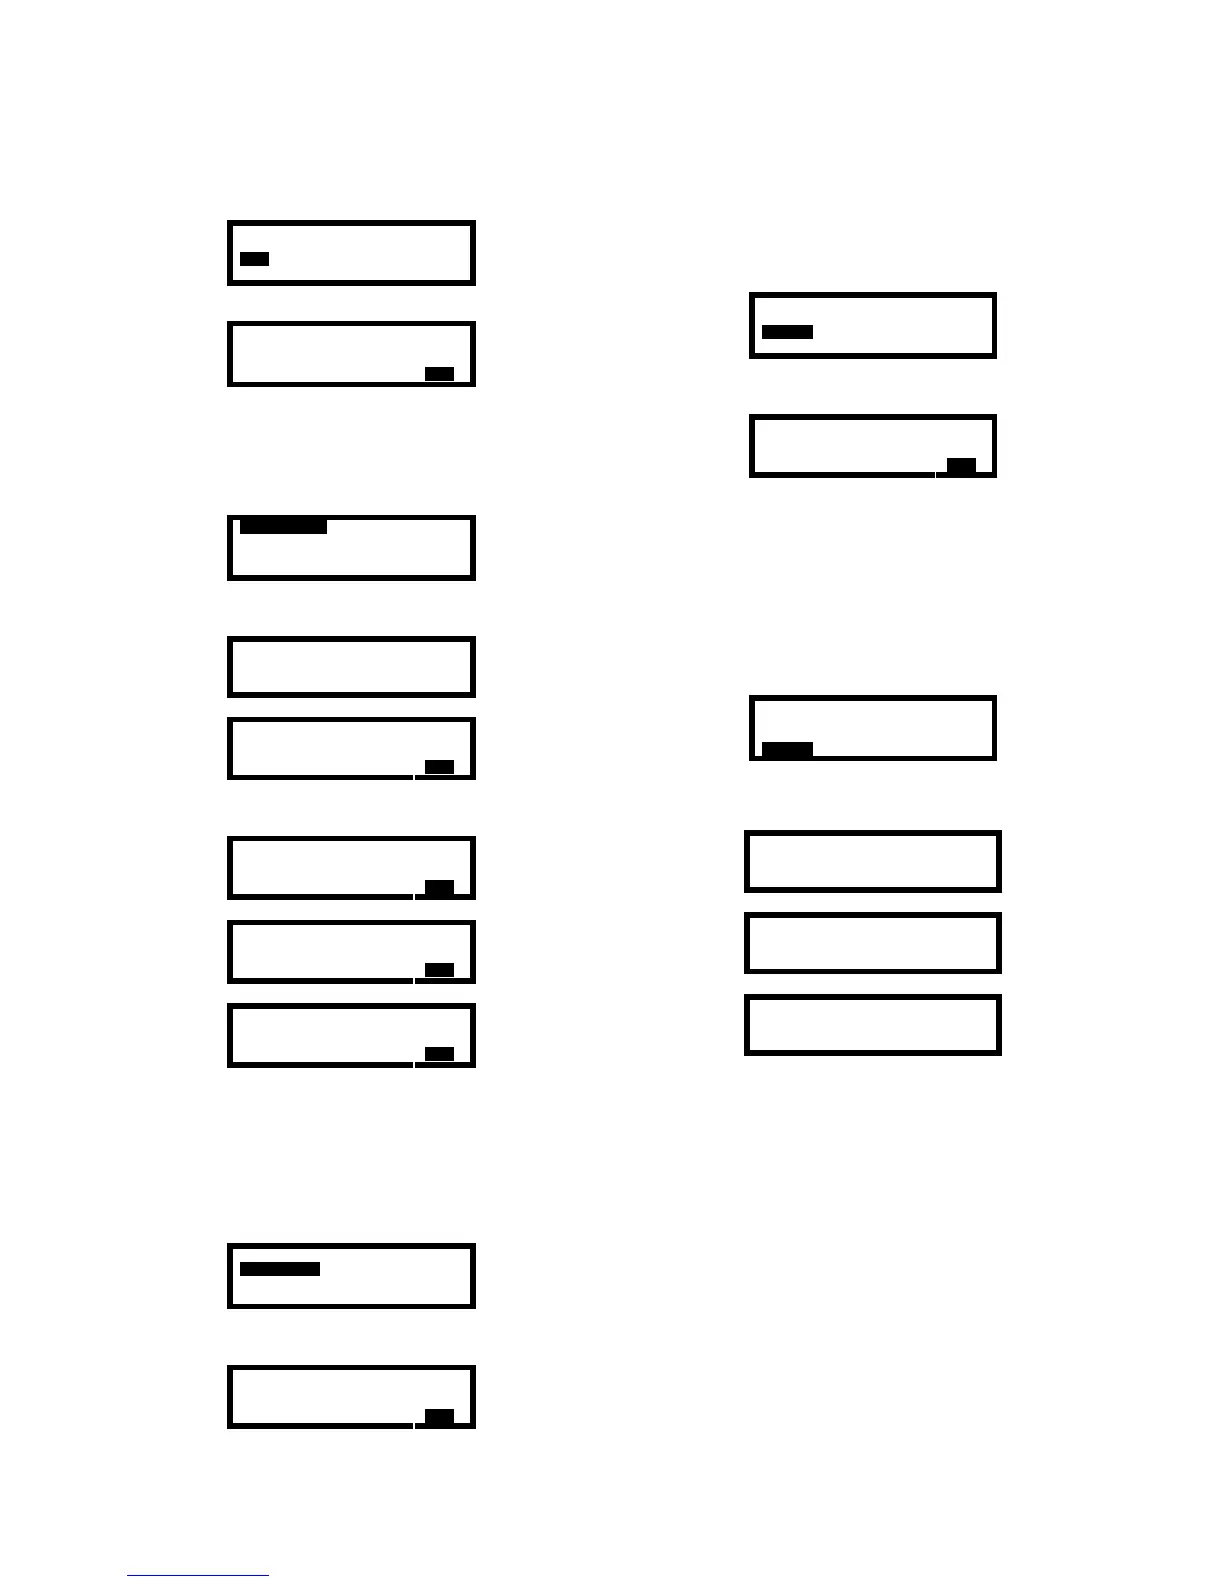
1. Enter the Main Menu as described above in section
3.1.1. Use the navigation arrows to highlight VIEW.
ALARMS CALIBRATION
OPTIONS SCREEN
VIEW
TIME
DISPLAY
EXIT
2. Press the MODE button to enter the View Menu.
ALARM_LEVELS
BAT_VOLTAGE
SERVICE
VERSION
EXIT
3.6.2 View alarm levels
1. Enter the View Menu as discussed above in section
3.6.1. Use the navigation arrows to highlight
ALARM_LEVELS.
ALARM_LEVELS
BAT_VOLTAGE
SERVICE
VERSION EXIT
2. Press the MODE button. The current alarm
settings will then be shown.
CURRENT ALARM
LEVELS
LOW ALARM LEVEL
O
2
= 18.0 %
EXIT
3. The right and left navigation arrows may then be
used to scroll through the various alarm settings.
LOW ALARM LEVEL
O
2
= 18.0 %
EXIT
→
HIGH ALARM LEVEL
O
2
= 23.5 %
EXIT
→
HIGH ALARM LEVEL
LEL = 10 %
EXIT
4. Press the MODE button at any time to return to the
Main Menu.
3.6.3 View battery voltage
1. Enter the View Menu as discussed above in section
3.6.1. Use the navigation arrows to highlight
BAT_VOLTAGE.
ALARM_LEVELS
BAT_VOLTAGE
SERVICE
VERSION EXIT
2. Press the MODE button. The battery voltage
screen will be shown.
Battery Voltage
3.6 Volts
EXIT
3. Press the MODE button to return to the Main Menu.
3.6.4 View service information
1. Enter the View Menu as discussed above in section
3.6.1. Use the navigation arrows to highlight
SERVICE.
ALARM_LEVELS
BAT_VOLTAGE
SERVICE
VERSION EXIT
2. Press the MODE button. The service information
screen will be shown.
For Service Call
860-344-1079
EXIT
3. Press the MODE button to return to the Main Menu.
3.6.5 View Software Version
The Version subdirectory of the View Menu contains
information on the current software version, current OTP
version and the date of the last update.
1. Enter the View Menu as discussed above in section
3.6.1. Use the navigation arrows to highlight
VERSION.
ALARM_LEVELS
BAT_VOLTAGE
SERVICE
VERSION
EXIT
2. Press the MODE button. The software version will
then be shown. Use the right and left navigation
arrows to scroll through the three available screens.
biosystems
PhD Lite V.3.18
→
biosystems
OTP V01.10
→
2003/09/08
14:14:34
3. Press the MODE button to return to the Main Menu.
3.7 The Time Menu
For PhD Lite instruments that do not include the
datalogger upgrade, the Time Menu provides access to
date and time-related functions.
Note: PhD Lite instruments with instrument
firmware earlier than version 1.29 may not include
the Time menu option.
Note: If your PhD Lite shows DATALOGGER in
place of TIME in the Options Menu, proceed to
Chapter 5.
3.7.1 Entering the Time Menu
1. Enter the Main Menu as described above in section
3.1.1. Use the navigation arrows to highlight TIME.