16
1. 87 7. 8 7 7. 2 2 6 9 BLACKBOX.COM
NEED HELP?
LE AVE THE TECH TO US
LIVE 24/7
TECHNICAL
SUPPORT
1. 87 7. 87 7. 2 26 9
CHAPTER 4: INITIAL INSTALLATION
4.1 HARDWARE DESCRIPTION
A Boxilla manager is supplied with the items shown in Table 4-1.
TABLE 4-1. WHAT’S INCLUDED
ITEM
Boxilla Unit
IEC power cord
(4) rubber feet for tabletop deployments
(1) ES D screw
Quick Start Guide
Once the contents of the Boxilla package have been verified, the first task is to configure the IP address of the unit. This can be set in two
ways: (1) using the serial port and (2) using the network port via a browser.
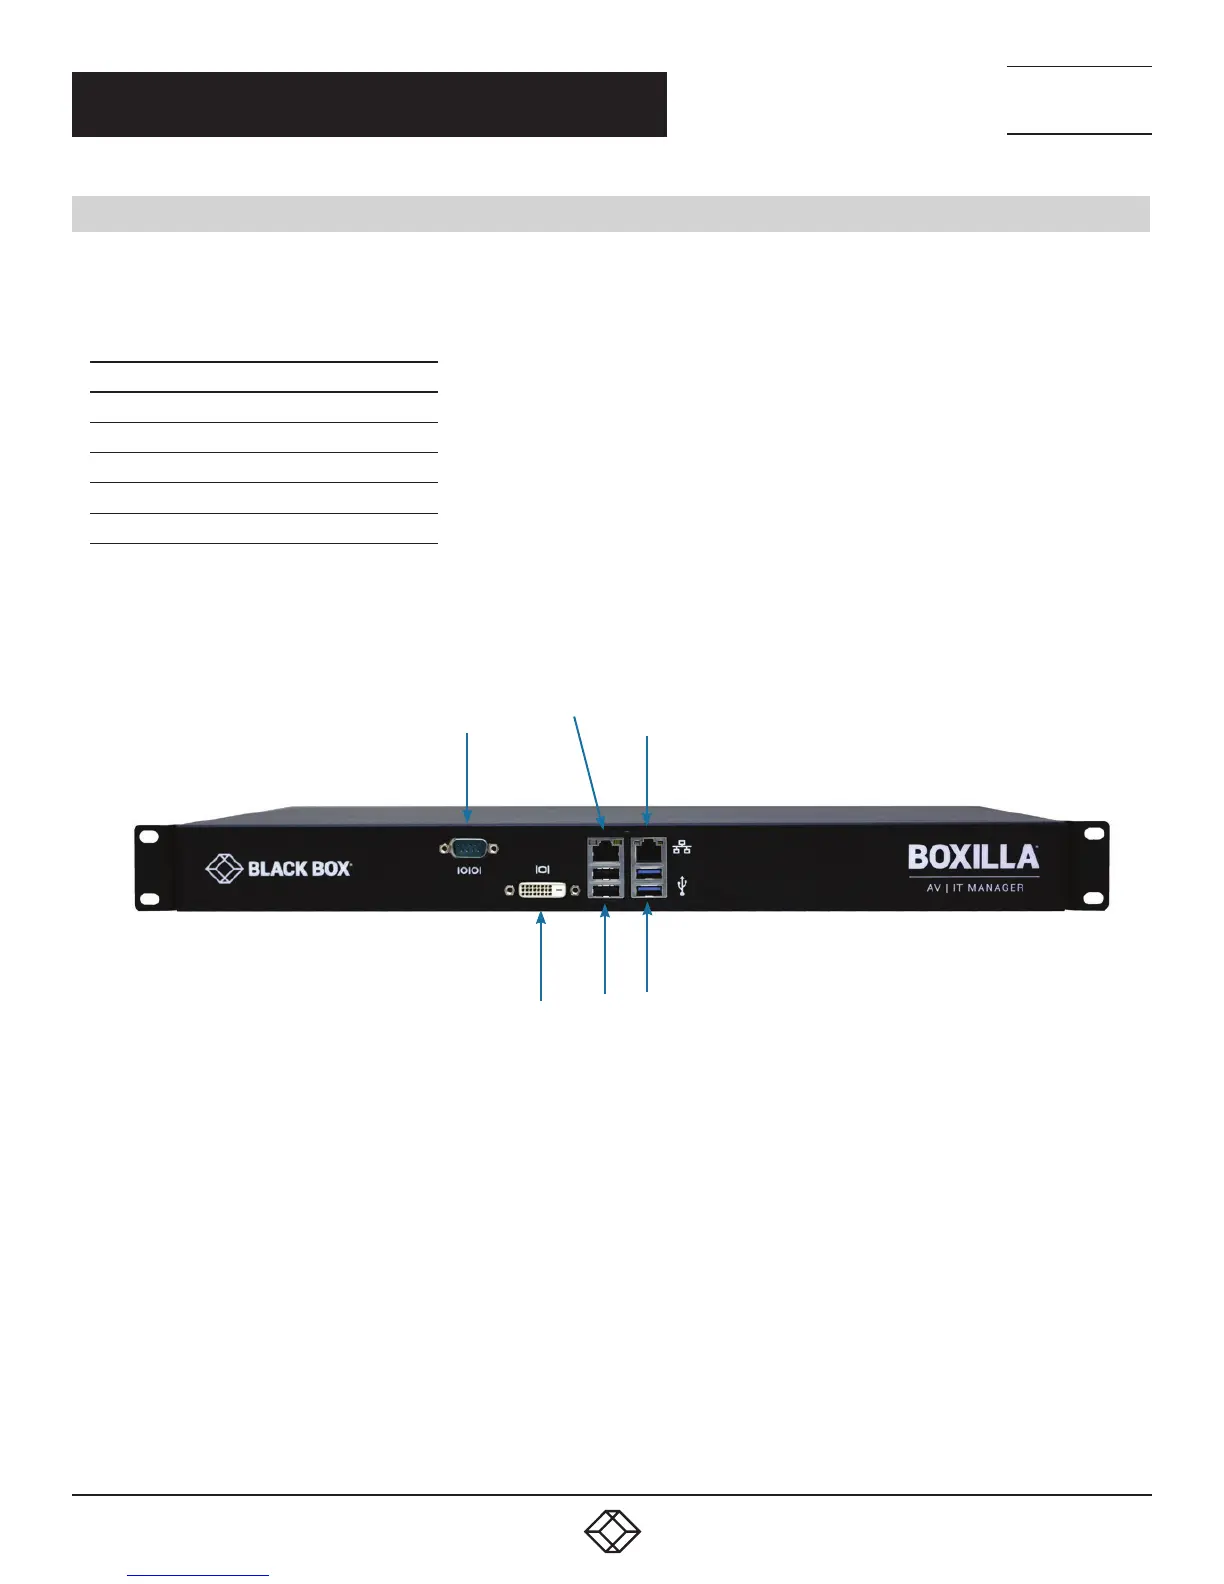
Serial
Network
DVI test
interface
USB
2.0
USB
3.0
Reserved for
future use
FIGURE 6. BOXILLA FRONT PANEL
NOTE: Only the Network port pointed to in the above diagram (on the right-hand side when you look at the Boxilla unit from the
front) is currently operational. The other port is reserved for a future feature.
CONNECTORS NEEDED FOR INSTALLATION
• Serial Port
• Network Port
• Power connector