67
CHAPTER 1: HEADLINE
1. 87 7. 8 7 7. 2 2 6 9 BLACKBOX.COM
NEED HELP?
LE AVE THE TECH TO US
LIVE 24/7
TECHNICAL
SUPPORT
1. 87 7. 87 7. 2 26 9
10.1 INTRODUCTION
This chapter considers integration aspects of Boxilla. The chapter is divided into two main sections, which include activities
on the DKM end and on the Boxilla side. The chapter describes the configuration elements for Boxilla and DKM.
Boxilla manages DKM connections towards InvisaPC appliances by means of Virtual CPUs. The VirtualCPU name must match the
InvisaPC Connection name. When the DKM Connection (vCPU to CON) is established, the DKM switch will echo this operation onto
the network. This will be picked up by Boxilla and Boxilla will initiate the desired connections between the InvisaPC Receiver and
the InvisaPC Transmitter/VM.
Follow these steps:
1. Create desired InvisaPC Connection.
2. Add a DKM Switch under Boxilla -> DKM -> Switches.
3. Create a Virtual CPU on the DKM JavaTool (named the same name as the InvisaPC Connection). Physically attach this to the
InvisaPC Receiver. When the DKM CON is then connected to the VirtualCPU, the connection name will be picked up and the
InvisaPC leg of the connection will be set up.
10.2 STEPS TO CREATE AND MANAGE VCPU CONNECTIONS ON THE UTILITY
Assumed: You have the desired InvisaPC connection setup.
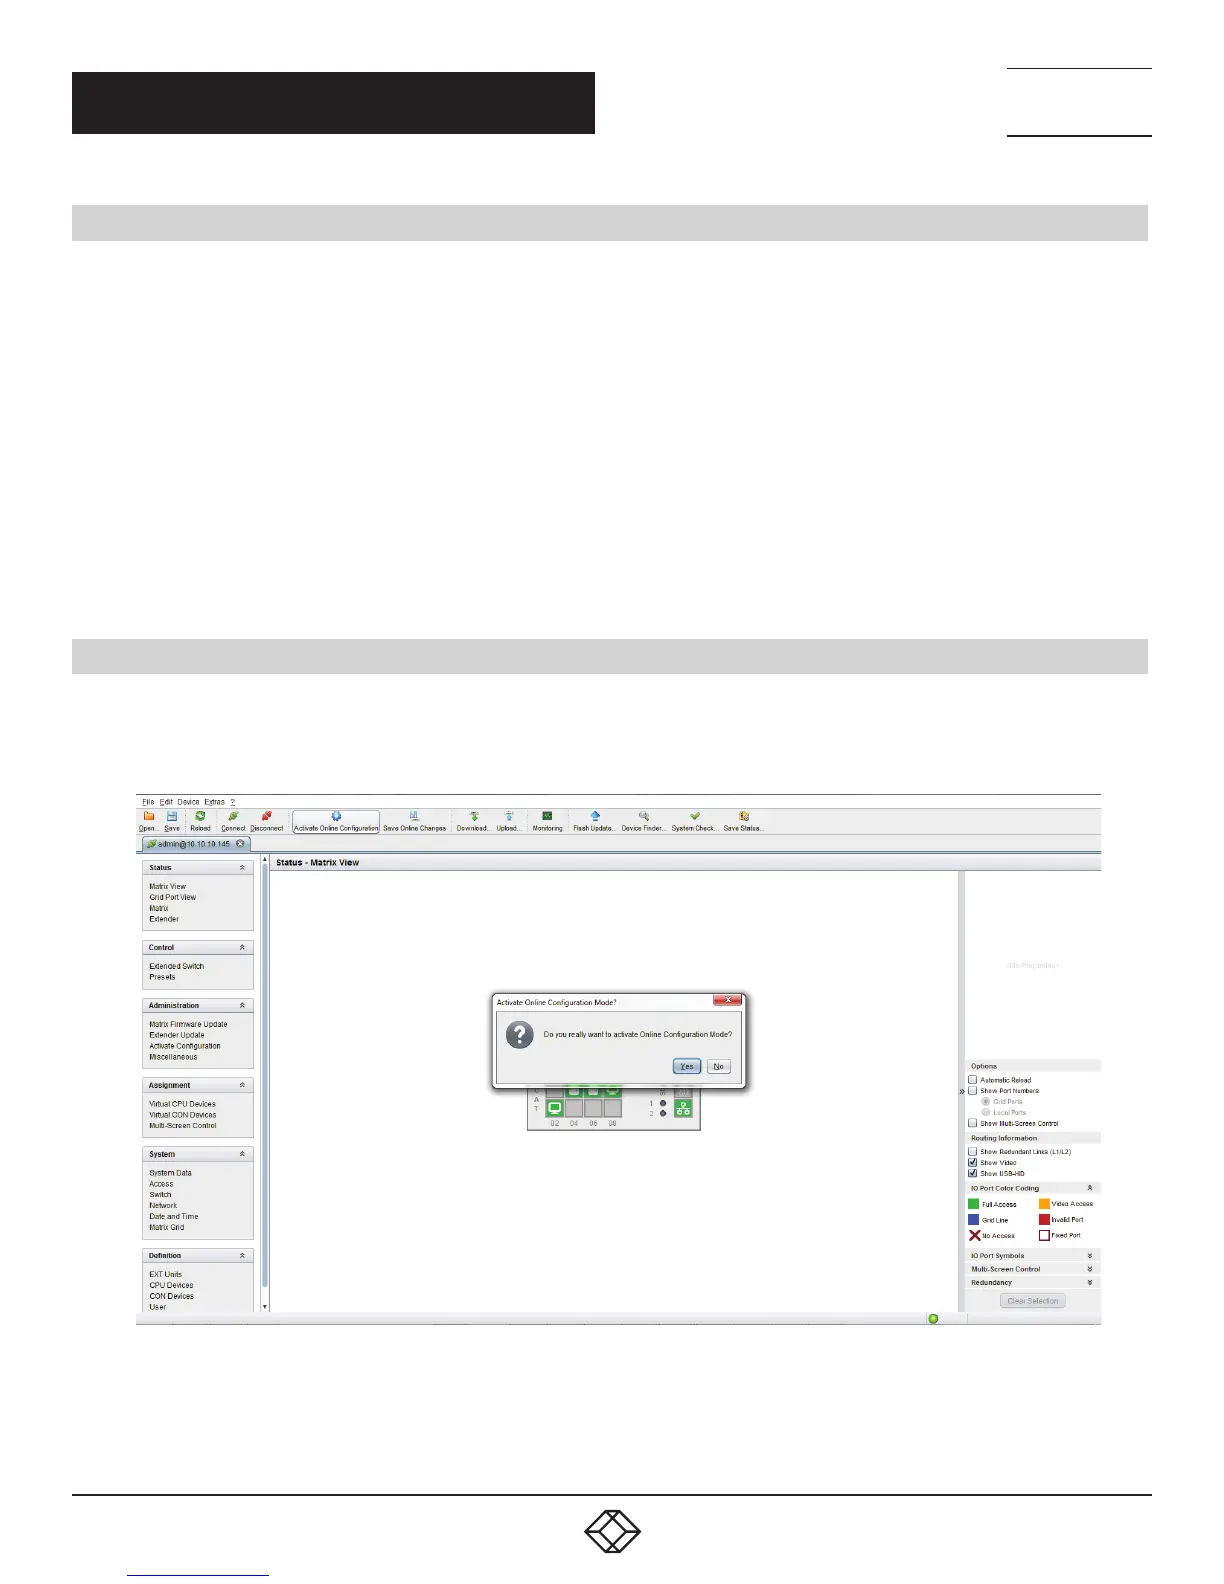
Open the Java Tool and select “Activate Online Configuration,” which is the 6th button in from the left in DKM FX Tool 3.4.3.0.81.
Select Yes when you are asked to confirm. NOTE: The screen you see depends on the version of the DKM Java Tool used.
FIGURE 71. JAVA TOOL SCREEN
Click “CPU Devices,” which is a menu item under “Definition” on the lower left side. Next, select the “New Device” button
on the lower right side of the screen. Select “Create a virtual CPU.”
CHAPTER 10: DKM INTEGRATION