20
1. 87 7. 8 7 7. 2 2 6 9 BLACKBOX.COM
NEED HELP?
LE AVE THE TECH TO US
LIVE 24/7
TECHNICAL
SUPPORT
1. 87 7. 87 7. 2 26 9
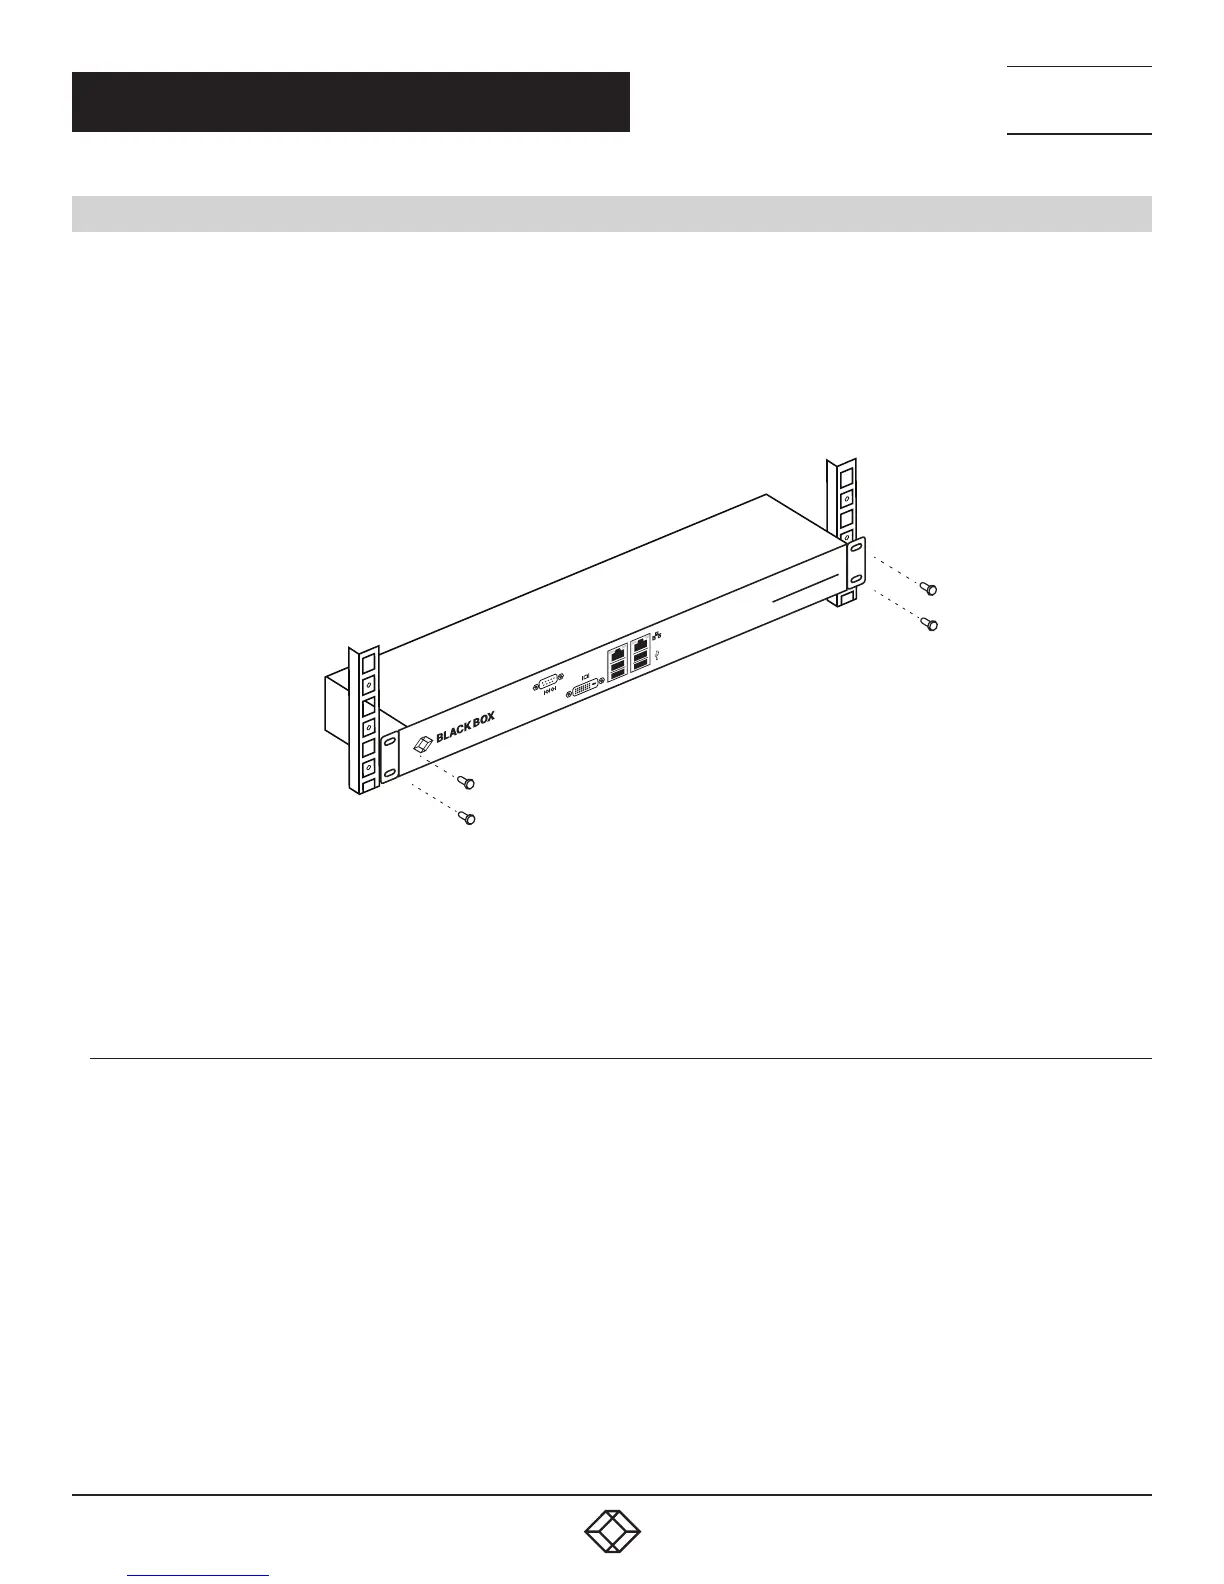
4.6 MOUNTING BOXILLA IN A RACK
The Boxilla unit is designed to be easy to mount within a standard 19” rack. The unit requires just a 1U space within the rack.
To mount the Boxilla unit within a rack:
1. Slide the Boxilla unit into the vacant 1U space within the rack.
2. Secure each bracket to the rack using two screws per side as shown below.
BOXILLA
AV l IT MAN A GE R
FIGURE 11. MOUNTING BOXILLA IN A RACK
To protect the unit, please use the ground point on the Boxilla unit on the rear of the Boxilla unit shown in Figure 12
(using the provided screw) for connecting to the ground point of the rack or cabinet.
4.6.1 RACKMOUNT SAFETY CONSIDERATIONS
Elevated Ambient Temperature: If installed in a closed rack assembly, the operating temperature of the rack environment
may be greater than room ambient. Use care not to exceed the rated maximum ambient temperature of the Boxilla unit.
Reduced Air Flow: Installation of the equipment in a rack should be such that the amount of airflow required for safe operation
of the equipment is not compromised.
Mechanical Loading: Mounting of the equipment in the rack should be such that a hazardous condition does not exist
due to uneven mechanical loading.
Circuit Overloading: Consideration should be given to the connection of the equipment to the supply circuit and the effect
that overloading of circuits might have on overcurrent protection and supply wiring. Consider equipment ratings
for maximum current.
Reliable Earthing: Reliable earthing of rack mounted equipment should be maintained. Pay particular attention to supply
connections other than direct connections to the branch circuit (for example, use of power strips).
CHAPTER 4: INITIAL INSTALLATION